Answer: Gigi (Gianna Maria-Onore Bryant) did not leave any last words before her death (January 26, 2020). Any website, videos or social media posts about…


Answer: Gigi (Gianna Maria-Onore Bryant) did not leave any last words before her death (January 26, 2020). Any website, videos or social media posts about…

You know how we all love our gemstone jewelry, right? Well, today we’re going to chat about the gorgeous tiger eye bracelet and what it…

Answer No, Yoriichi is not Tanjiro’s dad. He is, however, the first and legendary Demon Slayer…

When did Emma Watson lose her virginity? This question is not so much an answer to…

When did Harry Connick Jr have a stroke? You’re probably asking yourself this question right now.…
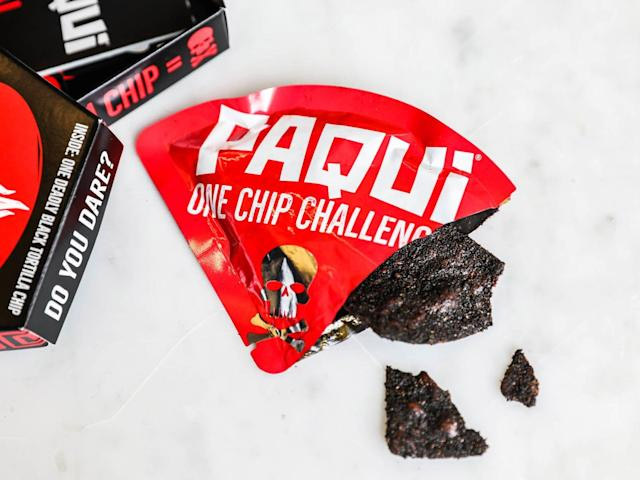
Short Answer: NO The Paqui One Chip Challenge is a popular a popular yet dangerous attempt…

If you’ve ever wondered how to make a kenney style tie dye, look no further! This…

If you are considering buying La Gritona, you might be wondering how to open the bottle.…

A hat can cause a headache, but this may be a symptom of a medical condition or previous…

If you’re wondering, “Why does my Ford F150 shake when I accelerate?” there are a few possible causes.…

If your man keeps staring at you when you’re not looking, he might be angry with you or…

Unravel the mystery of Arima Kaneki's father in this intriguing article exploring the clues and theories surrounding his…
Answer No, Yoriichi is not Tanjiro’s dad. He is, however, the first and legendary Demon Slayer who managed…

The authorship of the Bible has been a subject of debate and speculation for centuries. While traditionally attributed to divine inspiration, some scholars argue…

While it may seem quite perplexing, there have been instances where horses…

The question of whether a man invented ballet is a complex one.…

The claim that a dying soldier invented Coca-Cola is a popular myth…

“When Calls the Heart” season 8 premieres on February 21 at 9 p.m. ET/PT. We know that Bill Avery is still alive, but will…

If you are playing as an Elementalist, you might be wondering when…

When Does Damon and Bonnie Come Back? – A fan has asked…

If you’re wondering when Costco gets wreaths, look no further. This article…
Yes, 1000 dollar bills are still considered valid currency in the United States. However, they are no longer being printed…
Read MoreShort Answer Agua de Florida is a spiritual cologne that can be used in various ways to enhance spiritual practices.…
Read MoreHave you ever considered upgrading your firearm with a folding gun stock? Folding gun stocks offer numerous benefits, such as…
Read MoreNowruz, the Persian New Year, is a vibrant and joyous celebration of renewal and the arrival of spring. At the…
Read MoreHave you ever watched an experienced rider gracefully loping their horse in a perfect circle and wondered how they achieved…
Read MoreLearn how to play the Pogo mind game with step-by-step instructions, rules, strategies, and tips for improving your gameplay.…
Read MoreLearn how to make fake sperm with our step-by-step instructions. Discover the purpose, safety precautions, and alternative options for realistic…
Read MoreLearn how to make a stolen laptop untraceable and prevent it from being tracked back to you. Protect your privacy…
Read MoreDiscover effective techniques to prevent your neck gaiter from slipping. Keep it in place for ultimate comfort and protection.…
Read MoreLearn how to get belts in Club Penguin and level up your penguin character with our helpful tips and tricks.…
Read MoreCuckoldry has emerged as an intriguing and increasingly accepted relationship dynamic, captivating the curiosity of many individuals. The concept of cuckold…
Read MoreAre you a rifle enthusiast or avid hunter looking to customize and optimize your Savage Axis rifle? One of the…
Read MoreDo you ever find yourself longing to express your creativity through drawing, but struggle to actually get started? Many individuals,…
Read MoreWood has long been admired for its natural beauty and versatility in various applications. However, what if we told you…
Read MorePicture this: a woman in her full radiance, her desires ignited, and her pleasure unleashed. Female arousal is a realm…
Read MoreCreating a backyard ice rink is an exciting winter activity that brings joy to both kids and adults. However, there’s…
Read MoreWe’ve all been there – the heart-sinking moment when our vehicle gets stuck in the deep, unforgiving mud. It’s a…
Read MoreWhen it comes to hardwood floors, matte finish has become increasingly popular in recent years. Unlike glossy finishes that have…
Read MoreWhen it comes to milsurp stocks, whether it’s an old rifle or a vintage firearm, proper cleaning and maintenance are…
Read MoreMaintaining a clean oil pan is vital for your engine’s health and performance. Neglecting this essential maintenance task can lead…
Read More