
Last Updated on July 27, 2023
Welcome to our article on how to fix a header error in Premiere Pro. If you’re a high school student in years 10-11 or someone who is new to video editing, you may have encountered this frustrating issue while working on your projects. Header errors can prevent you from opening or exporting your files, causing delays and headaches. But fear not, as we are here to guide you through the process of resolving this problem. In this article, we will explain what header errors are, and then provide you with a step-by-step guide on how to fix them. So let’s dive in and get your Premiere Pro back on track!
Understanding header errors in Premiere Pro
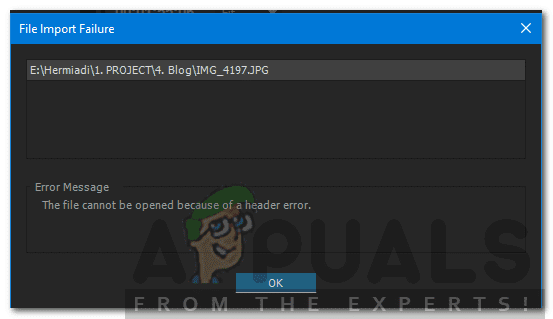
Header errors in Premiere Pro can be frustrating and can prevent you from working on your projects. These errors occur when there is an issue with the header information of your media files. Understanding these errors and knowing how to fix them is essential for a smooth editing experience. Here are some key points to help you understand header errors in Premiere Pro:
- Header errors can occur due to corrupt media files, outdated software, or cache file issues.
- Corrupt media files can cause header errors and should be checked and replaced if necessary.
- Updating your Premiere Pro software to the latest version can fix header errors caused by software compatibility issues.
- Clearing cache files can resolve header errors caused by cache file corruption.
- Resetting preferences can help fix header errors caused by incorrect settings or preferences.
- Repairing disk permissions can resolve header errors caused by permission issues on your computer.
- If all else fails, reinstalling Premiere Pro can be a last resort to fix persistent header errors.
By understanding the causes of header errors and following the appropriate steps to fix them, you can ensure a smooth editing process in Premiere Pro.
Step 1: Checking for corrupt media files
One of the main causes of header errors in Premiere Pro is corrupt media files. These files can cause issues with the header information, leading to errors and playback problems. To fix this issue, the first step is to check for any corrupt media files in your project.
To do this, go to the Project panel and look for any files that have a red “Media Offline” icon. These files are likely corrupt and need to be replaced. You can try re-linking the media files or replacing them with a backup copy.
It’s also a good idea to check the media files outside of Premiere Pro to ensure they are not corrupt. You can use a media player or another video editing software to play the files and see if they have any issues.
By checking for corrupt media files and replacing them if necessary, you can eliminate one possible cause of header errors in Premiere Pro.
Step 2: Updating Premiere Pro software
Another common cause of header errors in Premiere Pro is outdated software. Adobe regularly releases updates for Premiere Pro to fix bugs and improve performance. If you are experiencing header errors, it’s important to check if there are any updates available for your software.
To update Premiere Pro, open the Creative Cloud app and go to the “Apps” tab. Here, you will see a list of all the Adobe apps installed on your computer. If there is an update available for Premiere Pro, you will see a “Update” button next to the app.
Click on the “Update” button to start the update process. It may take some time to download and install the update, depending on your internet connection and computer speed.
By keeping your Premiere Pro software up to date, you can ensure that you have the latest bug fixes and improvements, which can help prevent header errors from occurring.
Step 2: Updating Premiere Pro software
One of the common causes of header errors in Premiere Pro is outdated software. Over time, Adobe releases updates to fix bugs and improve the performance of their software. Therefore, it is crucial to keep your Premiere Pro software up to date.
To update Premiere Pro, follow these steps:
- Open Premiere Pro on your computer.
- Click on the “Help” menu at the top of the screen.
- Select “Updates” from the drop-down menu.
- A new window will open, showing any available updates for Premiere Pro.
- If there are updates available, click on the “Update” button next to each update to install them.
- Once the updates are installed, restart Premiere Pro.
Updating Premiere Pro can often resolve header errors, as it ensures that you have the latest bug fixes and improvements. If the header error persists after updating the software, proceed to the next step.
Step 3: Clearing cache files
One of the common causes of header errors in Premiere Pro is corrupted cache files. These files store temporary data that helps the software run smoothly. However, if these files become corrupted, they can cause issues with the header and lead to errors. To fix this problem, you can try clearing the cache files. Here’s how:
- Open Premiere Pro and go to the “Edit” menu.
- Select “Preferences” and then choose “Media”.
- In the Media Preferences window, you will see an option to “Delete Unused Cache Files”. Click on it.
- A confirmation window will appear. Click “OK” to proceed.
- Wait for Premiere Pro to clear the cache files. This may take some time depending on the size of your cache.
- Once the process is complete, restart Premiere Pro and check if the header error is resolved.
Clearing cache files can help resolve header errors caused by corrupted temporary data. However, if the issue persists, you may need to try other troubleshooting steps.
Step 4: Resetting preferences
Resetting preferences in Premiere Pro can help resolve header errors that are caused by corrupted settings or preferences. Here’s how you can do it:
- Close Premiere Pro if it is open.
- Press and hold the Shift and Alt keys (Windows) or Shift and Option keys (Mac) while launching Premiere Pro.
- A dialog box will appear asking if you want to reset the preferences. Click “Yes” or “OK” to confirm.
- Wait for Premiere Pro to launch with the default preferences.
- Try importing or opening the project that was giving you the header error.
If resetting preferences doesn’t fix the header error, you can try the next step.
Step 5: Repairing disk permissions
One of the common causes of header errors in Premiere Pro is incorrect disk permissions. Disk permissions are settings that determine who can access and modify files on your computer’s hard drive. If these permissions are not set correctly, it can cause issues with the functioning of Premiere Pro.
To fix this issue, you will need to repair the disk permissions on your computer. Here’s how:
1. On a Mac:
– Open the “Disk Utility” application.
– Select your hard drive from the list on the left.
– Click on the “First Aid” tab.
– Click on the “Repair Disk Permissions” button.
– Wait for the process to complete.
2. On a Windows PC:
– Open the “Command Prompt” as an administrator.
– Type the command “chkdsk /f” and press Enter.
– Follow the on-screen instructions to repair the disk permissions.
Once you have repaired the disk permissions, restart your computer and check if the header error in Premiere Pro has been resolved.
Step 6: Reinstalling Premiere Pro
If you have tried all the previous steps and are still experiencing header errors in Premiere Pro, it may be necessary to reinstall the software. Reinstalling Premiere Pro can help resolve any issues that may have occurred during the initial installation process.
Before reinstalling, it is important to uninstall the current version of Premiere Pro from your computer. To do this, go to the Control Panel and select “Uninstall a program” (Windows) or “Applications” (Mac). Locate Premiere Pro in the list of installed programs and click on “Uninstall”. Follow the prompts to complete the uninstallation process.
Once Premiere Pro has been uninstalled, you can proceed with reinstalling the software. Visit the official Adobe website and download the latest version of Premiere Pro. Run the installer and follow the on-screen instructions to complete the installation.
After the installation is complete, launch Premiere Pro and check if the header errors have been resolved. If the issue persists, you may need to seek further assistance from Adobe support or consult with a professional technician.
Additional troubleshooting tips
If you have followed all the previous steps and are still experiencing header errors in Premiere Pro, don’t worry. There are a few additional troubleshooting tips that you can try to resolve the issue.
1. Check system requirements
Make sure that your computer meets the minimum system requirements for running Premiere Pro. Insufficient hardware or outdated drivers can sometimes cause header errors. Check Adobe’s website for the recommended specifications and compare them to your system.
2. Disable third-party plugins
If you have any third-party plugins installed in Premiere Pro, try disabling them temporarily. Sometimes, incompatible or outdated plugins can interfere with the software and cause header errors. Disable the plugins one by one and see if the issue persists.
By following these additional troubleshooting tips, you should be able to resolve any header errors you are experiencing in Premiere Pro. Remember to always keep your software and drivers up to date, and regularly clear cache files to prevent any future issues. With these steps, you can ensure a smooth and error-free editing experience.
Wrapping it up
After going through the various steps to fix a header error in Premiere Pro, it is clear that there are several potential solutions to this issue. By checking for corrupt media files, updating the software, clearing cache files, resetting preferences, repairing disk permissions, and even reinstalling Premiere Pro, users can effectively troubleshoot and resolve header errors.
However, it is important to note that header errors can be caused by a variety of factors, and not all solutions may work for every user. It is recommended to start with the basic troubleshooting steps and gradually move on to more advanced solutions if necessary.
Remember, patience and persistence are key when dealing with header errors in Premiere Pro. Don’t hesitate to seek further assistance from Adobe support or online communities if needed.
By following the steps outlined in this article, users can overcome header errors and continue their video editing projects smoothly and efficiently.
Learn how to fix header errors in Premiere Pro with these simple steps. Clear cache files, update software, and more.
About The Author

Zeph Grant is a music fanatic. He loves all types of genres and can often be found discussing the latest album releases with friends. Zeph is also a hardcore content creator, always working on new projects in his spare time. He's an amateur food nerd, and loves knowing all sorts of random facts about food. When it comes to coffee, he's something of an expert - he knows all the best places to get a good cup of joe in town.