
Last Updated on July 5, 2023
Creating a backyard ice rink is an exciting winter activity that brings joy to both kids and adults. However, there’s one frustrating issue that can dampen the fun: shell ice. This stubborn layer of uneven ice can turn your smooth skating surface into a bumpy ride. But fear not! In this comprehensive guide, we’ll delve into the world of shell ice and provide you with expert advice on how to fix it effectively. Get ready to transform your backyard rink into a skating paradise once again!
Understanding Shell Ice
Defining Shell Ice
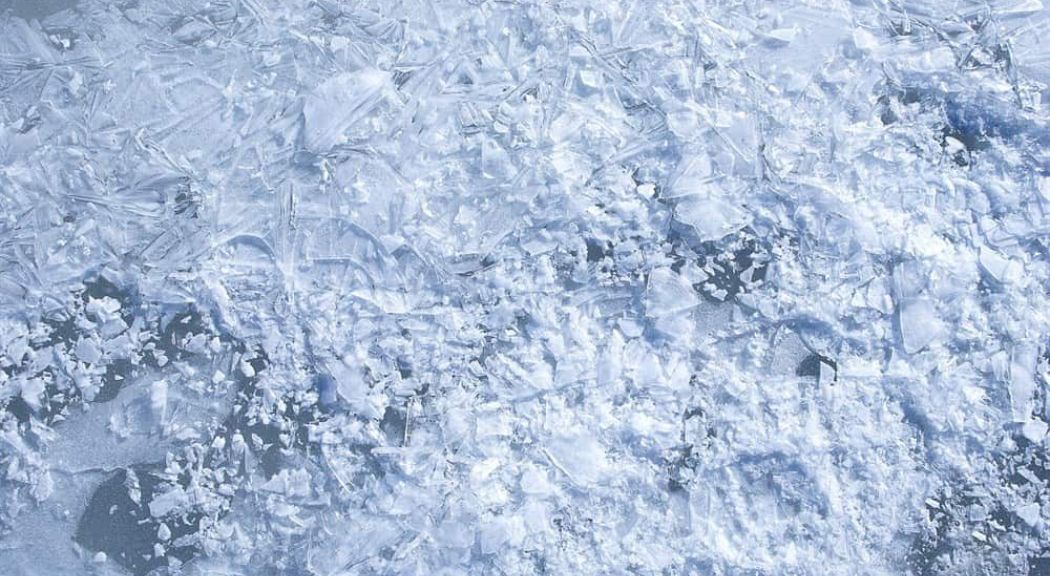
Shell ice refers to a layer of ice that forms on the surface of your rink but lacks the desired thickness and smoothness. It often appears as a thin, brittle layer that can make skating difficult and hazardous. This phenomenon is caused by several factors, including fluctuating temperatures, improper flooding techniques, and inadequate ice maintenance.
Identifying Shell Ice
Before diving into the repair process, it’s essential to assess the severity of the shell ice. Thin shell ice is easily recognizable as a translucent layer that seems fragile and may crack under slight pressure. Thick shell ice, on the other hand, is more substantial and poses a greater challenge to repair. Uneven shell ice creates bumps and ridges, resulting in an uneven skating surface. By understanding the type of shell ice you’re dealing with, you can determine the appropriate repair techniques.
Preparing for Shell Ice Repair
Gathering the Necessary Tools and Materials
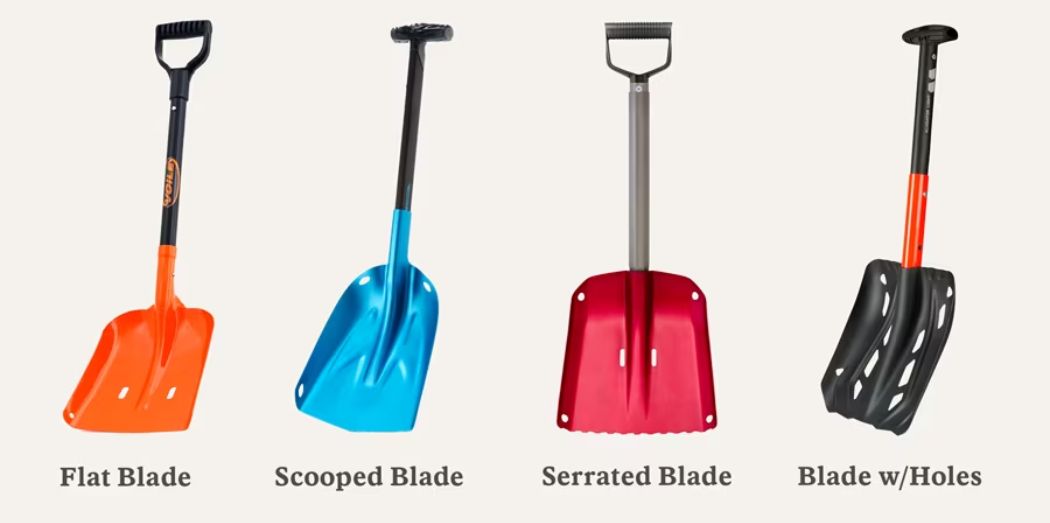
To tackle shell ice effectively, it’s crucial to gather the right tools and materials. Arm yourself with a sturdy shovel or an ice scraper to remove snow, slush, and loose ice. Additionally, you’ll need hot water, either prepared in a container or connected through a hose to a hot water source. An ice resurfacer or a large squeegee will come in handy for leveling the repaired ice surface. Finally, don’t forget to wear appropriate footwear and protective gear to ensure your safety during the repair process.
Step-by-Step Shell Ice Repair Process
Clearing the Rink Surface
Start by clearing the rink surface of any snow, slush, or loose ice. Use your shovel or ice scraper to remove these elements, creating a clean and even surface for the repair process. Take your time and ensure that the rink is free from any debris that could hinder the repair.
Warm Water Flooding
Once the surface is cleared, it’s time to introduce warm water to repair the shell ice. Prepare hot water either in a container or by connecting a hose to a hot water source. Begin applying the warm water to the shell ice areas, ensuring a controlled and gradual technique. Start with thin layers of warm water to allow proper bonding with the existing ice. Be patient and avoid flooding the area with excessive water, as this can lead to further complications.
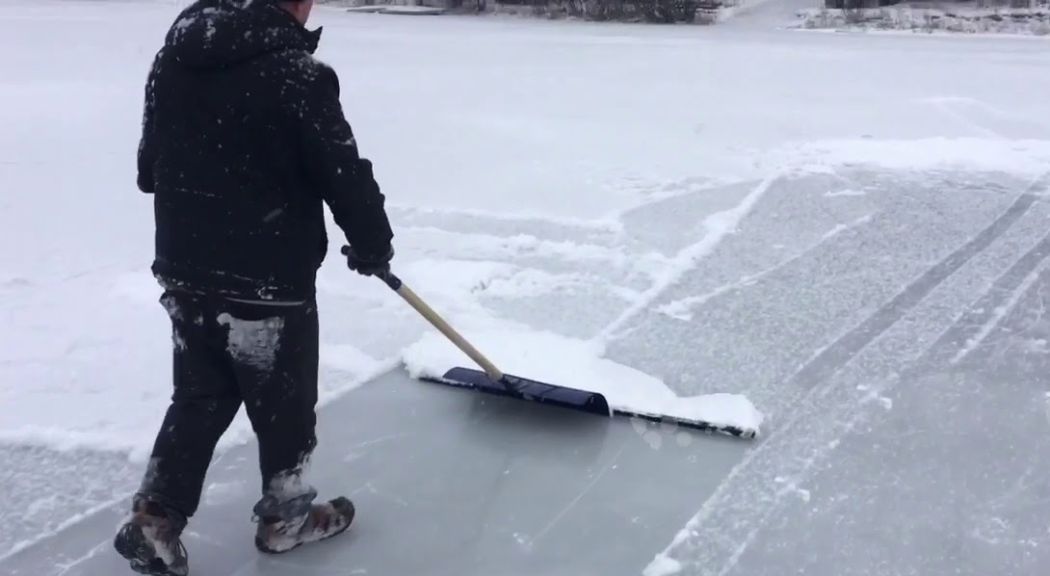
Smoothing and Leveling
To achieve a smooth and level surface, use an ice resurfacer or a large squeegee to spread the warm water evenly. This process will help remove bumps, ridges, and uneven areas caused by the shell ice. Take your time and work systematically to ensure that the repaired surface is as smooth as possible.
Rebuilding the Ice Surface
Repairing shell ice often requires multiple layers of warm water flooding. Repeat the warm water flooding and leveling process, allowing each layer to freeze before adding another. This step ensures proper bonding between the layers, resulting in a stronger and more resilient ice surface. Patience is key during this stage, as it may take several layers to completely repair the shell ice. Remember to monitor the thickness and consistency of each layer to achieve the desired results.
Preventive Measures for Shell Ice
Maintaining Consistent Ice Thickness
One of the best ways to prevent shell ice formation is to maintain a consistent and appropriate ice thickness. Regularly monitor the thickness of your ice and add layers as needed. A thicker ice surface provides better insulation and minimizes the chances of shell ice formation.
Implementing Proper Flooding Techniques
Proper flooding techniques play a crucial role in preventing shell ice. Consider using the thin-layer flooding method, where you apply thin and even layers of water to the rink surface. This technique allows for better bonding between the layers and reduces the likelihood of shell ice formation.
Monitoring Temperature and Humidity Levels
Temperature and humidity levels have a significant impact on ice quality. Maintain a consistent temperature within the rink area to avoid rapid freezing and thawing, which can contribute to shell ice formation. Additionally, monitor humidity levels to prevent excessive moisture on the ice surface.
Regular Snow and Debris Removal
Frequent snow and debris removal is essential to prevent ice deterioration and the formation of shell ice. Use a snow shovel or a snow blower to clear the rink surface after a snowfall. Additionally, regularly inspect the rink for debris and remove any objects that may affect the ice quality.
Ongoing Rink Maintenance
To keep your rink in top condition, regular maintenance is necessary. Plan for routine resurfacing sessions to maintain a smooth and even ice surface. Consider investing in an ice resurfacer or learning how to resurface the ice manually using a large squeegee. Furthermore, watering the rink regularly helps maintain its integrity and prevent shell ice formation.
Conclusion
With the right knowledge and techniques, fixing shell ice on your backyard rink is an achievable task. By understanding the causes of shell ice and implementing the step-by-step repair process outlined in this guide, you can restore your rink to its optimal condition. Remember to take preventive measures to minimize the chances of shell ice formation in the future, including maintaining consistent ice thickness, implementing proper flooding techniques, monitoring temperature and humidity levels, and performing regular maintenance. By following these guidelines, you’ll be well on your way to enjoying a smooth and enjoyable skating experience in your own backyard winter wonderland. So, grab your skates and get ready to glide across your beautifully repaired rink!
Additional Information & Tips
Snow Removal Techniques
- Snow Shovels: A good quality snow shovel with a wide blade is an essential tool for manually removing snow from the rink. Opt for a shovel with a sturdy handle and a blade designed for pushing or lifting snow efficiently. When shoveling, use smooth and controlled motions to avoid damaging the ice.
- Snow Blowers: For larger rinks or heavy snowfall, a snow blower can be a time-saving option. Choose a snow blower suitable for the size of your rink and ensure it has adjustable settings to control the throwing distance and direction of the snow. Always follow the manufacturer’s instructions for safe and proper use.
- Ice Scrapers: Ice scrapers or ice chippers are useful for removing stubborn ice patches or compacted snow that can’t be easily cleared with a shovel. Use the scraper’s sharp edge to break up the ice, and then remove the debris with a shovel or broom.
- Regular Maintenance: Establish a routine for regular snow removal. Depending on the weather conditions, you may need to clear the rink surface daily or after each snowfall. Promptly remove snow to prevent it from accumulating and affecting the ice quality.
- Snow Disposal: Decide on a suitable location for snow disposal to avoid creating obstacles or uneven spots. Consider melting the snow using warm water or redistributing it to areas that require additional ice thickness. Be mindful of local regulations regarding snow disposal.
Dealing with Ice Thickness Variations
- Water Layering: When flooding your rink, apply thin and even layers of water to ensure consistent ice thickness. This method promotes better bonding between layers and minimizes the risk of shell ice formation. Allow each layer to freeze before adding the next.
- Hot Water Flooding: If you notice areas with significantly thinner ice, you can use hot water flooding to gradually build up the ice thickness. Prepare hot water and carefully pour it over the thin spots, ensuring a controlled and gradual application. Repeat the process until the desired ice thickness is achieved.
- Ice Resurfacer Adjustment: If you have an ice resurfacer, adjust the blade height to accommodate areas with thinner ice. Lower the blade slightly to shave off a thin layer of ice from the thicker areas and distribute it over the thinner spots. This technique helps level the ice surface and improve overall thickness consistency.
- Additional Ice Layering: In cases where a particular area requires significant ice thickness adjustment, consider adding an additional layer of water exclusively to that area. Use a watering can or a fine mist sprayer to apply thin layers until the desired thickness is achieved.
Preventing Ice Cracks and Fissures
- Temperature Regulation: Rapid temperature fluctuations can cause stress on the ice, leading to cracks. Monitor the temperature inside and outside the rink area and aim to maintain a consistent and controlled temperature. Use shade structures or tarps to protect the rink from direct sunlight or excessive heat.
- Proper Flooding Techniques: Implement proper flooding techniques, such as thin-layer flooding. Applying thin and even layers of water promotes better bonding with the existing ice, reducing the likelihood of cracks. Avoid overflooding the rink, as excessive water can weaken the ice and increase the risk of cracking.
- Ice Thickness Management: Maintaining appropriate ice thickness is crucial for preventing cracks. Regularly monitor the ice thickness and add layers of water as needed to reinforce the integrity of the ice surface. A thicker ice layer provides better insulation and stability.
- Avoiding Overcrowding: Limit the number of skaters on the rink to prevent excessive stress on the ice. Overcrowding can lead to cracks due to the increased weight and pressure exerted on the surface. Implement rules and guidelines for maximum skater capacity based on the size of your rink.
- Proper Ice Maintenance: Maintain a consistent ice surface by regularly resurfacing and leveling. Smooth out any bumps or ridges that may cause stress on the ice and lead to cracking. Address any cracks that do appear promptly, using hot water flooding or specialized crack repair solutions.
Managing Melting and Refreezing
- Temperature Monitoring: Continuously monitor the temperature to stay informed about potential temperature fluctuations. Install a weather station or use a thermometer to track the temperature inside and outside the rink area. Be aware of forecasted weather changes to anticipate any significant temperature shifts.
- Shade Structures and Tarps: Create shade structures or use tarps to shield the rink from direct sunlight and excessive heat. This helps regulate the temperature and minimize the risk of rapid melting and refreezing. Erect temporary structures using poles or consider using large shade umbrellas to provide shade during warmer periods.
- Water Application: Apply thin layers of water regularly to maintain the ice surface and prevent melting. Use a fine mist sprayer or watering can distribute water evenly across the rink. This technique helps maintain the ice’s integrity and stability, reducing the likelihood of melting and refreezing.
- Protective Covering: In situations where significant temperature changes are expected or during prolonged periods of warmth, consider covering the rink with a protective layer. Use a tarp or heavy-duty plastic sheeting to cover the ice surface when not in use. This insulation can help preserve the ice and prevent excessive melting.
Repairing Damaged or Uneven Ice Surfaces:
- Hot Water Flooding: Hot water flooding can be an effective method to repair minor damages or uneven areas on the ice surface. Prepare hot water and pour it over the affected spots, allowing the water to bond with the existing ice. Gradually build up thin layers to level the surface.
- Patching Materials: For more significant damages or cracks, specialized patching materials designed for ice surfaces can be used. These materials, such as ice resurfacer repair solutions or ice patching kits, provide a durable and seamless repair. Follow the manufacturer’s instructions for proper application and allow sufficient drying time.
- Leveling Techniques: Use an ice resurfacer or a large squeegee to level the ice surface and remove any bumps or ridges. Work systematically, moving in smooth, overlapping passes to create an even and smooth skating surface. Apply additional layers of water as necessary to achieve the desired level.
- Regular Maintenance: Incorporate regular maintenance routines into your ice rink care. Schedule periodic resurfacing sessions to keep the ice surface in optimal condition. This helps address minor imperfections and maintains a smooth and even skating surface. Regularly inspect the rink for any signs of damage or unevenness and take immediate action to rectify the issues.
- Professional Assistance: In cases where significant repairs or ice surface leveling is required, consider seeking professional assistance. Professional ice technicians have the expertise and specialized equipment to handle complex repairs and ensure the best results. They can provide guidance on the best techniques for repairing and leveling the ice surface.
Addressing Water Drainage Issues
- Rink Base Leveling: Ensure that the rink base is properly leveled during the initial construction phase. A level base helps facilitate proper water drainage and prevents water from pooling in certain areas of the rink.
- Sloping the Rink: Create a slight slope in the rink’s base to encourage natural water drainage. This slope should be directed towards an appropriate drainage area, such as a nearby storm drain or designated drainage pit.
- Installing Drainage Systems: For more complex water drainage challenges, consider installing a drainage system specifically designed for backyard ice rinks. These systems can help redirect water away from the rink and maintain a dry and even surface.
- Regular Inspections: Regularly inspect the rink for any signs of water pooling or inadequate drainage. Address any issues promptly to prevent ice deterioration and ensure proper water flow.
Frequently Asked Questions
What is shell ice, and how does it form on a backyard rink?
How can I identify shell ice on my backyard rink?
What are the risks associated with shell ice?
What is the recommended approach to fix shell ice on a backyard rink?
What tools and materials do I need to fix shell ice on my backyard rink?
How can I prevent shell ice from forming on my backyard rink in the future?
How often should I perform maintenance on my backyard rink to prevent shell ice formation?
Can I fix shell ice without using warm water flooding?
Should I seek professional help to fix shell ice on my backyard rink?
How long does it take to fix shell ice on a backyard rink?
About The Author

Pat Rowse is a thinker. He loves delving into Twitter to find the latest scholarly debates and then analyzing them from every possible perspective. He's an introvert who really enjoys spending time alone reading about history and influential people. Pat also has a deep love of the internet and all things digital; she considers himself an amateur internet maven. When he's not buried in a book or online, he can be found hardcore analyzing anything and everything that comes his way.