
Last Updated on July 7, 2022
Embroidery is a very common way to add a beautiful detail to a bishop dress. Learn how to do it with this step-by-step guide. This article will also explain the differences between view A and B. This method is especially important if you plan to embroider the dress. After sewing the first piece of pleated drapery, it‚s time to move on to the next.
Difference between view A and
When sewing a bishop dress, it‚s helpful to know the difference between views A and B. View A has the center back seam while view B has the opening for a continuous bound placket. View A is best for hand pleating while view B is suitable for machine pleating. Both patterns are easy to follow and make the same dress. The main difference between the two patterns is how the front and back openings are created.
The first step is to cut a piece of fabric that is twice the length of the finished facing. Press the piece of fabric and mark the midpoint. Fold the fabric lengthwise and press. Place it against the wrong side of the bishop dress. The middle point of the fabric should align with the French seam on the back of the bishop dress. You can now begin sewing the placket.
Embroidery technique
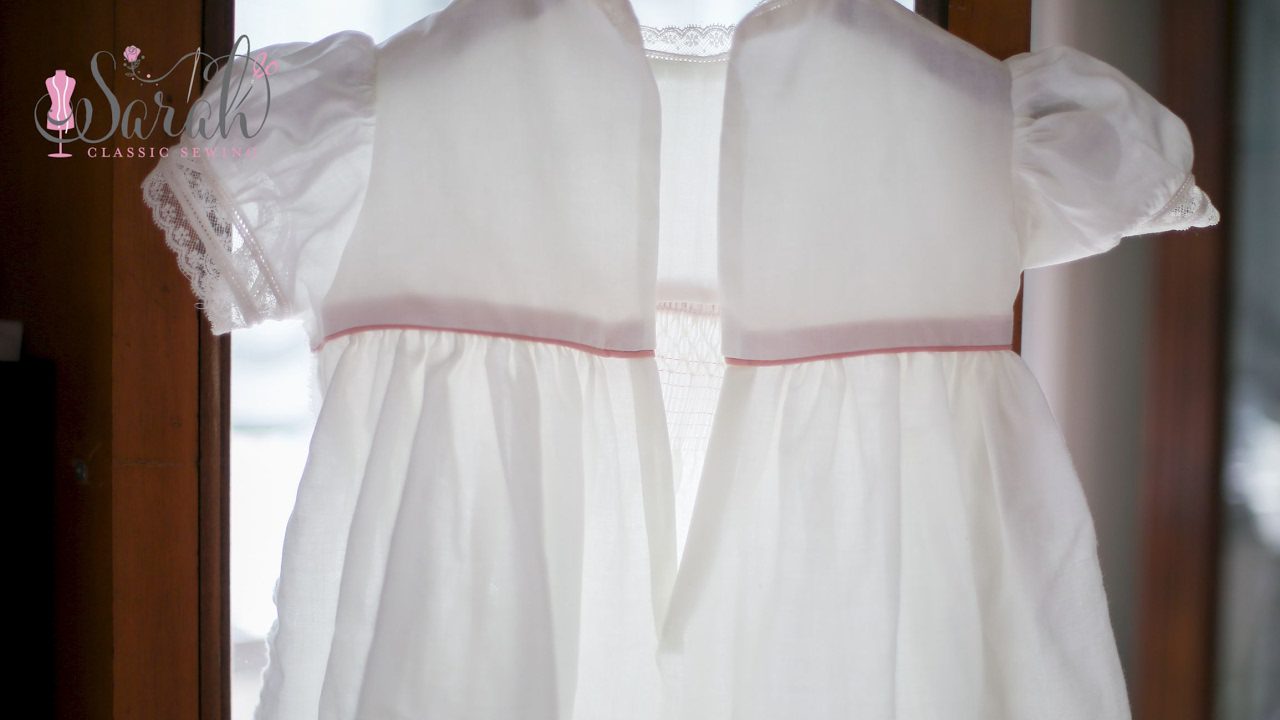
A Bishop dress has two parts: the flutter sleeves and the placket. The sleeves are made of a fluttery fabric and are pinned to the bishop dress. The fabric is gathered by hand or iron-on transfer dots. Once the fluttery sleeves have been sewn, the placket is complete. Embroidery techniques can be used to embellish the bishop dress, too.
The pleating process can be a bit time-consuming. Start by marking the grid line with a marker and then stitch along the lines, leaving tails to pull the pleats into place. Make sure you make an even number of pleats; an even number will make embroidering easier. Determine the depth of the pleat. You may only need to stitch a little way down the seam if the pleat is shallow. Next, sew the first row of running stitch. This stitch will guide the first row of gathering stitches.
When sewing a bishop dress, you will first need to sew the right side of the sleeve of the dress. You want the narrow side of the placket to cover the opening. Do not topstitch over the opening, instead stitch along the sides. The stitching line will help you as you sew the rest of the placket. You can also pin the fabric in place using a needle and fabric.
Once you have stitched the front side of the yoke, you can then sew the placket using buttons or buttonholes or hook and eye closures. Three buttons will be needed. To sew the buttons, mark the wrong side of the bodice with a pencil. You can also cut out a diagonal triangle if you wish. Once the buttons are in place, sew the placket.
Embroidery techniques are very versatile. The technique can be applied to any dress and can be used in many other ways. It can also be used to add decorative details to your garments. Sewn by hand, smocking can make your dresses look more luxurious than ever! You can learn more about the embroidery techniques by purchasing the Sew Beautiful collection CDs. The Sew Beautiful collection CD includes six complete issues of the magazine.
Seam allowance
The seam allowance for the placket on a bishop dress is about 5/8″ less than the finished facing width. The placket on this style is continuous, and the pleating threads on the back are removed from the seam allowance. The length of the placket should be enough to reach the top of the bodice and have a firm finish at the bottom. Once you have gathered the fabric for the placket, you can pin it to the dress.
Using the pattern, sew the placket on with a 1/4″ seam allowance. Leave a couple of inches extra on the top to cover the notches. The resulting seam allowance will create the tucks and bunching that are characteristic of this type of dress. Be sure to follow the pattern instructions when sewing the placket to the bodice. Make sure the notch is aligned correctly to avoid creating a gap for the buttons.
Once you have placed the fabric on the dress, fold it over the wrong side and press it. Then, sew the placket to the right side, using a 1/4″ seam allowance. Remember to back stitch the centre front seam, which should be stitched with a Back Stitch. Don‚t forget to turn the facing under before stitching the placket. Then, press the seam with the bias strip inside to prevent it from shifting out of place.
After sewing the back and sleeves, stitch the placket to the front and sew it in place. The seam allowance should not pucker or show any raw edges. When tucking the placket, be sure to finish the edges. Also, make sure the cuffs are pressed. Make sure to leave at least five inches of ease around the placket opening. These are the minimum requirements for a successful blouse or bishop dress.
The back and sleeve seam of a bishop dress should match. Add a 3/4″ seam allowance to the back sleeve to achieve a good drape and allow for the elbow to move when it is bent. Draw a 3/4″ line beneath section #3, the section next to the center. If you want the sleeve to be gathered, you can flip it up or down.
Back-smocking
To back-smock a bishop dress placket, you first need to determine where the pleats will begin and end. The first pleat will be at the center of the bishop dress. This pleat will be curved naturally. You can make the pleats larger or smaller by repeating the steps listed above. Once you‚ve completed the entire bishop dress, you‚ll need to hem the gown.
Before you begin back-smocking, you‚ll need to measure the arm curve on the pattern. You‚ll need to find the straight part where the arm curve starts. Then, measure this section against the brand of pleater you‚re going to use. Some brands of bishop plates are not designed for every size. Make sure to measure the arm curve against the pattern to find out how many rows to back-smock.
If you aren‚t a novice sewer, you‚ll need a sewing machine and some patience. For beginners, it can take a few tries to get the hang of it. You should be able to back-smock a bishop dress in a few days. You‚ll be happy you did once you‚ve mastered the technique. When working with a fabric that‚s malleable like tulle or organza, make sure to stitch the bias band the same distance from the first pleating row. Afterward, you‚ll need to adjust the tension of the outer rows until the placket is invisible.
The next step in the process is to back-smock the placket. Here‚s the step-by-step process. Then, you‚ll need to attach the fabric to the back-smocking plate. Once the embroidery is done, the dress will be finished and ready to wear. A smocking plate represents the embroidery design. The 18-inch doll dress, for example, uses simple heart embroidery.
Before attaching the bias band, you‚ll need to measure the width of the pleating band. The finished bias strip will be 1/4″ wide. It‚s best to make the pleats narrower than the bias band. If the bias band is too wide, you‚ll need to use pins to secure it. Once you‚ve done this, line up the front bias band with the smocking, and attach the bias band to the bishop.
About The Author

Wendy Lee is a pop culture ninja who knows all the latest trends and gossip. She's also an animal lover, and will be friends with any creature that crosses her path. Wendy is an expert writer and can tackle any subject with ease. But most of all, she loves to travel - and she's not afraid to evangelize about it to anyone who'll listen! Wendy enjoys all kinds of Asian food and cultures, and she considers herself a bit of a ninja when it comes to eating spicy foods.