
Last Updated on August 3, 2023
Welcome to our comprehensive guide on how to install and use dconf-Editor. In this article, we will walk you through the step-by-step process of installing this powerful tool and customizing your system settings effortlessly. Whether you are a beginner or an experienced user, this guide is designed to provide you with all the information you need to get started with dconf-Editor.
Understanding the Purpose of dconf-Editor
dconf-Editor is a powerful tool that allows users to customize and modify system settings in Linux. It provides a graphical interface for accessing and editing the dconf database, which stores configuration settings for various applications and components of the operating system. By using dconf-Editor, users can easily tweak and personalize their system settings to suit their preferences.
Here are some key points to understand about the purpose of dconf-Editor:
- Access and modify system settings: dconf-Editor allows users to access and modify a wide range of system settings, including desktop appearance, window behavior, application preferences, and more.
- Centralized configuration database: dconf-Editor provides a centralized location for managing configuration settings, making it easier to navigate and modify various options.
- Customization and personalization: With dconf-Editor, users can customize their system settings to create a personalized computing experience that suits their needs and preferences.
- Advanced features: dconf-Editor offers advanced features such as search functionality, bookmarks, and the ability to import/export settings, making it a versatile tool for power users.
Overall, dconf-Editor is a valuable tool for Linux users who want to have more control over their system settings and customize their computing experience.
Checking System Requirements
Before you can install dconf-Editor on your system, it is important to ensure that your system meets the necessary requirements. This will help to ensure a smooth installation process and prevent any compatibility issues.
Firstly, you need to check the operating system requirements. dconf-Editor is compatible with most Linux distributions, including Ubuntu, Fedora, and Debian. Make sure that you are running a supported version of the operating system.
Next, you need to check if the required dependencies are installed on your system. dconf-Editor relies on certain libraries and packages to function properly. These dependencies may vary depending on your Linux distribution. You can check the official documentation or the package manager of your distribution to find out the specific dependencies required.
Lastly, it is recommended to have a stable internet connection during the installation process. This will ensure that all necessary files are downloaded correctly and prevent any interruptions.
By checking these system requirements beforehand, you can ensure a successful installation of dconf-Editor and avoid any potential issues.
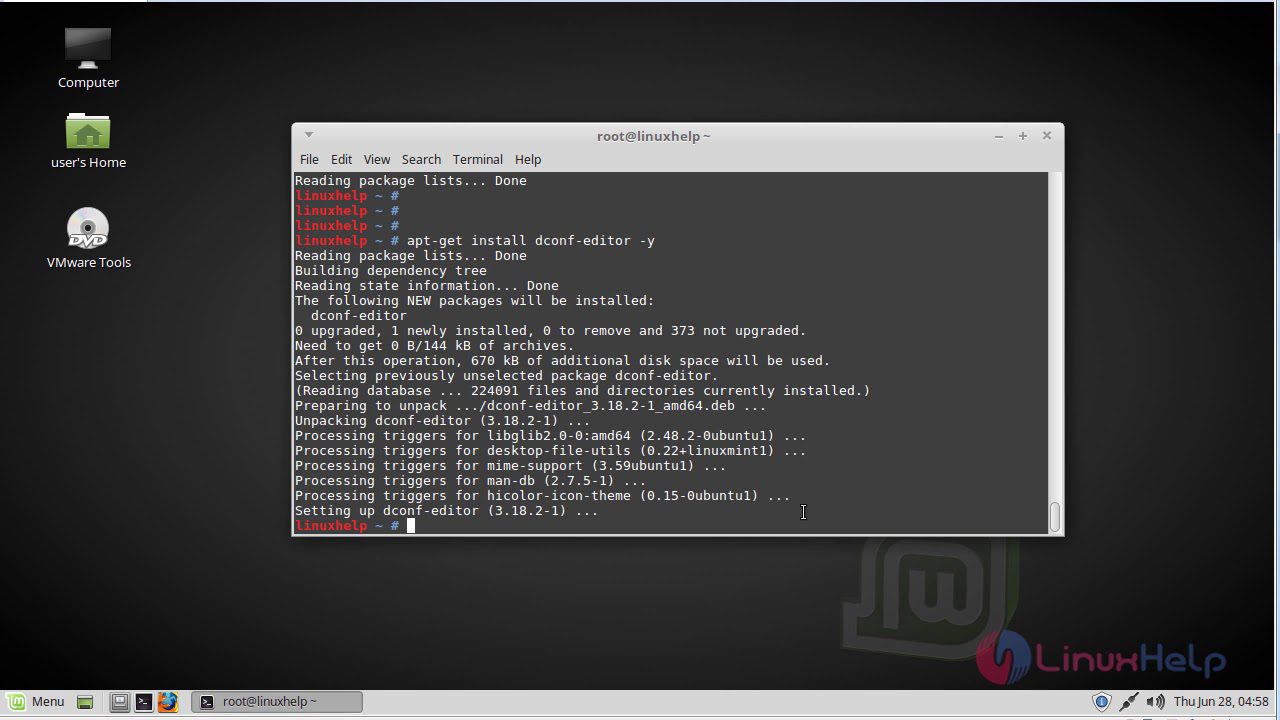
Downloading and Installing dconf-Editor
Once you have checked the system requirements and ensured that your system is compatible with dconf-Editor, it is time to proceed with the download and installation process. Follow the steps below to successfully install dconf-Editor on your system:
- Open your web browser and navigate to the official website of dconf-Editor.
- Locate the download section on the website and click on the appropriate link to download the installation package for your operating system.
- Once the download is complete, locate the downloaded file on your computer.
- Double-click on the downloaded file to initiate the installation process.
- Follow the on-screen instructions to complete the installation. Make sure to carefully read and accept the terms and conditions, if prompted.
- Once the installation is complete, you can launch dconf-Editor from the applications menu or desktop shortcut.
Congratulations! You have successfully downloaded and installed dconf-Editor on your system. Now, you can proceed to explore its user interface and customize system settings according to your preferences.
Exploring the User Interface of dconf-Editor:
1. Launching dconf-Editor: You can launch dconf-Editor by searching for it in your application menu or by running the command “dconf-editor” in the terminal.
2. Main Window: The main window of dconf-Editor consists of a sidebar on the left and a content area on the right. The sidebar contains various categories and subcategories of system settings that you can customize.
3. Navigating the Sidebar: You can navigate through the different categories and subcategories by clicking on them in the sidebar. This allows you to access specific system settings that you want to customize.
4. Viewing and Editing Settings: When you select a category or subcategory in the sidebar, the corresponding settings will be displayed in the content area. You can view and edit these settings by clicking on them.
5. Searching for Settings: If you are looking for a specific setting, you can use the search bar at the top of the main window. Simply type in the keyword or setting name, and dconf-Editor will filter the results for you.
6. Making Changes: To make changes to a setting, simply double-click on it and enter the desired value. You can also right-click on a setting to access additional options, such as resetting it to its default value.
7. Applying Changes: After making changes to a setting, you need to click the “Apply” button at the top of the main window to apply the changes. This ensures that the new settings take effect.
8. Undoing Changes: If you want to undo a change that you made, you can click the “Undo” button at the top of the main window. This will revert the setting back to its previous value.
9. Saving and Quitting: Once you are done customizing the system settings, you can save your changes by clicking the “Save” button at the top of the main window. You can then quit dconf-Editor.
10. Remember to exercise caution when making changes to system settings, as incorrect configurations can potentially cause issues with your system. It is always a good idea to backup your system before making any major changes.
Customizing System Settings with dconf-Editor
Once you have successfully installed dconf-Editor, you can start customizing your system settings to suit your preferences. Here are some tips on how to use dconf-Editor effectively:
- Backup your settings: Before making any changes, it is always a good idea to create a backup of your current settings. This will allow you to revert back to the original settings if needed.
- Explore the available options: dconf-Editor provides a wide range of settings that you can customize. Take some time to explore the different categories and options available to you.
- Make changes with caution: While dconf-Editor allows you to customize system settings, it is important to make changes with caution. Incorrect settings can potentially cause issues with your system.
- Document your changes: It is a good practice to document any changes you make using dconf-Editor. This will help you keep track of the modifications you have made and make it easier to troubleshoot any issues that may arise.
- Test your changes: After making any changes, it is recommended to test them to ensure they have the desired effect. This will help you identify any issues or conflicts that may occur.
- Seek help if needed: If you encounter any difficulties or have questions about using dconf-Editor, don’t hesitate to seek help from online forums or the dconf-Editor community.
By following these tips, you can effectively customize your system settings using dconf-Editor and enjoy a personalized computing experience.
Troubleshooting Common Installation Issues
While installing dconf-Editor, you may encounter some common issues that can be easily resolved. Here are a few troubleshooting tips to help you overcome these problems:
1. Dependency Errors
If you receive dependency errors during the installation process, it means that some required packages are missing on your system. To fix this, you can use the package manager to install the missing dependencies.
2. Permission Denied
If you encounter a “Permission Denied” error while installing or running dconf-Editor, it means that you don’t have the necessary permissions. In such cases, you can try running the installation command with administrative privileges using the “sudo” command.
3. Application Crashes
If dconf-Editor crashes or freezes after installation, it could be due to compatibility issues or conflicts with other software on your system. Try updating dconf-Editor to the latest version or check for any conflicting applications that may be causing the issue.
By following these troubleshooting tips, you can overcome common installation issues and ensure a smooth experience with dconf-Editor.
Tips and Tricks for Using dconf-Editor Effectively
Once you have successfully installed dconf-Editor, there are several tips and tricks that can help you make the most out of this powerful tool. Here are some suggestions to enhance your experience:
1. Backup your settings
Before making any changes in dconf-Editor, it is always a good idea to create a backup of your current settings. This way, if anything goes wrong, you can easily revert back to the previous configuration.
2. Use search functionality
dconf-Editor allows you to search for specific settings or keywords within the application. This can be extremely useful when you are looking for a particular option or trying to troubleshoot a specific issue.
3. Take advantage of bookmarks
If you frequently access certain settings, you can bookmark them in dconf-Editor for quick and easy access. This can save you time and effort when navigating through the application.
4. Experiment with different configurations
dconf-Editor provides a wide range of customization options. Don’t be afraid to experiment with different settings to find the configuration that works best for you. Just remember to take note of any changes you make, so you can easily revert back if needed.
By following these tips and tricks, you can effectively use dconf-Editor to customize your system settings and optimize your overall user experience.
Unlock the Full Potential of Your System with dconf-Editor
After exploring the various features and functionalities of dconf-Editor, it is clear that this powerful tool is a game-changer for system customization. By allowing users to delve deep into the system settings and make personalized adjustments, dconf-Editor empowers individuals to truly make their system their own.
With dconf-Editor, you can effortlessly tweak and fine-tune various aspects of your system, from appearance and behavior to privacy and security settings. Whether you are a tech enthusiast looking to optimize your system or a casual user wanting to personalize your desktop, dconf-Editor offers a user-friendly interface that caters to all levels of expertise.
By following the step-by-step instructions outlined in this article, you can easily install and navigate dconf-Editor, ensuring a seamless experience. Say goodbye to the limitations of default system settings and embrace the freedom to customize your system to your heart’s content.
So why wait? Unlock the full potential of your system today with dconf-Editor and enjoy a personalized computing experience like never before.
Learn how to install and use dconf-Editor to customize your system settings effectively. Enjoy the benefits now!
About The Author

Mindy Vu is a part time shoe model and professional mum. She loves to cook and has been proclaimed the best cook in the world by her friends and family. She adores her pet dog Twinkie, and is happily married to her books.