
Last Updated on September 16, 2022
You may be wondering how long to wait after shower door installation before you can use it. After all, you need to make sure everything is tight and the sealant is dry. Then, you should check to see if there are leaks or mold. Luckily, there are a few easy steps you can take to ensure everything is working properly. Keep reading to learn how to install a frameless glass shower door.
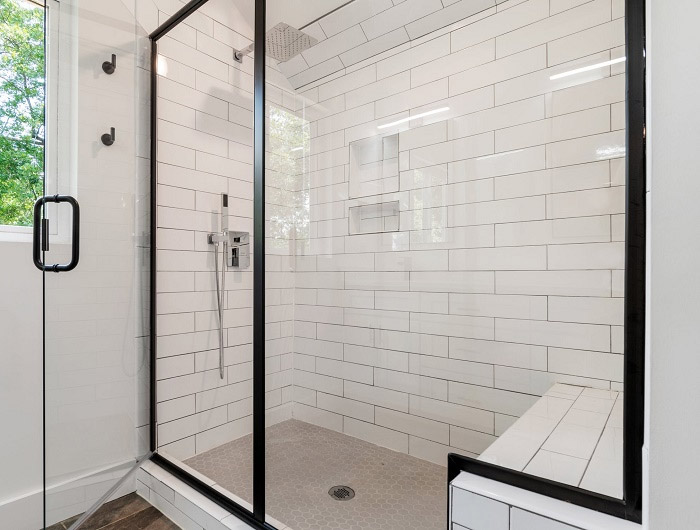
Installing a frameless glass shower door
A frameless glass shower door installation process is typically completed in two stages. First, the contractor will visit your bathroom to determine the size of the opening. After taking measurements, they will then begin manufacturing the glass pieces for the new enclosure. Then there will be a waiting period while the contractor cuts the glass. The final installation process should only take a few hours, and the entire process should last less than a day.
A frameless glass shower door can take a little longer to install than a framed one. A frameless door requires special drill bits and leveled clips and can be heavier than a framed one. Framed doors are easier to install because they rest on a frame and therefore require less time. However, you may be wondering how long it takes to install a frameless glass shower door.
Installing a frameless glass shower door is relatively straightforward, but it does require some knowledge and special tools. You can purchase a frameless glass shower door at your local home improvement store and install it yourself, but remember that you’ll need to drill holes, measure the length and align the glass. You’ll need at least two people to install it, and you’ll need a good guide for a frameless shower door installation.
Depending on the installation method you choose, frameless glass shower doors can cost anywhere from $500 to $1,300. The cost for installation will also depend on the type of glass used, the thickness, and the finish. Installation time varies based on the size of the unit and the glass, but the overall installation time is around three hours. Once you’ve completed the installation, a plumber will finish the work and remove the old door.
Caulking the joints
To properly seal the joints around your shower door, you need to apply caulk in the right place. Start at the bottom edge of the door and caulk in a few inches in each corner. If the joints are wider than an inch, you can use foam tape to fill the gap. When caulking the joints, do not apply too much caulk as it tends to sag and makes it harder to paint the edges.
Before you begin, you should choose the type of caulk you are going to use. Caulk comes in several types and is often divided by manufacturers into paintable and non-paintable varieties. Caulk is a flexible material that provides a transition between building materials and reduces the transfer of water and air. You can use caulk to seal cracks up to 1/2 inch wide, but you should use other elastomeric products as well.
Before caulking the joints after shower door installation, remove any old caulk and use painter’s tape to create a guide. Once you’ve created the guide for the new caulk line, use a caulk gun or a caulk tube to apply it evenly along the joints. Remove any excess caulk with a wet finger. If your shower door has tracks, you should caulk them as well. Make sure to clean the area thoroughly and sand rough areas. You can also use a caulking gun to apply the caulk under the door tracks. Caulking the tracks should be done in one fluid line, so that it fills the seams evenly.
Before caulking the joints after shower door installation, you should remove any existing caulk that has been applied to the walls. If you have any concrete or masonry surfaces, you can use a wire brush to clean the surfaces. If you have used acrylic or silicone caulk, you can use mineral spirits or soap and water to clean them. Once the caulk is clean, you can now paint them.
Inspecting for leaks
If you installed a new shower door, you may want to inspect it for leaks after use. The shower door might have been installed correctly, but it was not sealed properly. This may be the case even if it looks perfect. In this case, you should check the caulk and door sweeps for cracks. If you find any of them, you can fix them yourself. Then, you can check the shower door for leaks to make sure that the leak is not coming from those areas.
Water stains will be a common sign of a leak. The stains will be visible on the ceiling of the shower. If the shower is installed in a basement or multi-story house, you may also notice water stains on the joists below. A small nail or a flashlight can help you find the pipes and the source of the leak. Inspecting for leaks after shower door installation should save you a lot of money in the long run.
When inspecting for leaks after shower door installation, you should also inspect the frame. If the door is leaking, inspect the frame to make sure the shower door is securely attached. If the shower door frame is leaking, it may be due to a broken or cracked door sweep. Regardless of the cause, the shower door should be inspected after installation to make sure it is secure and free of leaks.
If you are not able to spot the cause, you can use some other methods to detect the problem. First, you can apply water to the suspected problem areas. Then, you can use hand-held moisture meters and infrared thermal photography to check for water behind the walls. A continuous leak will most likely indicate a problem with the waterproofing of the building. A leak that appears intermittently can indicate a problem with a different water system.
Inspecting for mold
Despite the fact that it is easy to overlook the first signs of mold, it is crucial to take the necessary precautions. Mold can be very dangerous, and ignoring the signs of mold can lead to further problems. While the presence of mold is not always visible, it can signal a larger problem inside the walls, subfloors, or other areas of the home. If you spot any of these signs, contact a professional mold remediation company right away.
It is important to remember that there are two types of mold. The first is mildew, which is only visible on the surface. This type of mold is not harmful to the structure of the home, but the other types can cause rot. To find out whether or not there is any mold present, probe the surface of the shower door using a sharp instrument. If the wood is crumbling or soft, then fungi have taken hold and may have caused the rot.
You may also notice hidden mold. In addition to visible mold, hidden mold can be found behind walls or ceiling tiles. Insufficient insulation and leaks can also lead to hidden mold. To identify hidden mold, check for a musty odor and see if the walls are soft or damp. In addition, look for water seepage and moist areas near outlets and wiring. If you notice any of these signs, it is time to contact a mold remediation service.
Black mold is a very dangerous type of mold. It can make your house unlivable for months. Although “black mold” is always black, it can also be green, red, or brown. In fact, it is possible to detect mold in these colors as well. Thankfully, there are many ways to detect mold after shower door installation. So, get on the ball and start inspecting your new shower door today!
Getting multiple quotes for shower door installation
The first step in getting multiple quotes for your shower door installation project is to gather as much information as you can about the price. While there are several factors to consider, it is vital to find the best price for your needs. It is also vital to choose a reputable company with a proven track record. A company with a good reputation will be more likely to be able to provide you with high-quality work at a reasonable cost.
Frameless shower doors are more expensive than other types of shower doors. While most shower doors are clear, you can opt for a decorative glass option that is patterned or etched. However, it is important to remember that decorative glass can greatly increase the cost of the door as it requires more labor. As a result, it is best to get multiple quotes from different companies before making a final decision. However, if you don’t want to spend a lot of money, you can choose a semi-frameless glass shower door that will fit your needs at an affordable price.
Shower doors come in many different configurations, so you should get multiple estimates for the installation of a new one. Some of the most common types of doors include pivoting and sliding doors. Some companies specialize in custom-made doors. Other factors to consider when getting quotes for shower door installation include the size of the opening, style, glass, and frame. Generally, the more complicated the installation, the more it will cost.
Besides the material used for the door, you should also consider the price of the hardware. For instance, if you choose glass to glass hinges, the price will be higher than for a sleeve-over clamp. A frameless shower will have perimeter glass secured, which is expensive. A U channel shower with clamps will cost more than a frameless shower. This type of door will require additional glass processing and hardware.
About The Author

Fernánda Esteban is a food fanatic. She can't go more than a few hours without eating, and she loves trying new foods from all over the world. Her friends know that they can always count on her for a good conversation, and she's an animal lover who will never turn down an opportunity to pet a dog or cat. Fernánda also enjoys learning about random facts, and she's a social media practitioner who loves to share what she knows with others.