
Last Updated on July 25, 2023
Short Answer
French polishing a piano is a meticulous process that involves applying layers of shellac to create a beautiful, glossy finish. To begin, the piano must be thoroughly cleaned and any existing finish removed. Next, a mixture of shellac flakes and alcohol is prepared and applied to the piano using a pad made of cotton or wool. This process is repeated multiple times, allowing each layer to dry before applying the next. Finally, the surface is smoothed and polished to achieve the desired shine. French polishing requires patience and attention to detail, but the end result is a stunning piano that is both visually appealing and protected.
French polishing is a highly skilled technique that can transform the appearance of a piano, giving it a stunning high-gloss finish. In this article, we will explore the art of French polishing and its application on pianos. We will delve into the importance of achieving a flawless finish and provide a step-by-step guide on how to prepare the piano surface for French polishing. Additionally, we will discuss the materials and tools needed for the process and explain how to apply the initial layers of shellac for a smooth foundation. We will also cover the technique of applying the French polish and the careful buffing and polishing required to achieve a flawless high-gloss finish. Finally, we will touch on the maintenance of a French polished piano and explore alternative polishing methods. By the end of this article, you will have the knowledge and skills to elevate the aesthetic appeal of your piano using French polishing techniques.
Understanding the importance of a high-gloss finish for pianos
When it comes to pianos, the finish is not just about aesthetics. A high-gloss finish is essential for several reasons:
- Protection: The finish acts as a protective layer, shielding the wood from moisture, dirt, and other potential damage.
- Enhanced sound: A smooth finish allows the sound to resonate more freely, resulting in a richer and more vibrant tone.
- Longevity: A well-maintained high-gloss finish can extend the lifespan of a piano, preventing wear and tear on the wood.
Now that we understand the importance of a high-gloss finish, let’s explore the step-by-step process of preparing the piano surface for French polishing.
Step-by-step guide to preparing the piano surface for French polishing
Before embarking on the French polishing process, it is crucial to properly prepare the surface of the piano. This step is essential in ensuring a smooth and flawless finish. Here is a step-by-step guide to help you prepare the piano surface:
1. Clean the surface
Start by thoroughly cleaning the piano surface to remove any dust, dirt, or grime. Use a soft cloth or brush to gently wipe away any debris. This will create a clean canvas for the French polishing process.
2. Remove old finish
If there is an existing finish on the piano, it is important to remove it before applying the French polish. This can be done using a chemical stripper or by sanding the surface. Be sure to follow the manufacturer’s instructions when using a chemical stripper and use a fine-grit sandpaper for sanding.
3. Fill any imperfections
Inspect the piano surface for any dents, scratches, or other imperfections. Use a wood filler or putty to fill in these areas. Allow the filler to dry completely before moving on to the next step.
4. Sand the surface
Once the filler has dried, use a fine-grit sandpaper to smooth out the surface of the piano. Sand in the direction of the wood grain to avoid creating scratches. This will create a smooth and even surface for the French polish.
By following these steps, you will be able to properly prepare the piano surface for the French polishing process. This will ensure a professional and high-quality finish that will enhance the aesthetic appeal of your piano.
Choosing the right materials and tools for the French polishing process
When it comes to French polishing a piano, selecting the appropriate materials and tools is crucial for achieving a professional and flawless finish. Here are some key considerations:
1. Shellac
Shellac is the primary material used in French polishing. It is a natural resin that is dissolved in alcohol to create a liquid polish. When choosing shellac, opt for high-quality flakes that are free from impurities. Different shades of shellac are available, so select the one that matches the desired color for your piano.
2. Alcohol
The alcohol used to dissolve the shellac should be of high purity, such as denatured alcohol or ethanol. Avoid using rubbing alcohol or other household alcohols, as they may contain additives that can affect the quality of the polish.
4. Polishing pads
Polishing pads are essential for applying the French polish to the piano surface. Choose soft, lint-free cotton or wool pads that are specifically designed for French polishing. These pads should be able to hold the polish and distribute it evenly.
4. Sandpaper
Prior to applying the French polish, the piano surface needs to be prepared by sanding. Use fine-grit sandpaper, around 320 to 400 grit, to smooth out any imperfections and create a smooth foundation for the polish.
By carefully selecting the right materials and tools, you can ensure a successful French polishing process and achieve a stunning high-gloss finish for your piano.
Applying the initial layers of shellac for a smooth foundation
When it comes to French polishing a piano, applying the initial layers of shellac is crucial for creating a smooth foundation. Here are the steps to follow:
- Clean the surface: Before applying shellac, make sure the piano surface is clean and free from dust and debris. Use a soft cloth or brush to gently remove any dirt.
- Prepare the shellac: Mix the shellac flakes with denatured alcohol in a glass jar. Allow the mixture to sit for a few hours until the flakes dissolve completely.
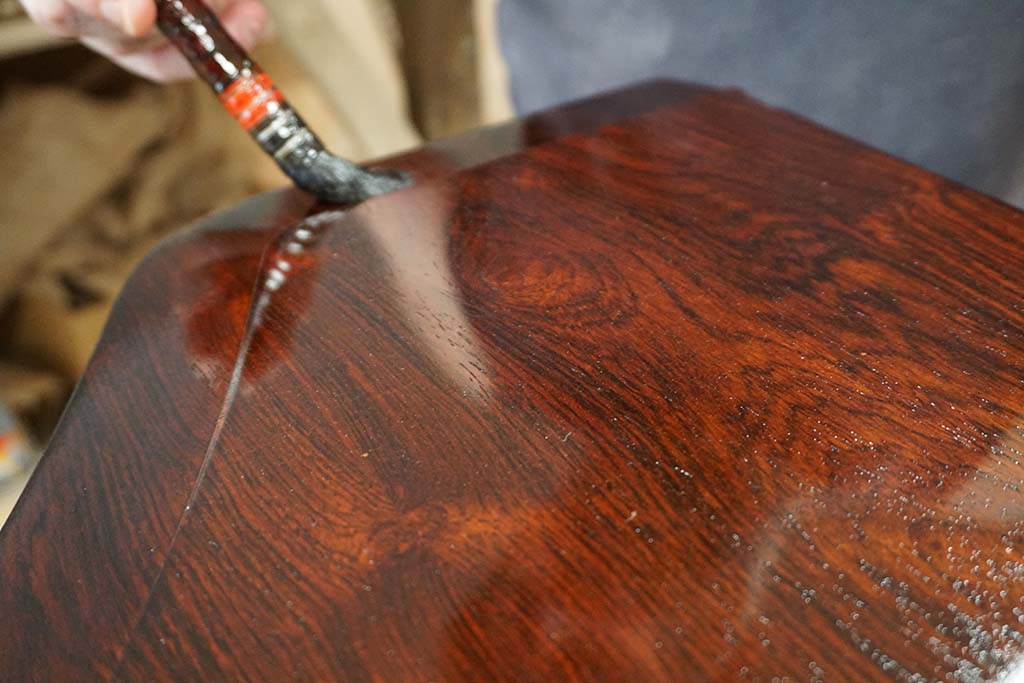
- Apply the first coat: Dip a clean, lint-free cloth into the shellac mixture and wring out any excess. Apply a thin, even coat of shellac to the piano surface, working in small sections at a time.
- Allow drying time: After applying the first coat, allow it to dry completely. This usually takes about 30 minutes to an hour, depending on the temperature and humidity.
- Apply subsequent coats: Repeat the process of applying thin, even coats of shellac, allowing each coat to dry before applying the next. Aim for at least three to four coats for a smooth foundation.
By following these steps, you can ensure that the initial layers of shellac are applied correctly, providing a solid base for the French polishing process.
Mastering the technique of applying the French polish to the piano surface
Once you have prepared the piano surface and applied the initial layers of shellac, it is time to master the technique of applying the French polish. This step requires precision and patience to achieve a flawless finish. Here are the steps to follow:
- Start by pouring a small amount of French polish onto a clean, lint-free cloth.
- Using circular motions, apply the French polish to the piano surface, working in small sections at a time.
- Apply light pressure and make sure to cover the entire surface evenly.
- Continue applying the French polish until you have covered the entire piano surface.
- Allow the French polish to dry completely before applying additional coats.
- Repeat the process of applying the French polish and allowing it to dry between coats until you have achieved the desired level of gloss.
Remember to work in a well-ventilated area and wear protective gloves to avoid any skin irritation. It is also important to clean your tools and brushes thoroughly after each use to maintain their effectiveness.
Mastering the technique of applying the French polish may take some practice, but with time and patience, you will be able to achieve a professional-looking finish on your piano.
Achieving a Flawless High-Gloss Finish through Careful Buffing and Polishing
Once the French polish has been applied to the piano surface, the final step in the process is to achieve a flawless high-gloss finish through careful buffing and polishing. This step is crucial in bringing out the true beauty and shine of the piano.
To begin, a soft cloth or buffing pad should be used to gently buff the surface of the piano. This will help to remove any imperfections or unevenness in the polish. It is important to use light pressure and circular motions to ensure an even and smooth finish.
After buffing, a high-quality polishing compound can be applied to further enhance the shine of the piano. This compound should be applied with a clean cloth and worked into the surface using circular motions. Again, it is important to use light pressure to avoid damaging the polish.
Finally, a clean, dry cloth should be used to remove any excess polish and buff the surface to a high shine. This step may need to be repeated several times to achieve the desired level of gloss.
By following these careful buffing and polishing techniques, you can achieve a flawless high-gloss finish on your French polished piano, elevating its aesthetic appeal and making it a true centerpiece in any room.
Maintaining the beauty of a French polished piano over time
Once you have successfully French polished your piano, it is important to take steps to maintain its beauty and preserve the finish over time. Here are some tips to help you keep your French polished piano looking its best:
1. Regular dusting
Dust can accumulate on the surface of your piano and dull the shine of the French polish. Use a soft, lint-free cloth to gently dust the piano regularly.
2. Avoid direct sunlight
Exposure to direct sunlight can cause the finish to fade and discolor over time. Keep your piano away from windows or use curtains or blinds to protect it from the sun’s rays.
3. Use a piano cover
When the piano is not in use, consider using a piano cover to protect it from dust, dirt, and accidental spills.
4. Avoid placing objects on the piano
Avoid placing heavy objects or items with sharp edges on the piano surface, as they can scratch or damage the French polish.
By following these simple maintenance tips, you can ensure that your French polished piano remains a beautiful and cherished instrument for years to come.
Enhancing the Beauty of Your Piano with French Polishing Techniques
French polishing is a highly skilled technique that can transform the appearance of your piano, giving it a stunning high-gloss finish. Throughout this article, we have explored the step-by-step process of French polishing, from preparing the piano surface to achieving a flawless finish through careful buffing and polishing.
By understanding the importance of a high-gloss finish for pianos, you can appreciate the value that French polishing brings to your instrument. The initial layers of shellac provide a smooth foundation, while mastering the technique of applying the French polish ensures an even and lustrous surface.
Choosing the right materials and tools is crucial for a successful French polishing process. Additionally, we have discussed alternative polishing methods that you can explore to suit your preferences.
By maintaining the beauty of your French polished piano over time, you can continue to enjoy its aesthetic appeal for years to come. Regular cleaning and gentle care will help preserve the shine and elegance of your instrument.
So, whether you are a professional pianist or a music enthusiast, French polishing techniques can elevate the aesthetic appeal of your piano, making it a true centerpiece in any room.
Frequently Asked Questions
Q: What is French polishing?
A: French polishing is a traditional method of applying a high-gloss finish to wooden surfaces, such as pianos, using shellac and a polishing technique.
Q: Why is a high-gloss finish important for pianos?
A: A high-gloss finish not only enhances the aesthetic appeal of a piano but also provides protection to the wood, making it more resistant to scratches and wear.
Q: How do I prepare the piano surface for French polishing?
A: To prepare the piano surface, you need to clean it thoroughly, remove any existing finish, and sand it to create a smooth and even surface for the French polish.
Q: What materials and tools do I need for French polishing?
A: You will need shellac flakes, denatured alcohol, a polishing pad, a rubber, a pumice stone, sandpaper, and a soft cloth for the French polishing process.
Q: How do I apply the initial layers of shellac for French polishing?
A: To apply the initial layers of shellac, you need to dissolve the shellac flakes in denatured alcohol, apply it evenly on the piano surface using a polishing pad, and let it dry between each layer.
Q: How do I master the technique of applying the French polish?
A: Mastering the technique of applying the French polish requires practice and patience. It involves applying thin and even layers of shellac using a circular motion and building up the polish gradually.
Q: How can I achieve a flawless high-gloss finish on my piano?
A: To achieve a flawless high-gloss finish, you need to carefully buff and polish the surface using a soft cloth and a polishing compound, making sure to remove any imperfections and achieve a smooth and reflective surface.
Q: How can I maintain the beauty of a French polished piano over time?
A: To maintain the beauty of a French polished piano, you should avoid placing it in direct sunlight, regularly dust it with a soft cloth, and periodically apply a thin coat of shellac to refresh the finish.
Q: Are there alternative polishing methods for pianos?
A: Yes, there are alternative polishing methods for pianos, such as using lacquer or polyurethane finishes. However, French polishing is preferred for its traditional and elegant look.
Q: How can French polishing techniques elevate the aesthetic appeal of my piano?
A: French polishing techniques can elevate the aesthetic appeal of your piano by creating a deep, rich, and reflective finish that enhances the natural beauty of the wood and adds a touch of elegance to the instrument.
About The Author

Fernánda Esteban is a food fanatic. She can't go more than a few hours without eating, and she loves trying new foods from all over the world. Her friends know that they can always count on her for a good conversation, and she's an animal lover who will never turn down an opportunity to pet a dog or cat. Fernánda also enjoys learning about random facts, and she's a social media practitioner who loves to share what she knows with others.