
Last Updated on July 27, 2023
Welcome to our article on how to make Fryums in the microwave! If you’re not familiar with Fryums, they are a popular snack that can be enjoyed on their own or with dips. Making Fryums in the microwave is a great option for those who want a quick and convenient way to enjoy this tasty treat. In this article, we will guide you through the process of making Fryums step by step. From gathering the ingredients and equipment needed, to shaping and cooking the Fryums, we’ve got you covered. So, let’s get started and learn how to make delicious homemade Fryums in the microwave!
Gather the ingredients and equipment needed for making Fryums
Before you start making Fryums in the microwave, it’s important to gather all the necessary ingredients and equipment. Here’s what you’ll need:
- Ingredients: Flour, salt, water, and any additional spices or flavorings you prefer.
- Equipment: A microwave-safe plate, a rolling pin, a knife or cookie cutter for shaping the Fryums, and a microwave.
Having all the ingredients and equipment ready beforehand will make the process smoother and more efficient.
Once you have everything prepared, you can move on to the next step of preparing the dough for Fryums.
Preparing the dough for Fryums
Once you have gathered all the necessary ingredients and equipment, it’s time to start preparing the dough for Fryums. Begin by combining the flour, salt, and spices in a large mixing bowl. Mix well to ensure that the spices are evenly distributed throughout the dough. In a separate bowl, whisk together the water and oil until they are well combined. This mixture will help bind the dough together and give it a smooth texture.
Next, make a well in the center of the dry ingredients and pour in the wet mixture. Using your hands or a wooden spoon, gradually incorporate the wet ingredients into the dry ingredients. Continue mixing until a soft and pliable dough forms. If the dough feels too dry, add a little more water. If it feels too sticky, add a little more flour.
Shaping the Fryums and arranging them on a microwave-safe plate
Once you have prepared the dough for Fryums, it’s time to shape them and arrange them on a microwave-safe plate. Shaping the Fryums can be a fun and creative process, allowing you to experiment with different shapes and sizes. You can use a rolling pin to roll out the dough into a thin sheet, and then use cookie cutters or a knife to cut out shapes like circles, squares, or stars.
Arrange the shaped Fryums on a microwave-safe plate, making sure to leave some space between each piece. This will ensure that they cook evenly and become crispy. If you don’t have a microwave-safe plate, you can use a microwave-safe glass or ceramic dish instead.
It’s important to arrange the Fryums in a single layer on the plate, without overlapping them. This will allow the microwaves to penetrate each piece and cook them thoroughly. If you have a large batch of Fryums, you may need to cook them in multiple batches to ensure even cooking.
5. Cooking the Fryums in the microwave:
- Place the microwave-safe plate with the shaped Fryums into the microwave.
- Set the microwave to high power and cook the Fryums for 1 minute.
- After 1 minute, carefully remove the plate from the microwave using oven mitts or a towel.
- Flip the Fryums over using a spatula or tongs to ensure even cooking.
- Place the plate back into the microwave and cook for another 1 minute.
- Repeat the flipping and cooking process until the Fryums are golden brown and crispy.
- Keep a close eye on the Fryums during the cooking process to prevent them from burning.
It is important to note that cooking times may vary depending on the wattage of your microwave, so it may take a few tries to find the perfect cooking time for your Fryums.
Remember to always use caution when handling hot plates and utensils from the microwave to avoid burns.
6. Flipping and repositioning the Fryums for even cooking
Once the Fryums have been cooking in the microwave for a few minutes, it’s important to flip and reposition them to ensure even cooking. This will help to prevent any parts of the Fryums from becoming overcooked or undercooked.
- Using oven mitts or a towel to protect your hands, carefully remove the microwave-safe plate from the microwave.
- Using a spatula or tongs, flip each Fryum over so that the other side is facing up.
- If there are any Fryums that are positioned closer to the edges of the plate, move them towards the center to ensure they cook evenly.
- Rotate the plate if necessary to ensure that all the Fryums are exposed to the heat evenly.
- Place the plate back in the microwave and continue cooking for the remaining time.
By flipping and repositioning the Fryums, you can ensure that they cook evenly and become crispy on both sides. This step is crucial for achieving the perfect texture and taste.
Testing the Fryums for crispness and adjusting cooking time if needed
Once the Fryums have finished cooking in the microwave, it is important to test them for crispness. This can be done by carefully touching one of the Fryums with your finger. If it feels soft or doughy, it needs to be cooked for a little longer. However, if it feels firm and crispy, then the Fryums are ready to be removed from the microwave.
If the Fryums need more cooking time, simply place them back in the microwave for an additional 30 seconds to 1 minute. Keep a close eye on them to prevent them from burning. Repeat the crispness test after the additional cooking time to ensure they are cooked to perfection.
It is important to note that the cooking time may vary depending on the wattage of your microwave. If you find that your Fryums are consistently undercooked or overcooked, you may need to adjust the cooking time accordingly. Experiment with shorter or longer cooking times until you achieve the desired level of crispness.
Once the Fryums are crispy and cooked to your liking, carefully remove them from the microwave using oven mitts or a heat-resistant spatula. Allow them to cool for a few minutes before serving to avoid burning your mouth.
Removing the Fryums from the microwave and allowing them to cool
Once the Fryums have finished cooking in the microwave, it is important to remove them carefully and allow them to cool before serving. This step is crucial to ensure that the Fryums become crispy and crunchy.
Using oven mitts or a kitchen towel, carefully remove the microwave-safe plate from the microwave. Be cautious as the plate may be hot. Place the plate on a heat-resistant surface and allow the Fryums to cool for a few minutes.
During the cooling process, the Fryums will continue to harden and become even more crispy. This step is essential for achieving the desired texture and taste.
Once the Fryums have cooled down, they are ready to be served and enjoyed. You can serve them as a standalone snack or pair them with your favorite dips or sauces.
Remember to store any leftover Fryums in an airtight container to maintain their crispness. Enjoy the homemade Fryums as a delicious and convenient snack anytime!
Serving and enjoying the homemade Fryums
Once the Fryums are cooked to perfection in the microwave, it’s time to serve and enjoy them. The crispy and flavorful snack is best enjoyed immediately after cooking, while it is still warm and crunchy.
To serve the Fryums, you can simply transfer them to a serving bowl or plate. You can also add a sprinkle of your favorite seasonings, such as chaat masala or chili powder, to enhance the taste.
Homemade Fryums can be enjoyed on their own as a delicious snack, or you can pair them with your favorite dips or chutneys. They make a great accompaniment to tea or coffee, and are perfect for serving at parties or gatherings.
Remember to allow the Fryums to cool for a few minutes before serving, as they can be very hot right out of the microwave.
So go ahead and indulge in the crispy goodness of homemade Fryums. Whether you’re enjoying them as a snack or serving them to guests, making Fryums in the microwave is a quick and convenient way to satisfy your cravings.
Try experimenting with different shapes and flavors to create your own unique variations of this popular snack. Happy cooking and happy snacking!
Enjoying Homemade Fryums Made Easy with the Microwave
After following the step-by-step guide on how to make Fryums in the microwave, it is clear that this method offers a quick and convenient way to enjoy this popular snack. By utilizing the microwave, you can save time and effort without compromising on taste and crispness.
With just a few simple ingredients and equipment, you can create your own batch of homemade Fryums in no time. The dough preparation and shaping process is straightforward, and arranging the Fryums on a microwave-safe plate is a breeze.
Once in the microwave, the Fryums cook evenly and can be easily flipped and repositioned for optimal crispness. Testing for crispness is a crucial step, as it allows you to adjust the cooking time if needed.
Finally, removing the Fryums from the microwave and allowing them to cool ensures a satisfying crunch with every bite. Whether you’re enjoying them as a snack on their own or serving them with your favorite dip, homemade Fryums made in the microwave are sure to be a hit. So why wait? Get creative and start making your own delicious Fryums today!
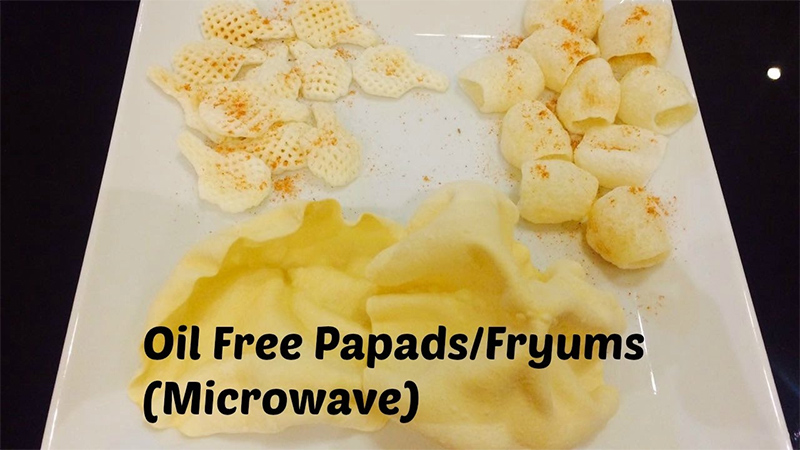
Learn how to make crispy and delicious Fryums in the microwave with this easy and convenient recipe.
About The Author

Alison Sowle is the typical tv guru. With a social media evangelist background, she knows how to get her message out there. However, she's also an introvert at heart and loves nothing more than writing for hours on end. She's a passionate creator who takes great joy in learning about new cultures - especially when it comes to beer!