
Last Updated on July 23, 2023
Short Answer
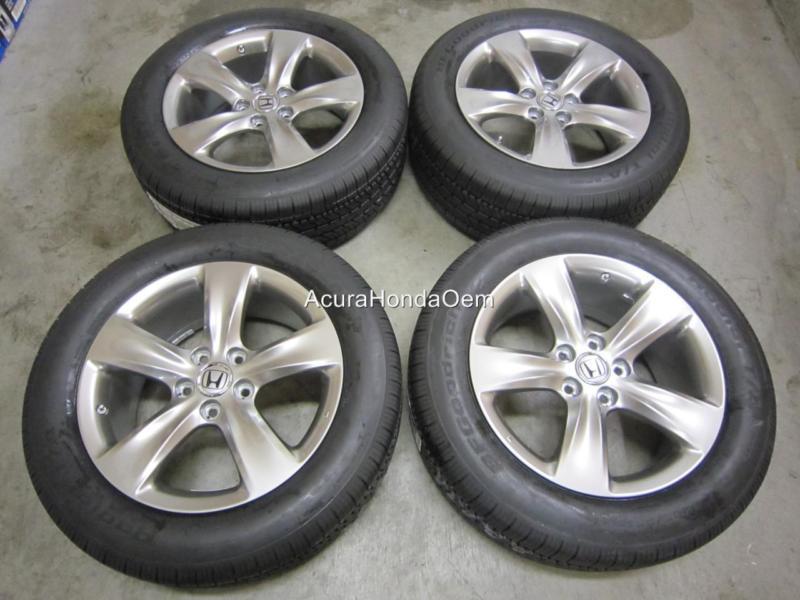
To remove the Pax wheels from your Honda Odyssey, you will need a few tools and follow a specific process. First, ensure the vehicle is on a level surface and the parking brake is engaged. Then, use a lug wrench to loosen the lug nuts on the wheels. Next, lift the vehicle using a jack and secure it with jack stands. Once the vehicle is lifted, fully remove the lug nuts and carefully take off the Pax wheels. Remember to handle the wheels with care to avoid any damage.
Removing the Pax wheels from your Honda Odyssey is an important task that requires careful attention and proper technique. In this article, we will provide you with a step-by-step guide on how to remove the Pax wheels from your Honda Odyssey. We will also discuss the tools required for this process and the precautions you should take before starting. Additionally, we will provide tips on how to safely lift your Honda Odyssey and remove the lug nuts from the Pax wheels. Finally, we will offer advice on cleaning and maintaining your Pax wheels during the removal process. By following these instructions, you can ensure a smooth and successful Pax wheel removal process for your Honda Odyssey.
Step-by-step guide: Removing the Pax wheels from your Honda Odyssey
Removing the Pax wheels from your Honda Odyssey may seem like a daunting task, but with the right tools and precautions, it can be done smoothly and successfully. Here is a step-by-step guide to help you through the process:
- Step 1: Gather the necessary tools for the job, including a jack, jack stands, lug wrench, and a torque wrench.
- Step 2: Before starting, make sure your vehicle is parked on a flat surface and the parking brake is engaged.
- Step 3: Use the lug wrench to loosen the lug nuts on the Pax wheels, but do not remove them completely.
- Step 4: Position the jack under the designated lifting points of your Honda Odyssey and raise the vehicle until the wheels are off the ground.
- Step 5: Place the jack stands under the vehicle for added stability and lower the jack slowly until the weight of the vehicle is resting on the stands.
- Step 6: Finish removing the lug nuts and carefully detach the Pax wheels from the hub.
By following these steps and taking the necessary precautions, you can safely remove the Pax wheels from your Honda Odyssey. Remember to clean and maintain your wheels during the removal process to ensure their longevity.
Tools required for removing Pax wheels from your Honda Odyssey
When it comes to removing Pax wheels from your Honda Odyssey, having the right tools is essential. Here are the tools you will need for a successful removal process:
1. Lug wrench
A lug wrench is a must-have tool for removing the lug nuts that secure the Pax wheels to your Honda Odyssey. Make sure to choose a lug wrench that fits the size of your lug nuts to avoid any damage.
2. Jack and jack stands
In order to safely lift your Honda Odyssey, you will need a jack and jack stands. These tools will provide the necessary support to keep your vehicle stable while you remove the Pax wheels.
Wheel chocks
Wheel chocks are small wedges that are placed behind the wheels to prevent your Honda Odyssey from rolling while you work. Using wheel chocks is crucial for your safety during the removal process.
By having these tools on hand, you can ensure a smooth and efficient removal of the Pax wheels from your Honda Odyssey. Remember to always follow proper safety precautions and consult your vehicle’s manual for specific instructions.
Precautions to take before removing Pax wheels from your Honda Odyssey
Before you begin the process of removing the Pax wheels from your Honda Odyssey, it is important to take certain precautions to ensure your safety and the safety of your vehicle. These precautions will help prevent any accidents or damage that may occur during the removal process.
1. Safety first
Always prioritize safety when working on your vehicle. Make sure you are wearing appropriate protective gear, such as gloves and safety glasses, to protect yourself from any potential hazards.
2. Secure the vehicle
Before lifting your Honda Odyssey, make sure it is parked on a level surface and engage the parking brake. This will prevent the vehicle from rolling or shifting while you are working on it.
3. Use proper tools
Ensure that you have the correct tools for the job. Using the wrong tools can lead to damage to your vehicle or injury to yourself. Refer to the previous section on the tools required for removing Pax wheels from your Honda Odyssey.
4. Consult the owner’s manual
It is always a good idea to consult the owner’s manual for your Honda Odyssey before attempting any maintenance or repair tasks. The manual will provide specific instructions and precautions that are unique to your vehicle.
By taking these precautions, you can ensure a smooth and successful Pax wheel removal process for your Honda Odyssey, without any accidents or damage. Remember to always prioritize safety and follow the proper procedures to maintain the integrity of your vehicle.
How to safely lift your Honda Odyssey for Pax wheel removal
Before you begin removing the Pax wheels from your Honda Odyssey, it is crucial to lift the vehicle safely to ensure your own safety and prevent any damage to the car. Here are the steps to follow:
- Find a flat and level surface to park your Honda Odyssey.
- Engage the parking brake to prevent the vehicle from rolling.
- Place wheel chocks behind the rear wheels to further secure the car.
- Locate the designated lifting points on your Honda Odyssey. These are usually marked with arrows or symbols on the vehicle’s undercarriage.
- Position a hydraulic jack or a floor jack under the lifting point closest to the wheel you are removing.
- Slowly pump the jack handle or use the hydraulic controls to raise the vehicle until the wheel is off the ground.
- Place jack stands under the vehicle’s frame or designated lifting points for added stability.
- Lower the vehicle onto the jack stands and ensure that it is securely supported.
By following these steps, you can safely lift your Honda Odyssey and proceed with the Pax wheel removal process without any risks or accidents.
Removing the lug nuts from your Honda Odyssey’s Pax wheels
Once you have safely lifted your Honda Odyssey and secured it with jack stands, you can proceed to remove the lug nuts from the Pax wheels. Follow these steps:
- Locate the lug nuts on each wheel. They are typically found in a circular pattern around the center of the wheel.
- Using a lug wrench or a socket wrench with the appropriate size socket, place the wrench onto the lug nut and turn it counterclockwise to loosen the nut.
- Repeat this process for all the lug nuts on each wheel.
- Once all the lug nuts are loosened, you can remove them by hand. Place them in a safe location where they won’t get lost.
- After removing the lug nuts, carefully grasp the wheel with both hands and gently pull it towards you to detach it from the hub.
- Set the removed wheel aside and repeat the process for the remaining wheels.
Remember to handle the lug nuts and wheels with care to avoid any damage or injury. It is also a good practice to clean the lug nuts and inspect them for any signs of wear or damage before reinstalling them.
Detaching the Pax wheels from your Honda Odyssey’s hub
Once you have removed the lug nuts, it is time to detach the Pax wheels from your Honda Odyssey’s hub. This step requires caution and precision to avoid any damage to the wheels or the hub.
Start by gently pulling the wheel towards you to loosen it from the hub. If the wheel is stuck, you can use a rubber mallet to tap it lightly from the backside. Be careful not to hit the wheel too hard, as this can cause dents or scratches.
Once the wheel is loose, carefully lift it off the hub and set it aside. It is important to handle the wheel with care to prevent any damage. Place the wheel on a clean and flat surface to avoid any dirt or debris from getting onto the wheel.
Repeat this process for each Pax wheel on your Honda Odyssey until all the wheels have been detached from the hub.
By following these steps, you can safely and successfully detach the Pax wheels from your Honda Odyssey’s hub.
Tips for cleaning and maintaining your Pax wheels during removal
While removing the Pax wheels from your Honda Odyssey, it is important to take proper care of them to ensure their longevity and performance. Here are some tips for cleaning and maintaining your Pax wheels during the removal process:
1. Use a gentle cleaning solution
Before removing the Pax wheels, make sure to clean them using a gentle cleaning solution and a soft brush. Avoid using harsh chemicals or abrasive materials that can damage the wheels.
2. Inspect for any damage
While cleaning the Pax wheels, carefully inspect them for any signs of damage or wear. Look for cracks, dents, or bent rims. If you notice any issues, it is recommended to consult a professional for repairs or replacements.
Apply a protective coating
After cleaning the Pax wheels, consider applying a protective coating to prevent corrosion and maintain their shine. There are various wheel protectants available in the market that can help prolong the life of your wheels.
By following these tips, you can ensure that your Pax wheels remain in top condition during the removal process. Remember to handle them with care and seek professional assistance if needed.
Conclusion: Ensuring a smooth and successful Pax wheel removal process for your Honda Odyssey
Removing the Pax wheels from your Honda Odyssey may seem like a daunting task, but with the right knowledge and tools, it can be a smooth and successful process. By following the step-by-step guide and taking the necessary precautions, you can ensure that the removal is done safely and efficiently.
One important aspect to consider is the lifting of your Honda Odyssey. It is crucial to use the proper lifting equipment and techniques to avoid any accidents or damage to your vehicle. Taking the time to properly lift your Odyssey will make the removal of the Pax wheels much easier.
Once the vehicle is lifted, the next step is to remove the lug nuts from the Pax wheels. This can be done using a lug wrench or a socket wrench, depending on your preference. It is important to ensure that the wrench is securely attached to the lug nuts to avoid any slippage or damage.
After the lug nuts are removed, you can proceed to detach the Pax wheels from the hub of your Honda Odyssey. This may require some force, so it is important to be careful and gentle to avoid any damage to the wheels or the hub.
Finally, it is essential to clean and maintain your Pax wheels during the removal process. This will help prolong their lifespan and ensure that they are in good condition for future use.
By following these steps and tips, you can ensure a smooth and successful Pax wheel removal process for your Honda Odyssey. Remember to always prioritize safety and take your time to avoid any accidents or damage to your vehicle.
Ensuring a Smooth and Successful Pax Wheel Removal Process for Your Honda Odyssey
Removing the Pax wheels from your Honda Odyssey may seem like a daunting task, but with the right knowledge and tools, it can be a smooth and successful process. Throughout this article, we have discussed the importance of removing Pax wheels, provided a step-by-step guide, listed the necessary tools, and highlighted precautions to take before starting the removal process.
One crucial aspect of safely removing Pax wheels is knowing how to lift your Honda Odyssey properly. By following the recommended lifting techniques, you can avoid any potential damage to your vehicle.
Additionally, we have covered the process of removing the lug nuts and detaching the Pax wheels from the hub. These steps require careful attention to detail to ensure a successful removal without causing any harm to your vehicle.
Lastly, we have provided tips for cleaning and maintaining your Pax wheels during the removal process. By following these tips, you can keep your wheels in top condition and prolong their lifespan.
Overall, by following the steps and guidelines outlined in this article, you can confidently remove the Pax wheels from your Honda Odyssey and ensure a smooth and successful process.
About The Author

Fernánda Esteban is a food fanatic. She can't go more than a few hours without eating, and she loves trying new foods from all over the world. Her friends know that they can always count on her for a good conversation, and she's an animal lover who will never turn down an opportunity to pet a dog or cat. Fernánda also enjoys learning about random facts, and she's a social media practitioner who loves to share what she knows with others.