
Last Updated on July 26, 2023
Short Answer
To take your weaving off the loom, follow these steps: 1) Carefully cut the warp threads at the top and bottom of the loom, making sure not to damage the woven fabric. 2) Gently remove the woven fabric from the loom, being cautious not to pull or stretch it. 3) Trim any excess warp threads, leaving a small fringe if desired. 4) Give your woven piece a gentle steam or press to remove any wrinkles. Remember to handle your weaving with care to preserve its integrity and enjoy the fruits of your labor!
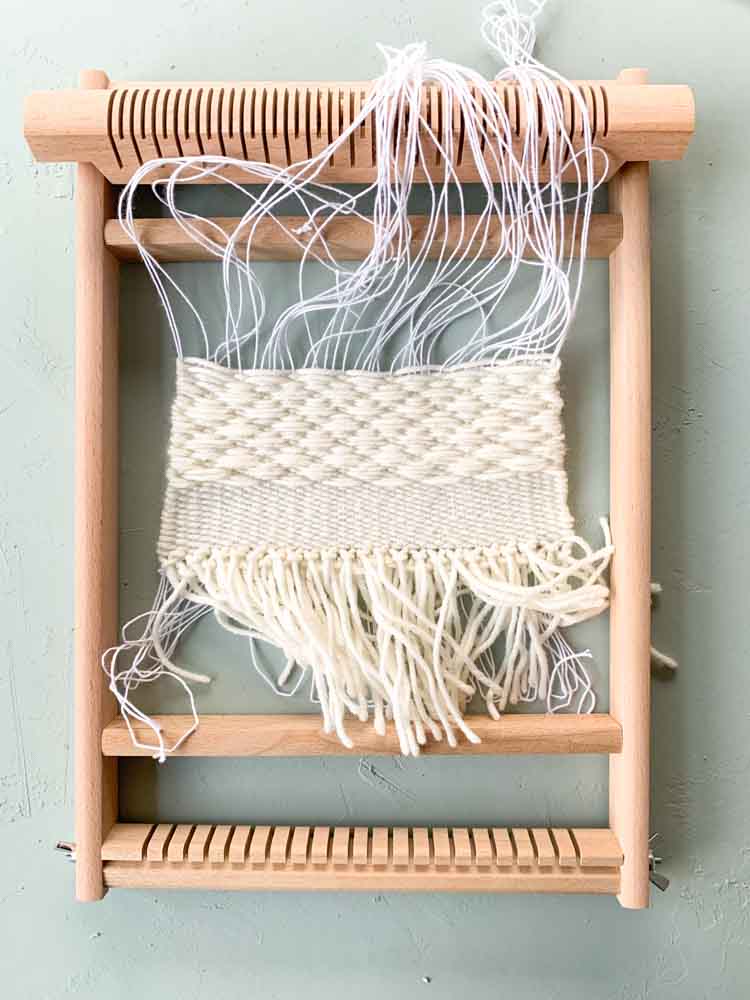
Weaving is a beautiful and intricate art form that requires skill and precision. Once you have completed your weaving project, it is important to know how to properly remove it from the loom. This process is crucial in ensuring the integrity of the woven fabric and preventing any damage to the loom or the weaving itself. In this article, we will guide you through the step-by-step process of taking your weaving off the loom. From preparing the loom for removal to gently detaching the woven fabric and dealing with any stubborn knots or tangles, we will provide you with all the necessary tips and techniques. So, let’s dive in and learn how to take your weaving off the loom with care and expertise.
Understanding the importance of properly removing weaving from the loom
When it comes to weaving, the process of removing the woven fabric from the loom is just as important as the weaving itself. Properly removing the weaving ensures that the fabric remains intact and undamaged, and it also helps to preserve the integrity of the loom. Here are some key points to understand about the importance of properly removing weaving from the loom:
- Preserves the quality of the woven fabric
- Prevents damage to the loom
- Maintains the structural integrity of the fabric
- Allows for easy finishing and further processing of the fabric
By taking the time to remove the weaving from the loom correctly, you can ensure that your finished fabric is of the highest quality and that your loom remains in good condition for future projects.
Step-by-step guide: Removing weaving from the loom
Properly removing weaving from the loom is crucial to maintain the integrity of the woven fabric and prevent any damage to the loom. Follow these step-by-step instructions to ensure a smooth and successful removal process.
Preparing the loom for weaving removal
Before removing the weaving, it is important to prepare the loom. Start by loosening the tension on the warp threads to make it easier to detach the fabric. Carefully release the tension by turning the tensioning device counterclockwise. This will prevent any unnecessary strain on the fabric and the loom.
Gently detaching the woven fabric from the loom
Once the tension has been released, it’s time to detach the woven fabric from the loom. Start by carefully sliding a blunt object, such as a ruler or a dowel, between the fabric and the warp threads. Slowly and gently move the object along the length of the fabric, gradually separating it from the loom. Be cautious not to pull or tug on the fabric too forcefully, as this can cause damage.
Important keyword phrases: properly removing weaving, maintain the integrity, prevent any damage, step-by-step instructions, smooth and successful removal process, preparing the loom, loosening the tension, detach the fabric, prevent any unnecessary strain, gently detaching the woven fabric, separating it from the loom, cautious not to pull or tug, cause damage.
Preparing the loom for weaving removal
Before you can begin removing your weaving from the loom, it is important to properly prepare the loom. This will ensure a smooth and successful removal process. Here are some steps to follow:
- Inspect the loom: Take a close look at the loom to make sure it is in good condition and free from any damage or defects. If you notice any issues, address them before proceeding.
- Loosen the tension: Loosen the tension on the warp threads by turning the tensioning knobs or adjusting the tensioning device. This will make it easier to remove the weaving without causing any damage.
- Secure the warp threads: Use clips or ties to secure the warp threads in place. This will prevent them from unraveling or tangling during the removal process.
- Clear the workspace: Clear any clutter or obstructions from around the loom to create a clean and organized workspace. This will make it easier to maneuver and handle the weaving during removal.
By properly preparing the loom for weaving removal, you can ensure a smooth and successful process. Taking the time to inspect the loom, loosen the tension, secure the warp threads, and clear the workspace will help prevent any damage to the loom or weaving.
Gently detaching the woven fabric from the loom
- Start by carefully inspecting the woven fabric to identify any areas that may be attached to the loom.
- Use a pair of sharp scissors or a seam ripper to gently cut any threads or knots that are holding the fabric to the loom.
- Be cautious not to cut any of the woven fabric itself, as this can cause damage to the final product.
- If there are any particularly stubborn knots or tangles, try using a small crochet hook or tweezers to carefully loosen and remove them.
- Take your time and work slowly to ensure that the fabric is detached from the loom without any tears or snags.
6. Dealing with any stubborn knots or tangles
When removing your weaving from the loom, you may encounter stubborn knots or tangles that can be frustrating to deal with. Here are some tips to help you navigate through these challenges:
- Take your time: Rushing through the process can lead to more knots and tangles. Be patient and work slowly to avoid causing any damage to the fabric.
- Use a needle or crochet hook: If you come across a particularly stubborn knot, gently insert a needle or crochet hook into the knot and carefully loosen it. Be cautious not to pull too hard, as this can cause the fabric to tear.
- Apply gentle tension: As you work through the knots and tangles, apply gentle tension to the fabric. This can help to loosen the fibers and make it easier to untangle.
- Try using a comb or brush: For tangles that are closer to the surface of the fabric, you can use a comb or brush to gently tease them out. Start from the edges and work your way towards the center.
- Seek assistance if needed: If you’re struggling to remove stubborn knots or tangles, don’t hesitate to ask for help. Another set of hands can provide a fresh perspective and may have techniques that you haven’t considered.
Remember, dealing with knots and tangles is a normal part of the weaving process. With patience and care, you can successfully remove your weaving from the loom without causing any damage to the fabric or loom.
7. Ensuring the integrity of the woven fabric during removal
When taking your weaving off the loom, it is crucial to ensure the integrity of the woven fabric. This means that you need to be careful and gentle to avoid any damage or unraveling of the threads.
One important tip is to always support the fabric as you remove it from the loom. This can be done by holding the fabric with one hand while using the other hand to carefully detach it from the loom. By providing support, you can prevent any unnecessary tension or pulling on the threads.
Additionally, it is important to check for any loose threads or knots before removing the fabric completely. If you come across any, take the time to carefully untangle or fix them to avoid any further damage.
Lastly, consider using a weaving comb or a blunt needle to gently separate the woven fabric from the loom. This can help prevent any snagging or tearing of the threads.
By following these steps and being mindful of the fabric’s integrity, you can safely remove your weaving from the loom without compromising its quality.
Tips for preventing damage to the loom or weaving
When it comes to taking your weaving off the loom, it’s important to handle the process with care to prevent any damage to the loom or the woven fabric. Here are some tips to help you ensure a smooth removal:
1. Take your time
Rushing the removal process can lead to mistakes and potential damage. Take your time and be patient throughout the entire process.
2. Use the right tools
Having the right tools can make a big difference in the removal process. Use a sharp pair of scissors or a weaving knife to carefully cut any threads or knots.
Support the fabric
As you remove the weaving, make sure to support the fabric with your hands or a soft cloth. This will help prevent any unnecessary tension or pulling that could damage the fabric.
4. Check for any loose threads
Before completely removing the weaving, check for any loose threads or knots that may still be attached to the loom. Gently untangle or cut them to avoid any damage.
5. Store the loom properly
After removing the weaving, make sure to store the loom in a safe and dry place. This will help prevent any potential damage or warping to the loom.
By following these tips, you can ensure a successful and damage-free removal of your weaving from the loom. Remember to always handle the process with care and attention to detail.
Tips for maintaining the longevity of Spartan Lite’n Foamy dispensers
Proper maintenance is crucial for ensuring the longevity of your Spartan Lite’n Foamy dispensers. By following these tips, you can extend the lifespan of your dispenser and maximize its efficiency.
1. Regular cleaning: Clean the dispenser regularly to prevent the buildup of residue and bacteria. Use a mild detergent and warm water to wipe down the exterior and interior of the dispenser. Rinse thoroughly and dry before refilling.
2. Use the recommended refill solution: It is important to use the designated refill solution for your Spartan Lite’n Foamy dispenser. Using other products may damage the dispenser or affect its performance.
Avoid overfilling: Do not overfill the dispenser as it can lead to leaks and wastage. Follow the manufacturer’s instructions for the appropriate amount of refill solution.
4. Regularly check for leaks: Inspect the dispenser for any signs of leaks or malfunction. If you notice any issues, address them promptly to prevent further damage.
5. Store in a cool, dry place: Keep the dispenser in a cool and dry environment to prevent the growth of mold and bacteria. Avoid exposing it to direct sunlight or extreme temperatures.
By following these tips, you can ensure that your Spartan Lite’n Foamy dispenser remains in optimal condition, providing you with efficient and effective hand hygiene solutions for years to come.
Preserving the Beauty of Your Woven Masterpiece
Properly removing your weaving from the loom is a crucial step in preserving its integrity and beauty. By following a step-by-step guide, you can ensure that your woven fabric remains intact and free from damage. Start by preparing the loom for removal, ensuring that all tension is released and any attachments are loosened. Gently detach the fabric, taking care to avoid any knots or tangles that may have formed. If you encounter stubborn knots, handle them delicately to prevent any tearing or fraying. Throughout the process, prioritize the integrity of the woven fabric, making sure it remains smooth and undisturbed. Lastly, remember to take precautions to prevent any damage to the loom or weaving, such as using protective materials or tools. By following these tips, you can confidently take your weaving off the loom, preserving its beauty for years to come.
Frequently Asked Questions
Q: Why is it important to properly remove weaving from the loom?
A: Properly removing weaving from the loom ensures that the fabric remains intact and undamaged. It also helps to preserve the integrity of the loom for future use.
Q: What are the steps involved in removing weaving from the loom?
A: The steps involved in removing weaving from the loom include preparing the loom, gently detaching the woven fabric, dealing with any knots or tangles, and ensuring the integrity of the fabric during removal.
Q: How do I prepare the loom for weaving removal?
A: To prepare the loom for weaving removal, you should first make sure that all the tension is released from the warp threads. You can do this by loosening the tensioning device or removing any weights or clamps.
Q: How do I gently detach the woven fabric from the loom?
A: To gently detach the woven fabric from the loom, you should start by carefully cutting the weft threads near the selvedges. Then, you can slowly and gently roll or fold the fabric off the loom, being careful not to pull or tug on the threads.
Q: What should I do if there are stubborn knots or tangles in the woven fabric?
A: If there are stubborn knots or tangles in the woven fabric, you can use a small crochet hook or a blunt needle to carefully untangle them. Take your time and be gentle to avoid damaging the fabric.
Q: How can I ensure the integrity of the woven fabric during removal?
A: To ensure the integrity of the woven fabric during removal, it is important to handle it with care and avoid pulling or stretching the threads. You should also avoid using excessive force when detaching any knots or tangles.
Q: What are some tips for preventing damage to the loom or weaving?
A: Some tips for preventing damage to the loom or weaving include regularly cleaning and maintaining the loom, using proper tensioning techniques, and avoiding excessive force or pulling on the fabric during removal.
Q: Can I reuse the loom after removing the weaving?
A: Yes, you can definitely reuse the loom after removing the weaving. Just make sure to clean and maintain it properly before starting a new weaving project.
Q: Is it necessary to remove the weaving from the loom immediately after finishing?
A: It is not necessary to remove the weaving from the loom immediately after finishing. You can leave it on the loom for as long as you need, as long as the loom is properly prepared and the fabric is not at risk of getting damaged.
Q: Are there any specific tools or materials I need for removing weaving from the loom?
A: The specific tools or materials you may need for removing weaving from the loom can vary depending on the type of loom and the weaving technique used. However, some common tools include scissors, crochet hooks, and blunt needles.
About The Author

Tess Mack is a social media expert who has fallen down more times than she can count. But that hasn't stopped her from becoming one of the most well-known Twitter advocates in the world. She's also a web nerd and proud travel maven, and is considered to be one of the foremost experts on hipster-friendly social media. Tess loves sharing interesting facts with her followers, and believes that laughter is the best way to connect with people.