
Last Updated on July 27, 2023
Welcome to our comprehensive guide on how to clean an air mover. In this article, we will delve into the importance of maintaining a clean air mover and provide you with step-by-step instructions on how to effectively clean and maintain this essential piece of equipment. Whether you are a homeowner or a professional, understanding the proper cleaning techniques will not only prolong the lifespan of your air mover but also ensure its optimal performance. So, let’s get started by exploring why cleaning an air mover is crucial and what supplies you will need for this task.
Understanding the importance of cleaning an air mover
Cleaning an air mover is essential to maintain its efficiency and prolong its lifespan. A dirty air mover can accumulate dust, dirt, and debris, which can hinder its performance and lead to potential malfunctions. Regular cleaning not only ensures optimal airflow but also improves the air quality in your space. Here are some key reasons why cleaning an air mover is important:
- Prevents clogging: Cleaning removes dirt and debris that can clog the air mover’s vents and filters, allowing for better airflow.
- Improves efficiency: A clean air mover operates more efficiently, consuming less energy and reducing utility costs.
- Enhances air quality: Cleaning eliminates dust and allergens, improving the air quality and creating a healthier environment.
- Extends lifespan: Regular maintenance and cleaning can extend the lifespan of your air mover, saving you money on replacements.
Understanding the importance of cleaning an air mover is the first step towards maintaining its performance and ensuring a clean and healthy environment.
Gathering the necessary cleaning supplies
Before you begin cleaning your air mover, it is important to gather all the necessary cleaning supplies. This will ensure that you have everything you need to effectively clean and maintain your air mover. Some of the supplies you will need include cleaning solution, a soft cloth or sponge, a vacuum cleaner with a brush attachment, and a screwdriver. These supplies will help you remove any dirt, dust, or debris that may have accumulated on the exterior, fan blades, vents, and filters of your air mover.
Having all the necessary cleaning supplies on hand will save you time and effort, allowing you to clean your air mover more efficiently. It is also important to check the manufacturer’s instructions or guidelines for any specific cleaning products or methods that are recommended for your particular air mover model. By gathering the necessary cleaning supplies, you will be well-prepared to tackle the task of cleaning your air mover and ensuring its optimal performance.
Preparing the air mover for cleaning
Before you begin cleaning your air mover, it is important to take some necessary steps to prepare it for the cleaning process. This will ensure that you can clean it effectively and safely.
Step 1: Unplug the air mover
The first step is to unplug the air mover from the power source. This is crucial to prevent any accidents or injuries while cleaning.
Step 2: Remove any attachments or accessories
Next, remove any attachments or accessories that may be attached to the air mover. This includes any extension cords, hoses, or nozzles. This will make it easier to clean the main unit.
Step 3: Inspect the air mover
Take a close look at the air mover to check for any visible damage or loose parts. If you notice any issues, it is best to address them before proceeding with the cleaning process.
Step 4: Refer to the manufacturer’s instructions
Lastly, refer to the manufacturer’s instructions for any specific cleaning guidelines or precautions. Different air mover models may have different cleaning requirements, so it is important to follow the instructions provided.
By following these steps, you can ensure that your air mover is properly prepared for cleaning, allowing you to clean it effectively and maintain its efficiency.
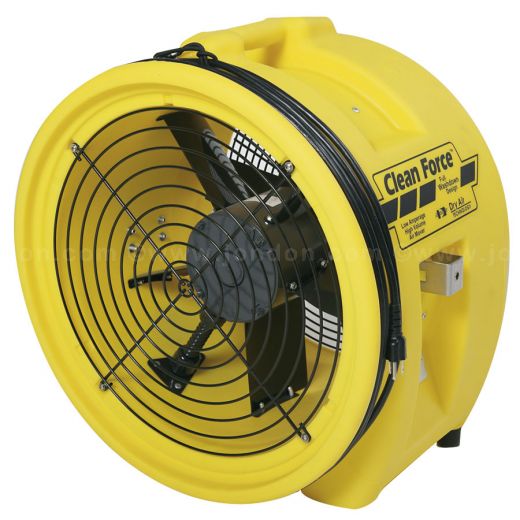
5. Cleaning the exterior of the air mover
Once you have gathered all the necessary cleaning supplies and prepared the air mover for cleaning, it’s time to clean the exterior of the machine. This step is important to remove any dirt, dust, or debris that may have accumulated on the surface of the air mover.
- Start by unplugging the air mover from the power source to ensure your safety.
- Use a damp cloth or sponge to wipe down the exterior of the machine. You can also use a mild detergent or cleaning solution if necessary.
- Pay special attention to any areas that may be more prone to dirt buildup, such as the handle or control panel.
- Be careful not to get any water or cleaning solution inside the air mover, as this can damage the internal components.
- Once you have thoroughly cleaned the exterior, use a dry cloth to wipe away any excess moisture.
Cleaning the exterior of the air mover not only improves its appearance but also helps to maintain its performance and prolong its lifespan. By regularly cleaning the exterior, you can prevent dirt and debris from entering the machine and causing damage.
Cleaning the fan blades and vents
Once you have cleaned the exterior of the air mover, it is important to also clean the fan blades and vents. This will help to ensure that the air mover is working efficiently and effectively.
- Start by unplugging the air mover and removing any screws or clips that hold the fan blades in place.
- Use a soft brush or cloth to gently remove any dust or debris from the fan blades. Be careful not to bend or damage the blades.
- Next, use a vacuum cleaner with a brush attachment to remove any remaining dust or debris from the fan blades and vents.
- If there are any stubborn stains or buildup on the fan blades, you can use a mild detergent or cleaning solution to gently scrub them clean.
- After cleaning the fan blades, wipe down the vents with a damp cloth to remove any dust or dirt.
- Allow the fan blades and vents to dry completely before reassembling the air mover.
Cleaning the fan blades and vents regularly will help to prevent dust and debris from building up and affecting the performance of the air mover. It is recommended to clean these parts at least once every few months, or more frequently if the air mover is used in a particularly dusty or dirty environment.
Cleaning the Filters
One crucial step in cleaning an air mover is to clean the filters. The filters are responsible for trapping dust, dirt, and other particles in the air, preventing them from circulating back into the room. Over time, these filters can become clogged and less effective, which can hinder the performance of the air mover.
To clean the filters, start by removing them from the air mover. Most air movers have removable filters that can be easily taken out. Once removed, gently tap the filters to remove any loose debris. Then, rinse the filters under running water to remove any remaining dirt. If the filters are particularly dirty, you can use a mild detergent to help remove stubborn stains.
After rinsing, allow the filters to air dry completely before reattaching them to the air mover. It is important to ensure that the filters are completely dry to prevent mold or mildew growth. Once dry, carefully reinsert the filters back into their designated slots in the air mover.
Regularly cleaning the filters of your air mover will not only improve its performance but also prolong its lifespan. It is recommended to clean the filters at least once every few months or more frequently if you use the air mover in a particularly dusty environment.
Drying and Reassembling the Air Mover
Once you have thoroughly cleaned the exterior, fan blades, vents, and filters of your air mover, it is important to ensure that it is completely dry before reassembling it. Any moisture left inside the air mover can lead to mold or mildew growth, which can affect its performance and pose health risks.
To dry the air mover, use a clean, dry cloth to wipe away any remaining moisture. Pay special attention to the areas around the fan blades and vents, as these are the most prone to retaining moisture. You can also use a hairdryer on a low heat setting to speed up the drying process.
Once the air mover is completely dry, carefully reassemble all the parts that you removed during the cleaning process. Make sure that all the components fit securely and that there are no loose or damaged parts. Double-check that the filters are properly installed and that the fan blades are aligned correctly.
After reassembling the air mover, plug it back in and turn it on to ensure that it is working properly. Listen for any unusual noises or vibrations, as these may indicate that something is not properly reassembled. If you notice any issues, disassemble the air mover again and check for any mistakes or damage.
Regular maintenance tips to keep your air mover clean and efficient
Regular maintenance is essential to ensure that your air mover continues to function effectively and efficiently. By following these simple tips, you can keep your air mover clean and in optimal condition:
1. Clean the exterior regularly:
Use a damp cloth or sponge to wipe down the exterior of the air mover. This will remove any dust or dirt that has accumulated on the surface.
2. Clean the fan blades and vents:
Use a soft brush or vacuum cleaner attachment to remove any debris from the fan blades and vents. This will prevent the build-up of dust and ensure that the air mover can circulate air effectively.
Additionally, you should check the fan blades for any signs of damage or wear. If you notice any issues, it is important to replace the blades to maintain optimal performance.
Regular maintenance is key to keeping your air mover clean and efficient. By following these tips, you can ensure that your air mover continues to provide you with clean and fresh air for years to come.
Conclusion: Ensuring the cleanliness and efficiency of your air mover is crucial for its optimal performance and longevity. By following the steps outlined in this article, you can effectively clean your air mover and maintain its functionality. Remember to gather the necessary cleaning supplies, prepare the air mover for cleaning, and clean both the exterior and interior components thoroughly. Pay special attention to the fan blades, vents, and filters, as these areas tend to accumulate the most dirt and debris. Once the cleaning process is complete, allow the air mover to dry completely before reassembling it. Additionally, implementing regular maintenance practices, such as cleaning the filters regularly and inspecting the air mover for any signs of damage, will help keep it in top condition. By taking the time to clean and maintain your air mover, you can ensure its longevity and enjoy its efficient performance for years to come.
Conclusion: In conclusion, maintaining the cleanliness and efficiency of your air mover is essential for its optimal functioning. By following the step-by-step guide provided in this article, you can effectively clean your air mover and ensure its longevity. Remember to gather the necessary cleaning supplies and prepare the air mover before starting the cleaning process. Clean the exterior, fan blades, vents, and filters thoroughly to remove any dirt or debris. Once the cleaning is complete, allow the air mover to dry completely before reassembling it. Additionally, implementing regular maintenance practices, such as cleaning the filters regularly and inspecting the air mover for any signs of damage, will help keep it in excellent condition. By dedicating time to clean and maintain your air mover, you can enjoy its efficient performance and extend its lifespan.
Learn how to clean an air mover effectively and keep it running efficiently with these simple steps and maintenance tips.
About The Author

Zeph Grant is a music fanatic. He loves all types of genres and can often be found discussing the latest album releases with friends. Zeph is also a hardcore content creator, always working on new projects in his spare time. He's an amateur food nerd, and loves knowing all sorts of random facts about food. When it comes to coffee, he's something of an expert - he knows all the best places to get a good cup of joe in town.