
Last Updated on September 17, 2022
If you want to learn how to root a Razer Phone 1, you should watch the YouTube video below. The video is provided with all rights reserved. Please do not copy or reproduce it without authorisation. If you wish to root your phone, you must also backup its data. You can use the FramaRoot app to root a Razer Phone. Just follow the steps in the video. Remember, always create a backup before you start.
Taking over your razer phone
The Razer Phone 1 is a great device for gamers, and it looks just like the smartphones of old. It is a great phone, with a great display, and performs like a true flagship. But it does have some shortcomings. The camera has a bit of a “uncanny valley” when compared to the competition. Taking over your razer phone 1 is easy with this guide.
In addition to offering a great gaming experience, the Razer Phone 2 also has a decent everyday driver. As a gaming phone, the Razer Phone 2 must deliver a high-quality experience. While gaming phones are often used in a dedicated gaming area, the majority of users do not carry around two smartphones. That means the Razer Phone 2 must be a good daily driver. So, let’s take a look at some of the top features.
To begin, you must reboot your Razer Phone into safe mode. After you have done that, you must observe your phone for 24 hours to ensure that nothing malicious has infiltrated it. Once you’re confident that you’ve done the right thing, you can try to uninstall any third-party apps and restore your phone. Once you’ve done that, you can reboot the phone, and the phone will be back to normal.
Razer has made partnerships with developers of games that will enhance the gaming experience. The pre-installed Arena of Valor and Cmune’s Ultra Hunt are two of the first games to be available for the Razer Phone. While the Razer Phone will offer games from the Google Play store, these games will not fully exploit its features at launch. Until more games are available for the Razer Phone, gamers will have to play it safe and wait.
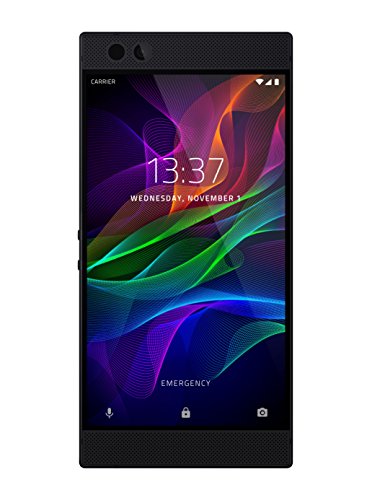
The Razer Phone lacks a 3.5mm headphone socket, but it comes with a USB Type-C adapter with a built-in DAC and AMP. Moreover, the Razer Phone has a dual camera setup in the top corner, above the huge Razer logo. It is a great choice for mobile gamers. The dual camera set provides a lot of fun for both the camera and the gamer.
The Razer Phone is known for being loud. Its speakers have Dolby Atmos certification. That means they are among the loudest smartphones in the market. But this usually comes at a price. Normally loud speakers lead to distortion in the sound. However, the Razer Phone’s speakers have far less distortion than those of other phones. You may even want to listen to music without headphones. But if you can’t stand the noise from your headphones, the Razer Phone has a front-facing speaker that gets incredibly loud.
Create a backup before rooting a razer phone
First, create a backup before rooting a Razer phone 1. Once you’ve rooted the device, it will reboot into a temporary version of the TWRP recovery. You may want to keep this backup just in case, as it’s always a good idea to create a backup before making any changes. If you don’t want to lose everything, create a backup of all your important files and contacts.
While rooting your Razer phone lets you bypass Android security restrictions, it can also expose it to mobile malware. Rooting is like jailbreaking an Apple device, and it allows you to change the software code and install other software. It’s important to follow the instructions carefully to prevent bricking your device. Follow our step-by-step guide to root your Razer phone safely. To begin, follow the steps in the guide above, and create a backup of your current file system.
If you’ve never rooted a Razer phone before, be sure to back up all your files first. Rooting your phone is dangerous because it wipes all your essential data and reinitializes it from its front state. You shouldn’t risk bricking your phone by accidentally turning it off. Instead, charge the device to 40% and avoid the process completely. If you’re unsure, you can charge it for as long as you need, but this won’t guarantee a full backup of your phone.
Before you begin rooting your Razer phone, it’s important to remember to make a backup of the software on your device. After you’ve completed the rooting process, your phone will no longer have a warranty. Therefore, create a back-up before rooting a razer phone 1 and proceed with caution. Remember: it’s best to have a backup before you begin rooting a Razer phone.
You can also use the built-in backup facility of Android. Google now supports backups through a Google account. To make use of this feature, you can install the Google Backup application on your phone. You can also backup all the data on your phone by installing specific apps and logging in from there. You can restore apps and data from your backup easily by restoring the files you’ve deleted before rooting.
Before rooting a Razer Phone, create a backup of all your data. Before you start, make sure your phone is fully charged and that it is connected to your computer or cloud storage. Also, make sure you have installed OEM unlocking and USB Debugging before you begin. Finally, make sure you have selected a safe password and operating system. You don’t want to get in trouble later and find out that your phone was rooted.
Using the FramaRoot app to root a razer phone
Using the FramaRoot app to download and root a Razer phone will not only allow you to download and install the latest apps, but it will also give you access to advanced battery management and other features. The app is designed for a variety of phone models, so it is recommended that you download and install both. It is important to back up your data before rooting your phone.
There are a couple of downsides to using the free version of Framaroot. If you accidentally root your phone, you could brick it or cause it to restart abruptly. After you unroot your phone, it will restart automatically. If you do want to donate, you can download the premium version of Framaroot, but it’s not recommended. It will also void the warranty.
To use the FramaRoot app, you must first enable USB debugging on your Razer phone. To enable this option, go to Developer Options on your phone. Toggle USB Debugging on and then click on it. After that, download the factory image from the Android website. Unzip the file to your desktop. Then open the PowerShell window.
Once you have the latest FramaRoot app, you can install SuperSU automatically. This application is useful for rooting Android devices without a PC. It makes the process simpler and less complicated. And you can unroot your phone, too, with a few clicks. And don’t worry if you don’t know much about software. The FramaRoot app even includes a manual rooting tutorial.
There are many apps to root android devices, but Framaroot is the best. It is compatible with the entire range of Android devices, including razer phones. It even supports phones from lenovo, htc, Sony, Pantech, and Motorola. You can use FramaRoot on any of these devices, too! And once you have the FramaRoot app, you’ll be able to install whatever apps you want, with no hassle.
After enabling USB debugging, you’ll need to install KingRoot. Then, connect the HP to your PC and open the app. KingRoot will automatically detect your HP. Follow the instructions on the screen and it will root your device. Just make sure to reboot your PC after the installation process is complete. Once you have completed the installation, connect your HP to your PC and follow the instructions.
About The Author

Mindy Vu is a part time shoe model and professional mum. She loves to cook and has been proclaimed the best cook in the world by her friends and family. She adores her pet dog Twinkie, and is happily married to her books.