
Last Updated on September 16, 2022
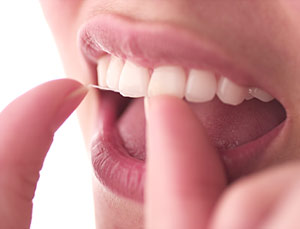
You probably have seen a diagram on the back of your toothbrush about how to floss your teeth, but have you ever wondered how to actually do it? Here is a helpful diagram by the American Dental Association, which explains how to brush and floss your teeth. The diagram shows you the types of floss you should use, how to make sure you are using the proper angle when you use your floss, and how to avoid making it smack against your gums.
American Dental Association’s diagram of how to floss
A diagram of how to floss your teeth is available from the American Dental Association. This diagram shows step-by-step directions for brushing and flossing your teeth. Use your thumb and forefinger to guide one inch of floss between your teeth. Wrap the floss around one of your fingers and the other in a tight C-shape, starting from the tip of a tooth and moving upwards until it touches the gum line. Repeat on each tooth.
The American Dental Association recommends using an 18-inch piece of floss, and it’s best to use a clean one. The most effective way to floss is to loop the floss around your fingers and gently glide it around your teeth. If you’re unsure of the correct technique, ask your dentist or hygienist for a demonstration. Proper flossing is crucial for preventing gum disease and tooth decay. Even people who have restorations should floss to maintain their oral health and prolong their use.
Flossing is essential in the prevention of many oral diseases. Flossing also prevents tooth decay and gum disease. Using the right technique will make the process much easier. Practice makes perfect, so work on sections that feel comfortable and follow the diagram of how to floss. As you become more familiar with it, you’ll be able to complete the task faster and more efficiently. Just keep practicing!
Flossing technique is the same for all teeth, whether you’re brushing your upper or lower. However, it’s best to floss both the sides and the back of the last tooth. You should also floss the side of the missing tooth, because these spaces can harbor food particles. Proper flossing can prevent plaque and excess food particles that can lead to cavities and gum disease. A simple and effective way to floss your teeth is by using a piece of floss that slides under the gum line.
Types of floss to use
Flossing is an essential part of good oral hygiene. Depending on the type you choose, it may not take more than a minute or two a day. Even kids need help with flossing until the age of 10 or 11. However, if you are having trouble choosing the right type of floss, here are some things you should consider. You’ll find it easier to floss with a holder, which consists of two prongs with a small string between.
Waxed floss is made of thin nylon threads that have been coated in wax to prevent them from breaking. This material also glides between teeth easily, but is harder to use outside the home. Its wax coating keeps it from tearing, but the thicker section is the worst, since it can trap food and bacteria. You should try flavoured floss if you’re looking for a more pleasant experience.
When choosing a type of floss, consider your individual needs. People with close teeth may find waxed floss more comfortable, while those with more space between their teeth may want to use dental tape. Whatever your needs, a dental hygienist will help you choose the right type of floss for your teeth. In addition to flossing, make sure you floss regularly with both types. This will help ensure your oral health is kept good for a long time to come.
The super floss is a patented product made of yarn-like material. It is designed to clean around braces and dental bridges. The stiff end is shaped like a tooth and has several different segments for navigating tricky spaces. There are also super floss and water flossers, which shoot thin streams of water between your teeth and gums. They come with water pressure that helps to get rid of plaque and food buildup.
Waxed floss is also an option, though it’s slightly thinner than the unwaxed variety. Waxed floss has a thin layer of wax, which makes it less likely to break. Waxed floss, on the other hand, is less likely to break, but it may be harder to get between the teeth. However, it may be more comfortable for those with wide-spaced teeth.
Angle of floss to hug the tooth
When you’re flossing, you’ll want to start by wrapping the end of the floss around your middle fingers. Next, use your fingers to guide the floss between your teeth, pulling any plaque or food particles out of your mouth. As you continue flossing, unwrap the clean floss from your fingers as you go. Next, wrap the floss around the last back tooth, hugging it like a “C.” Finally, move the floss upwards and outwards as you floss to avoid getting trapped in between the teeth.
Once you’ve started flossing, be sure to follow this method to the letter. Gently gliding the floss under the gum line will help you clean your teeth better. Then, you’ll move to the other side of the tooth to floss the other side. Flossing with this method will stimulate gum tissue, reduce bleeding, and encourage you to floss more often. Here’s how to do it:
The first step is to slide the floss up and down the surface of your tooth. Using a see-saw motion, you’ll want to keep the angle of the floss just below the gum line. Once you’ve done this, rewind the floss. This method is effective for both upper and lower teeth. Make sure to use your index fingers to guide the floss into the right place. Always discard the used floss once you’re done with a set of teeth.
Once you’ve wrapped the floss around your middle fingers, you can now move the floss between your teeth. Be sure to never snap the floss or force it between the teeth, as you’ll end up cutting the gum tissue and hurting your gums. Angle your floss to hug the tooth in the “c” shape while you slide it gently into the gap between the gum and the tooth. Afterwards, you can slide the floss back and forth between the two teeth and then gently pull it out of the gap.
Avoid letting it smack against the gums
If you are using the wrong type of floss, you might be causing more damage than good to your gums. Choosing the wrong type can also lead to problems with your floss getting stuck or smacking against the gums. Here’s how to avoid this issue:
When you’re flossing, you shouldn’t let the piece of dental floss “smack against” the gums. Not only can this be uncomfortable and harmful for your gums, but it can also lead to bleeding and gum recession. It’s best to gently move floss away from the gums and along the tooth’s surface. To do this, you should first start at the base of a tooth and move it toward the gum line, instead of smacking it.
Another common mistake is inserting the floss between the teeth and pulling it out. This method can leave a lot of plaque behind. Instead, move the floss along the sides of the teeth, then gently glide it about two millimeters below the gum line. Failure to follow these instructions will increase the risk of periodontal disease. In addition, it’s best to floss after brushing, before or after eating.
The most common cause of bleeding during the flossing process is excessive force used to remove plaque. Excessive pressure pulls back the gums and exposes the roots of teeth. This can make the teeth a lot more sensitive to touch. In addition, excessive flossing force may even result in gum recession. Remember, the goal of flossing is to remove bacteria, plaque, and food debris. Floss reaches areas that the toothbrush cannot reach.
About The Author

Mindy Vu is a part time shoe model and professional mum. She loves to cook and has been proclaimed the best cook in the world by her friends and family. She adores her pet dog Twinkie, and is happily married to her books.