
Last Updated on September 17, 2022
If you have a cigarette or e-cigarette and are wondering how to crack the wire on it, you’ve come to the right place. Here, you’ll learn how to use a lighter to heat up the cart’s wires and get rid of the liquid within. You can also sell your cart to the local government or recycle it yourself. However, before you do anything drastic, make sure to check the battery and atomizer connections.
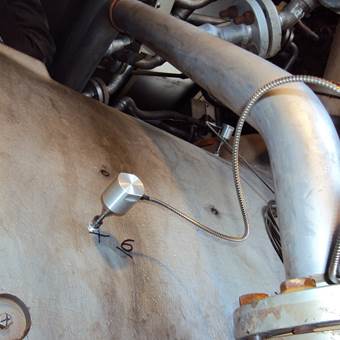
Using a lighter
If the cart you’re using doesn’t have batteries, you can use a lighter to crack the wires. First, you need to locate the USB port. Locate the red and black wires that come from the cart’s base. Twist the two together. If you’re unable to find the port, use a wire stripper to remove the wires. Alternatively, you can use a lighter to heat the cartridge. Make sure to keep the connection between the two wires covered with a non-conductive material.
Checking for loose wires
If your golf cart’s electrical system isn’t working properly, you may want to check for loose or frayed wires. A faulty connection can prevent electricity from reaching the batteries. It can also prevent power from flowing to the rest of the cart. If you notice that your cart’s batteries don’t seem to be charging properly, you may need to clean the area around them with electrical contact cleaner.
The easiest way to check for loose wires is to disconnect the charger from the cart. Disconnect the cable from the battery and check for electrical tape on the cables. If you don’t see any tape, then check for loose wires. You can also try testing the charger to make sure the connection is working properly. This is especially useful if you notice intermittent charging or an intermittent connection. Also, if the cord is tangled, wrap it with electrical tape.
Checking for loose wires is an important step in ensuring the safety of your cart. A loose wire can cause a cart to overheat. While water may not cause any harm to the electrical components, it can cause corrosion. Make sure the battery is tightly screwed down as well. You should also check the battery caps to make sure they are secured. Lastly, make sure that you wear safety glasses and gloves to prevent any damage.
Checking for damaged battery
Depending on the usage, your golf cart’s battery will eventually need to be replaced. If you’ve noticed any of these performance problems, it’s time to replace the battery. While you might be tempted to replace just one battery, it’s important to remember that the new and old batteries charge at different rates. The new battery will overcharge and lose capacity faster than the old one. It’s also better to replace all batteries than just one.
To check for damage, remove the battery and write down the voltage of the cell. It should show some signs of gassing and bubbling. If you see any of these signs, it’s time to retire the battery from service. To make sure the battery is properly charged, it needs to be discharged at least 6 hours and discharged for 24 hours. Check the charge level with a DC voltmeter and note the readings. If you see the battery is still full, you can continue the process until it starts showing SG.
When it comes to charging your golf cart’s battery, it’s important to know the proper way to charge it. Charging a battery in an electric golf cart will release hydrogen gas, water, and acid. These gases can corrode golf cart parts. To clean out the acid, simply add a tablespoon of baking soda to hot water and wipe the battery terminals with a damp cloth. Then, wash it off with clean water and wipe it dry.
Checking for a short atomizer
If you notice the ’Shorted’ error message, it’s probably an atomizer that’s faulty. This error message can appear even if the atomizer’s ohm resistance is within the range of acceptable values. Check the atomizer’s 510 threaded connector to ensure that the insulator is securely connected to the tank. If it’s not connected to the tank, you might have to remove the pre-built coil and replace it with a new one. Other causes of shorted atomizers include damaged batteries, a mod, or a bad atomizer.
When the atomizer’s coil has a short, the mod shorts out. The voltage output is disrupted and excessive current flows along the wrong path. In most cases, this can be easily remedied by replacing the atomizer. But if the warning is not immediate, you should consult a tech to diagnose the issue. If the problem persists, contact the manufacturer for immediate service.
If the atomizer is a rebuildable, the problem is most likely in the coil build. It could be seated properly, or it could have an insulator that has become loose. Sometimes, people misjudge the size of their builds, and it can result in a short. If the atomizer has a short, check that the posts fit snugly. Make sure the end leads are cut short so that they do not touch the deck or the atomizer housing.
Checking for a damaged solenoid
If your golf cart turns over and does not start, you may have a faulty solenoid, battery, or keyswitch. In order to test them, you must disconnect the cables from the large terminals. Then, turn the cart on and press the accelerator. The solenoid will click if the rod actuates and closes the circuit. It may also have been cracked or has a loose wire.
To test whether your cart’s solenoid is broken, turn off the key and place the cart in “neutral.” Plug in a multimeter and set it to ohms. Place a contact on each terminal, making sure that the “0” side is on the forward position. If you hear a clicking sound, the solenoid is bad.
If you’re worried that the battery may be too low, try resetting the cart. To reset the motor, press the reset button located near the main power source. Make sure that you have the correct size battery. Using a 6 volt battery can cause the terminal to melt or the wire to heat. In either case, you’re creating a potentially dangerous scenario.
The solenoid is responsible for allowing electricity to flow from batteries to the electric motor. In the “on” position, the solenoid makes a clicking noise. The solenoid engages the electric motor when you turn the cart on or step on the seat. It wears out very quickly. You should test it to make sure that it is intact. If you do not hear a clicking noise, then it is probably not the solenoid.
Checking for a damaged drive train
If the cart’s motor is not working, it’s probably a result of a faulty drive train. A damaged solenoid could cause a variety of problems, including an inability to start, a malfunctioning motor, or a bad coil. A qualified mechanic can help you diagnose the problem and determine what needs to be repaired. Here are some tips to help you diagnose a damaged drive train.
Ensure the cables are securely fastened to the main body of the cart. If any of the cables are loose or frayed, they should be tightened. Check the connections between the motor and the solenoid to see if the two are operating properly. If the battery pack voltage drops drastically when you try to start the cart, it could be a bad battery. Checking for a damaged drive train may save you money on repairs, but you should still replace the batteries if necessary.
When checking for a damaged drive train, make sure to check for cracks or broken parts. When testing the speed of the cart, always make sure it is within the range it was built for. If the motor still turns, you can try resetting the speed controller by pressing the reset button. Otherwise, you might need to try restarting the cart and clearing out cobwebs from the motor.
About The Author

Mindy Vu is a part time shoe model and professional mum. She loves to cook and has been proclaimed the best cook in the world by her friends and family. She adores her pet dog Twinkie, and is happily married to her books.