
Last Updated on July 27, 2023
Welcome to our comprehensive guide on how to charge the battery on the Yamaha Grizzly 700. As proud owners of this powerful ATV, it is crucial to understand the importance of properly charging its battery. In this article, we will take you through a step-by-step process, ensuring that you have all the necessary information to keep your battery in top condition.
Understanding the Battery
In this section, we will delve into the details of the battery used in the Yamaha Grizzly 700 and its specifications. It is important to have a good understanding of the battery before proceeding with the charging process. Here are some key points to consider:
- The Yamaha Grizzly 700 uses a 12-volt battery.
- The battery is a sealed lead-acid (SLA) battery, which means it is maintenance-free and does not require regular topping up of electrolyte.
- The battery has a capacity of X ampere-hours (Ah), which determines how long it can provide power to the ATV.
- It is important to check the battery’s voltage regularly to ensure it is within the recommended range for optimal performance.
Having a good understanding of the battery’s specifications will help you choose the right charger and ensure a proper charging process.
Preparing for Charging:
Before you can begin charging the battery on your Yamaha Grizzly 700, there are a few important steps you need to take to ensure a safe and successful charging process. First, make sure that the ATV is parked in a well-ventilated area, away from any flammable materials. This will help prevent any potential accidents or damage. Next, turn off the engine and remove the key from the ignition. It’s important to disconnect any electrical devices or accessories that may be connected to the battery, such as lights or a winch. This will help prevent any interference during the charging process. Finally, inspect the battery for any signs of damage or corrosion. If you notice any issues, it’s best to address them before proceeding with the charging process. By following these steps, you can ensure that your Yamaha Grizzly 700 is properly prepared for charging its battery.
Choosing the Right Charger:
When it comes to charging the battery on your Yamaha Grizzly 700, it’s important to choose the right charger for the job. There are several different types of chargers available, each with their own unique features and capabilities. The most common types of chargers include trickle chargers, smart chargers, and rapid chargers. Trickle chargers are designed to slowly charge the battery over an extended period of time, while smart chargers are equipped with advanced technology that can automatically adjust the charging rate based on the battery’s needs. Rapid chargers, on the other hand, are capable of charging the battery at a much faster rate, but they may not be suitable for all battery types. When selecting a charger for your Yamaha Grizzly 700, it’s important to consider the battery’s specifications and the manufacturer’s recommendations. This will help ensure that you choose a charger that is compatible with your ATV’s battery and can provide the optimal charging performance.
Choosing the Right Charger
When it comes to charging the battery on your Yamaha Grizzly 700, choosing the right charger is crucial. There are different types of chargers available in the market, each with its own features and capabilities. It is important to select a charger that is compatible with the battery specifications of your ATV.
One of the most common types of chargers is the trickle charger. This charger provides a slow and steady charge to the battery, which is ideal for maintaining its health and preventing overcharging. Trickle chargers are often recommended for long-term storage or when the ATV is not in use for extended periods.
Another type of charger is the smart charger. This charger is designed to automatically adjust the charging rate based on the battery’s condition and needs. It is a convenient option as it eliminates the risk of overcharging or undercharging the battery. Smart chargers are recommended for regular charging and maintaining the battery’s optimal performance.
Before purchasing a charger, it is important to check the specifications of your Yamaha Grizzly 700 battery and ensure that the charger is compatible. Look for chargers that have safety features such as overcharge protection and short circuit protection to ensure the safety of both the battery and the charger.
Connecting the Charger:
- Before connecting the charger, make sure the ATV is turned off and the charger is unplugged.
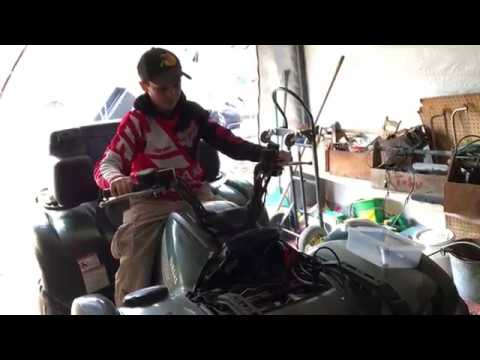
- Locate the battery compartment on the Yamaha Grizzly 700. It is usually located under the seat or in the front storage compartment.
- Open the battery compartment and locate the positive (+) and negative (-) terminals on the battery.
- Identify the corresponding terminals on the charger. The positive terminal is usually marked with a red color or a plus sign, while the negative terminal is marked with a black color or a minus sign.
- Take the positive clamp of the charger and attach it to the positive terminal of the battery. Make sure it is securely connected.
- Take the negative clamp of the charger and attach it to the negative terminal of the battery. Again, ensure it is securely connected.
- Double-check that the clamps are properly attached and there are no loose connections.
- Once everything is securely connected, plug in the charger to a power source.
Charging Process
Once you have connected the charger to the battery, it is important to follow the recommended charging process to ensure that the Yamaha Grizzly 700 battery is charged properly. Here are the steps to follow:
- Set the charger to the appropriate charging mode: Depending on the type of charger you are using, you may need to select the correct charging mode. Refer to the charger’s manual for instructions on how to do this.
- Start the charging process: Once the charger is set to the correct mode, you can start the charging process by turning on the charger. The charger will begin supplying power to the battery.
- Monitor the charging progress: It is important to monitor the charging progress to ensure that the battery is charging properly. Keep an eye on the charger’s display or indicator lights to see if the battery is charging and how much charge it has received.
- Charge for the recommended duration: The recommended charging duration for the Yamaha Grizzly 700 battery may vary depending on the charger and the battery’s current state of charge. Refer to the charger’s manual or the battery manufacturer’s instructions for the recommended charging duration.
- Do not overcharge the battery: Overcharging the battery can lead to damage and reduce its lifespan. Once the battery is fully charged, it is important to disconnect the charger to prevent overcharging.
By following these steps, you can ensure that the Yamaha Grizzly 700 battery is charged properly and ready for use.
Monitoring the Charging: Tips on how to monitor the charging progress and ensure the battery is charging properly.
While charging the battery of your Yamaha Grizzly 700, it is crucial to monitor the charging progress to ensure that the battery is charging properly. Here are some tips to help you monitor the charging process:
1. Use a Battery Charger with Monitoring Features:
Invest in a battery charger that comes with monitoring features such as an LCD display or LED indicators. These features will allow you to easily track the charging progress and voltage levels.
2. Check the Charger’s Manual:
Refer to the charger’s manual to understand the specific monitoring features and indicators. This will help you interpret the information accurately.
3. Regularly Check the Voltage Levels:
Periodically check the voltage levels of the battery using a multimeter. This will give you an idea of how much charge the battery has received and if it is charging properly.
4. Observe the Charging Time:
Keep track of the charging time recommended by the manufacturer. If the battery takes significantly longer to charge or if it charges too quickly, it may indicate a problem with the charger or the battery itself.
By following these tips and closely monitoring the charging process, you can ensure that your Yamaha Grizzly 700 battery is charging properly and avoid any potential issues.
Disconnecting the Charger
Once the battery of your Yamaha Grizzly 700 is fully charged, it is important to disconnect the charger properly to avoid any potential hazards. Follow these step-by-step instructions to safely disconnect the charger:
Step 1: Turn off the Charger
Before disconnecting the charger, make sure to turn it off. This will prevent any accidental sparks or electrical shocks.
Step 2: Remove the Charger Cables
Start by removing the charger cables from the battery terminals. Begin with the negative cable (usually black) and then remove the positive cable (usually red). Use a wrench or pliers to loosen the terminal nuts and carefully detach the cables.
Step 3: Inspect the Cables
After removing the cables, inspect them for any signs of damage or wear. If you notice any frayed wires or loose connections, it is important to address these issues before recharging the battery again.
Step 4: Store the Charger
Once the charger is disconnected, store it in a safe and dry place. Make sure to keep it away from any flammable materials or sources of heat.
By following these steps, you can safely disconnect the charger from your Yamaha Grizzly 700 battery. Remember to always prioritize safety and proper maintenance to ensure optimal performance and longevity of your ATV’s battery.
Maintaining the Battery
Once you have successfully charged your Yamaha Grizzly 700 battery, it is important to take steps to maintain its health and prolong its lifespan. By following these tips, you can ensure that your battery continues to perform optimally:
1. Regularly check the battery’s voltage:
Using a voltmeter, check the voltage of your battery on a regular basis. A healthy battery should have a voltage reading between 12.6 and 12.8 volts. If the voltage drops below 12.4 volts, it may indicate that the battery is losing its charge and needs to be recharged.
2. Keep the battery clean:
Regularly inspect the battery for any signs of dirt, corrosion, or debris. Clean the battery terminals and connections using a mixture of baking soda and water. This will help prevent any build-up that can interfere with the battery’s performance.
3. Avoid overcharging:
Overcharging the battery can lead to damage and reduce its lifespan. Make sure to follow the recommended charging process and duration mentioned in the previous section. Disconnect the charger once the battery is fully charged to prevent overcharging.
By following these maintenance tips, you can ensure that your Yamaha Grizzly 700 battery remains in good condition and provides reliable performance for years to come.
Conclusion: Ensuring Optimal Performance and Longevity
In conclusion, it is crucial to follow proper charging procedures for the Yamaha Grizzly 700 battery to ensure optimal performance and longevity. The battery plays a vital role in powering the ATV, and without a properly charged battery, the vehicle may not function efficiently.
Throughout this article, we have discussed the various aspects of charging the Yamaha Grizzly 700 battery. We have explored the type of battery used in the ATV and its specifications, as well as the step-by-step process of preparing for charging. We have also delved into the different types of chargers available and how to select the appropriate one for the Yamaha Grizzly 700.
Furthermore, we have provided detailed instructions on how to safely connect and disconnect the charger from the battery. We have also highlighted the recommended charging process and duration, along with tips on monitoring the charging progress.
Lastly, we have emphasized the importance of maintaining the battery’s health to prolong its lifespan. By following these guidelines, ATV owners can ensure that their Yamaha Grizzly 700 battery remains in optimal condition, providing reliable performance for years to come.Learn how to properly charge the battery on your Yamaha Grizzly 700 ATV for optimal performance and longevity.
About The Author

Alison Sowle is the typical tv guru. With a social media evangelist background, she knows how to get her message out there. However, she's also an introvert at heart and loves nothing more than writing for hours on end. She's a passionate creator who takes great joy in learning about new cultures - especially when it comes to beer!