
Last Updated on September 17, 2022
If you’re a newbie to rock climbing and need to install a bolt on a climbing hold, this article is for you! In this article we’ll discuss Screw-on holds, Black oxide finished bolts, and Tapcon screws. You’ll also learn about wedging. After you’ve read this article you’ll be ready to install bolts on your own! Let’s get started!
Wedging
If you’re new to rock climbing, you might be wondering how to install bolts on your climbing holds. First, determine what threading your holds need. Almost all holds have 3/8-16 threading, but some walls may use metric wall threading. When in doubt, ask your climbing instructor. A good rule of thumb is to use bolts that are the same length as the hold’s diameter. Then, make sure to measure the length of your bolts before installation.
Once you’ve determined the dimensions of your hold, the next step is to install the bolt. Place the bolt at the base of the hold. The bolt needs to extend enough past the hold’s base to engage the T-nut, but not so far that the bolt itself will rotate or break. If it doesn’t, you’ll have to go back and tighten the bolt again. Be sure to check each hold to ensure the bolt’s threads extend past the base, but don’t overdo it!
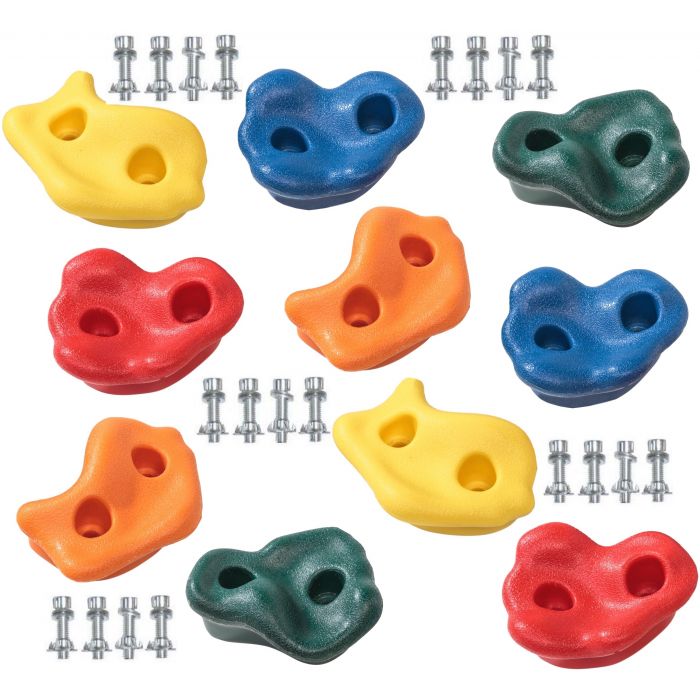
Bolts on climbing holds are the easiest to install. The advantage of this is that they are more versatile and last longer than other types of holds. You’ll need a drill bit with the correct size to install bolts on your climbing holds. Then, use a pencil to mark the location of the bolts and a tape measure to find the center of the bolt. A screw will fit snugly into the holes, but you’ll have to adjust it if you’re not satisfied with the result.
Screw-on holds
When installing bolt-on climbing holds, you have many options. You can place them on the wall in any position and any way you wish. If you do not have a concrete block in place, you can use a 3/16″ drill bit. Next, you need to drill a hole to screw the hold into. Make sure that the hole is flat and smooth, as any uneven surface will make the hold loose and unattached. You can also use a hammer drill to make a hole for the screws. Once you have the hole drilled, you can tighten the screw and then thread the hold into the wall. Be sure to use the right size drill bit, as if the screw is too small, it will bite into the wall and strip out the hole.
When installing bolt-on climbing holds, be sure to drill holes in both directions. Depending on the wall thickness, you can use a wooden screw to secure the bolts. When installing screws, make sure that they stick out the sides so that the top edge of the hold overhangs the layers closest to the wall. This allows the climber to have a better grip. Avoid cutting holds with straight edges, as they may cause sweaty hands.
Black oxide finished bolts
There are several benefits to black oxide finished bolts for climbing holds. The bolt is inexpensive, mildly corrosion resistant, and performs the purpose it was meant to perform. However, it can be frustrating to find that your bolted climbing holds are spinning out midroute. While it is possible to prevent bolt spins with a few simple tricks, they are definitely not a foolproof solution. Here are a few tips to help you choose the best bolts for your holds.
The corrosion rate increases significantly in saltwater. Because dissolved salts change to negative ions, saltwater conducts electricity better than freshwater, which speeds up the process of corrosion. Heat also speeds up the process, and mild acids can speed up the process. As decaying vegetation affects groundwater, it turns acidic. As a result, climbing bolts will rust faster in a location with high humidity than in a dry climate.
Most climbing walls use 3/8″-16 threading for climbing holds. The most common type is 3/8″-16. However, there are many other variations of bolts available. If you’re looking for an affordable way to build an indoor climbing wall, consider purchasing screw-in T-nuts. They are more durable, but they are harder to find and will take longer to install. Additionally, these bolts are less likely to blow out.
Tapcon screws
When choosing a climbing hold bolt, you should consider how much weight will be placed on the anchor. A 3/16″ Tapcon screw can support up to 220-600 lbs of pullout force per inch of thread engagement. Tapcon screws also require a predrilled hole. A wedge anchor is the best choice for high-load applications and is commonly used for sport routes. While this type of bolt requires more effort to install, it is extremely solid.
When choosing a tapcon screw for a climbing hold, you should pay attention to the head type. If you’re using the screw for indoor applications, the standard blue Tapcon screw will provide enough rust resistance. On the other hand, if you’re using the screw outdoors, you can buy stainless steel ones. Stainless steel Tapcons are made of 410 stainless steel and have a silver Climaseal coating to offer enhanced rust resistance.
Screw-on holds require a hole in the wall for the bolt to be installed. To drill this hole, you’ll need a 5/8” drill bit. Before you use the screw, be sure to drill several threads into the supportive portion of the wall. Otherwise, the screw could cause a hole in the wall or crack the texture layer. The longer screw, the better. It’s also important to make sure the anchor cone is secured securely.
OSB
The bolt is installed through the climbing hold and the T-nut. The T-nut is not installed properly if it does not align with the angle of the hold. If the bolt is not installed correctly, it could pop out of the hold or end up in the wall behind it. When installing a bolt, you must be aware of these two points before attempting it. Below are some helpful tips for installation. When installing a bolt, always make sure that the threaded portion extends past the base of the hold.
Before you install the bolt, make sure the panel is free of cracks around the climbing hold. If you do find a crack, you should loosen the bolt and re-torque it to the proper torque setting. If the crack persists, contact AquaClimb for further evaluation. For best results, make sure that there is a 1/4″ gap between the two panels. This will minimize cracking.
The length of the bolt should match the thickness of the climbing hold. A bolt that is too long or too short will not reach the anchors on the back of the hold. On the other hand, a bolt that is too short will protrude on the front and will not reach the anchors on the back. For thinner holds, use 3/8-inch bolts. For thicker holds, use 1/2-inch bolts. Experiment with different bolt lengths and sizes until you find the right one for you.
Kandi Holds
The first step in installing a bolt on a climbing hold is to make sure that the hold will not rotate once the bolt is installed. When installing the bolt, ensure that the threads of the T-nut do not extend past the base of the hold. If the bolt is not installed properly, the unthreaded portion of the bolt may run into the t-nut or the wall behind the hold. To install a bolt, take a few minutes to check each hold. To seat a hold, apply just enough force to prevent it from rotating but not too much so that it will break.
Once you have finished drilling the hole, you can install the screws into the holding area. Screws can be a simple, DIY method. A hammer drill with a 3/16″ bit will work fine. Once the first screw is in place, it can be threaded into the hold. Screws should be tightened until they are tight, and the hold should be secured in place. You can use the same technique to screw in a bolt to a climbing hold that has a slant to it.
Metal studs
When installing metal studs on a climbing hold, keep in mind that they are not designed to bear any lateral loads, so if you plan to use them for support, you should reinforce them. The most common stud size is 2×4 dimensional lumber, with 1.5″ of the surface facing the drywall. When installing metal studs on a climbing hold, make sure to set the fasteners at least two inches apart on center.
Steel stud framing tools include a straight-cut aviation metal snip, a plumb bob, and a 4-ft. level. You’ll also need a drill with variable speeds and multiple clutch settings. A 2-inch extension bit holder is necessary, as is a pair of drywall screws and a pair of sheet-metal locking pliers. Make sure that you use a drywall screw or two to prevent them from coming out during installation.
The bolt must extend past the base of the hold so it can engage the T-nut. If it doesn’t, it could run into the t-nut, or even into the wall behind the hold. Make sure you check the threads on each hold to make sure they are long enough. This way, you can avoid problems later. Also, ensure that you install the bolts at the correct lengths.
About The Author

Mindy Vu is a part time shoe model and professional mum. She loves to cook and has been proclaimed the best cook in the world by her friends and family. She adores her pet dog Twinkie, and is happily married to her books.