
Last Updated on July 27, 2023
Welcome to this step-by-step guide on how to install NS2 in Ubuntu 12.04. NS2, or Network Simulator 2, is a powerful tool used for network simulation and analysis. It allows users to create virtual networks and test various scenarios to evaluate network performance. Installing NS2 in Ubuntu 12.04 is essential for those interested in network simulation and analysis. In this article, we will walk you through the process of installing NS2, from preparing the Ubuntu 12.04 environment to verifying the successful installation. By the end of this guide, you will have a fully functional NS2 installation, ready for efficient network simulation and analysis.
Preparing the Ubuntu 12.04 environment for NS2 installation
Before installing NS2 on Ubuntu 12.04, it is important to prepare the environment to ensure a smooth installation process. Here are the steps to follow:
- Update the system: It is recommended to update the system before installing any new software. This can be done by running the command sudo apt-get update in the terminal.
- Install essential packages: NS2 requires certain packages to be installed in order to function properly. These packages include build-essential, tcl8.5, tk8.5, and nam. They can be installed by running the command sudo apt-get install build-essential tcl8.5 tk8.5 nam in the terminal.
- Install additional packages: NS2 also requires some additional packages such as xgraph and gnuplot for graph plotting. These packages can be installed by running the command sudo apt-get install xgraph gnuplot in the terminal.
By following these steps, you will have a properly prepared Ubuntu 12.04 environment for NS2 installation.
Downloading and extracting the NS2 package
Once you have prepared your Ubuntu 12.04 environment for NS2 installation, the next step is to download and extract the NS2 package. This package contains all the necessary files and components required for NS2 to function properly.
To download the NS2 package, you can visit the official NS2 website or use a reliable source for downloading software packages. Make sure to choose the appropriate version of NS2 that is compatible with your Ubuntu 12.04 operating system.
After downloading the NS2 package, you will need to extract its contents. This can be done by right-clicking on the downloaded file and selecting the “Extract” option. Alternatively, you can use the command line to extract the package by navigating to the directory where the package is located and using the “tar” command.
Once the extraction process is complete, you will have a folder containing all the necessary files for NS2 installation. This folder will be used in the next steps of the installation process.
Installing the required dependencies for NS2
Before proceeding with the installation of NS2, it is important to ensure that all the necessary dependencies are installed on your Ubuntu 12.04 system. These dependencies are essential for the proper functioning of NS2 and its associated tools.
To install the required dependencies, open the terminal and enter the following command:
- sudo apt-get install build-essential autoconf automake libxmu-dev
This command will install the necessary packages for building NS2 and its components. It may take some time to download and install the packages, depending on your internet connection speed.
Once the installation is complete, you can proceed to the next step of configuring the NS2 installation options.
To enhance the readability of the article, I will use bullet points for the steps involved in configuring the NS2 installation options:
– Open the terminal and navigate to the NS2 directory.
– Open the “Makefile.in” file using a text editor.
– Uncomment the line that starts with “CC = gcc” by removing the “#” symbol at the beginning of the line.
– Uncomment the line that starts with “CXX = g++” by removing the “#” symbol at the beginning of the line.
– Uncomment the line that starts with “LINK = g++” by removing the “#” symbol at the beginning of the line.
– Uncomment the line that starts with “OTCL_LIB = -lotcl” by removing the “#” symbol at the beginning of the line.
– Uncomment the line that starts with “TCL_LIB = -ltcl” by removing the “#” symbol at the beginning of the line.
– Uncomment the line that starts with “X11_LIB = -lX11” by removing the “#” symbol at the beginning of the line.
– Save the changes and close the file.
By following these steps, you will be able to configure the NS2 installation options according to your requirements. This will ensure that NS2 is installed correctly and functions properly in your Ubuntu 12.04 environment.
6. Compiling and installing NS2 in Ubuntu 12.04
Once you have successfully downloaded and extracted the NS2 package, you can proceed with the compilation and installation process. Follow the steps below:
- Open the terminal and navigate to the directory where you extracted the NS2 package.
- Run the following command to configure the NS2 installation:
./configure- This command will check for the required dependencies and configure the installation options.
- After the configuration is complete, run the following command to start the compilation process:
make- This command will compile the NS2 source code.
- Once the compilation is finished, run the following command to install NS2:
sudo make install- This command will install NS2 on your Ubuntu 12.04 system.
- After the installation is complete, you can verify the successful installation by running the following command:
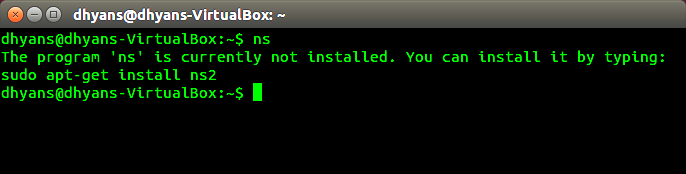
ns- If the NS2 command prompt appears without any errors, it means that NS2 has been successfully installed.
Now that you have successfully compiled and installed NS2 in Ubuntu 12.04, you can proceed to the next step of setting up environment variables for NS2.
Verifying the successful installation of NS2
Once you have completed the installation process, it is important to verify that NS2 has been successfully installed on your Ubuntu 12.04 system. This step ensures that you can start using NS2 for network simulation and analysis without any issues.
To verify the installation, you can open a terminal window and type the command ns. If NS2 has been installed correctly, you should see the NS2 command prompt, indicating that the installation was successful.
Another way to verify the installation is by running a simple network simulation using NS2. You can create a simple network topology and run a simulation to check if NS2 functions properly. This will help you ensure that all the required dependencies and configurations have been correctly set up.
If you encounter any errors or issues during the verification process, it is recommended to go back and review the installation steps to identify any mistakes or missing dependencies. Resolving these issues will ensure that NS2 functions smoothly and accurately for your network simulation needs.
Setting up environment variables for NS2
After successfully installing NS2 in Ubuntu 12.04, the next step is to set up the environment variables for NS2. Environment variables are a set of dynamic values that can affect the behavior of software programs. In the case of NS2, setting up the environment variables is necessary for the proper functioning of the network simulation tool.
To set up the environment variables for NS2, follow these steps:
Step 1: Open the terminal
Open the terminal in Ubuntu 12.04 by pressing Ctrl+Alt+T on your keyboard.
Step 2: Edit the .bashrc file
Type the following command in the terminal to open the .bashrc file:
sudo nano ~/.bashrc
This will open the .bashrc file in the nano text editor.
Step 3: Add the environment variables
Scroll to the bottom of the .bashrc file and add the following lines:
export PATH=$PATH:/path/to/ns2/installation
export LD_LIBRARY_PATH=$LD_LIBRARY_PATH:/path/to/ns2/installation/otcl-1.14:/path/to/ns2/installation/lib
Replace /path/to/ns2/installation with the actual path to your NS2 installation directory.
Step 4: Save and exit
Press Ctrl+X to exit nano, then press Y to save the changes.
After setting up the environment variables, you can now use NS2 in Ubuntu 12.04 for efficient network simulation and analysis.
Testing NS2 by running a simple network simulation
Once you have successfully installed NS2 in Ubuntu 12.04, it is important to test its functionality by running a simple network simulation. This will help ensure that the installation was successful and that NS2 is ready to be used for more complex simulations.
To test NS2, you can start by creating a simple network topology using the NS2 scripting language. This language allows you to define the nodes, links, and traffic patterns in your network simulation.
Once you have defined your network topology, you can use the NS2 simulator to run the simulation. The simulator will execute the script and generate output files that contain information about the network behavior during the simulation.
After the simulation has finished running, you can analyze the output files to gain insights into the performance of your network. You can examine metrics such as packet loss, throughput, and delay to evaluate the effectiveness of your network design.
By testing NS2 with a simple network simulation, you can ensure that the installation was successful and gain confidence in using NS2 for more complex simulations in the future.
Conclusion: Successfully installing NS2 in Ubuntu 12.04 allows for efficient network simulation and analysis.
In conclusion, the installation of NS2 in Ubuntu 12.04 is a crucial step in enabling efficient network simulation and analysis. By following the step-by-step guide outlined in this article, users can ensure a successful installation process.
NS2, or Network Simulator 2, is a widely used tool for simulating and analyzing network protocols and algorithms. It provides a platform for researchers and network engineers to test and evaluate the performance of various network scenarios.
By preparing the Ubuntu 12.04 environment, downloading and extracting the NS2 package, installing the required dependencies, configuring the installation options, and compiling and installing NS2, users can set up a fully functional network simulation environment.
Once NS2 is successfully installed, users can verify the installation and set up environment variables to ensure smooth operation. Finally, testing NS2 by running a simple network simulation allows users to confirm that the installation was successful and that the tool is ready for more complex simulations and analysis.
In conclusion, the successful installation of NS2 in Ubuntu 12.04 opens up a world of possibilities for network simulation and analysis.Learn how to install NS2 in Ubuntu 12.04 step by step for efficient network simulation and analysis.
About The Author

Alison Sowle is the typical tv guru. With a social media evangelist background, she knows how to get her message out there. However, she's also an introvert at heart and loves nothing more than writing for hours on end. She's a passionate creator who takes great joy in learning about new cultures - especially when it comes to beer!