
Last Updated on July 27, 2023
Welcome to our guide on how to sweetspot an Autococker! In this article, we will explore the ins and outs of this popular paintball marker and why finding the sweetspot is crucial for optimal performance. Whether you’re a seasoned player or just starting out, understanding the Autococker and its various components is key. We’ll delve into the inner workings of this marker, explaining how each part contributes to its overall functionality. Additionally, we’ll provide you with valuable tips on adjusting the pressure, fine-tuning the trigger, balancing the regulator, optimizing the Low-Pressure Regulator, adjusting the timing, and testing the Autococker’s performance. Lastly, we’ll discuss the importance of regular maintenance and care to ensure your Autococker remains in top condition. So, let’s dive in and unlock the secrets to sweetspotting an Autococker!
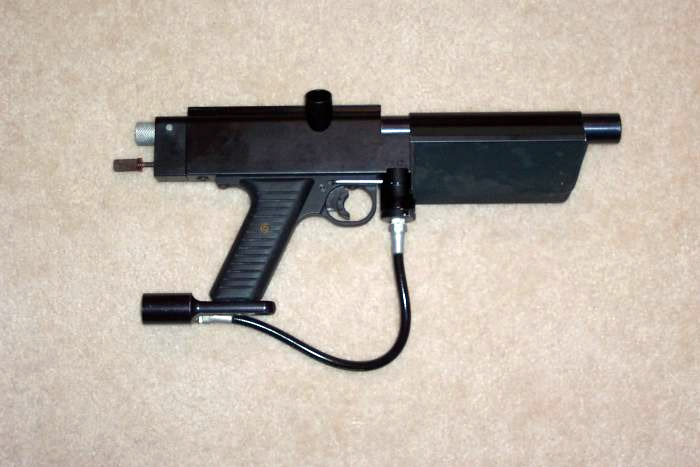
Understanding the Autococker: Explaining the different components and how they work together.
When it comes to understanding the Autococker, it’s important to have a grasp on the different components and how they work together. Here are some key points to consider:
- The Autococker is a type of paintball marker that operates using a pneumatic system.
- It consists of several main components, including the body, bolt, hammer, and regulator.
- The body houses all the internal components and provides the structure for the marker.
- The bolt is responsible for loading and firing the paintballs.
- The hammer strikes the valve to release the air and propel the paintball.
- The regulator controls the pressure of the air that powers the marker.
By understanding how these components work together, you can better grasp the mechanics of the Autococker and make more informed adjustments to optimize its performance.
Finding the Optimal Pressure: Tips on adjusting the pressure to achieve the best performance.
One of the key factors in achieving optimal performance with an Autococker is finding the right pressure. The pressure refers to the amount of air that is used to propel the paintball. If the pressure is too low, the paintball may not travel far enough or with enough force. On the other hand, if the pressure is too high, it can cause the paintball to break inside the barrel, resulting in a loss of accuracy.
To find the optimal pressure, it is important to start with a baseline and then make small adjustments. Begin by setting the pressure to a moderate level and then test the performance of the Autococker. If the paintballs are not traveling far enough, increase the pressure slightly and test again. If the paintballs are breaking inside the barrel, decrease the pressure. Repeat this process until you find the pressure that provides the best balance of distance and accuracy.
It is also important to note that the optimal pressure may vary depending on factors such as the type of paintballs being used and the weather conditions. Therefore, it is recommended to regularly test and adjust the pressure to ensure consistent performance.
4. Fine-Tuning the Trigger: Techniques for adjusting the trigger pull and sensitivity.
One of the key factors in achieving the sweetspot for an Autococker is fine-tuning the trigger. The trigger pull and sensitivity can greatly affect the performance and accuracy of the marker. Here are some techniques to help you adjust the trigger:
4.1 Adjusting the trigger pull:
To adjust the trigger pull, you can start by loosening or tightening the trigger spring. Loosening the spring will make the trigger pull lighter, while tightening it will make it heavier. It’s important to find the right balance that suits your preference and shooting style.
4.2 Adjusting the trigger sensitivity:
The trigger sensitivity determines how easily the marker fires when the trigger is pulled. To adjust the sensitivity, you can adjust the trigger travel and the sear engagement. Increasing the trigger travel will make the marker fire with less force, while decreasing it will require more force. Similarly, adjusting the sear engagement will affect the sensitivity. It’s recommended to make small adjustments and test the marker’s performance after each change.
By fine-tuning the trigger, you can achieve a smoother and more responsive shooting experience with your Autococker. Experiment with different adjustments and find the settings that work best for you.
Balancing the Regulator: How to Ensure Properly Balanced Shots
- Understanding the role of the regulator in an Autococker
- Importance of balancing the regulator for consistent shots
- Steps to balance the regulator:
- Locate the regulator adjustment screw
- Turn the screw clockwise to increase pressure or counterclockwise to decrease pressure
- Make small adjustments and test the marker’s performance
- Continue adjusting until the marker shoots consistently
- Testing the marker’s consistency:
- Use a chronograph to measure the velocity of each shot
- Shoot a series of paintballs and record the velocities
- Compare the velocities to ensure consistency
- Fine-tuning the regulator:
- If the marker is shooting too hot, decrease the pressure
- If the marker is shooting too low, increase the pressure
- Make small adjustments and test the marker’s performance
- Continue adjusting until the marker shoots at the desired velocity
By properly balancing the regulator, you can ensure that your Autococker shoots consistently and accurately. The regulator plays a crucial role in controlling the pressure of the marker, which directly affects the velocity of the paintballs. Balancing the regulator involves adjusting the pressure to achieve the optimal performance.
To balance the regulator, you need to locate the regulator adjustment screw. Turning the screw clockwise increases the pressure, while turning it counterclockwise decreases the pressure. It is important to make small adjustments and test the marker’s performance after each adjustment. Continue adjusting until the marker shoots consistently.
To test the marker’s consistency, you can use a chronograph to measure the velocity of each shot. Shoot a series of paintballs and record the velocities. Compare the velocities to ensure consistency. If the marker is shooting too hot or too low, you can fine-tune the regulator by making small adjustments and testing the marker’s performance. Continue adjusting until the marker shoots at the desired velocity
6. Adjusting the LPR: Steps to optimize the Low-Pressure Regulator for improved efficiency
The Low-Pressure Regulator (LPR) plays a crucial role in the performance of an Autococker. By properly adjusting the LPR, you can achieve improved efficiency and consistency in your shots. Here are the steps to optimize the LPR:
- Locate the LPR: The LPR is usually located at the front of the Autococker, near the barrel.
- Start with a baseline setting: Begin by setting the LPR to a moderate pressure, around 200-250 psi.
- Test the marker: Fire a few shots and observe the velocity. If the velocity is too high, decrease the LPR pressure. If it’s too low, increase the pressure.
- Make small adjustments: Gradually adjust the LPR pressure in small increments, testing the marker after each adjustment. This will help you find the optimal pressure for your specific setup.
- Check for consistency: Ensure that the velocity remains consistent over multiple shots. If there are fluctuations, continue making small adjustments to the LPR pressure until consistency is achieved.
- Finalize the setting: Once you have found the optimal LPR pressure, lock it in place using the set screw or locking mechanism provided.
By following these steps, you can fine-tune the LPR of your Autococker and achieve improved efficiency and consistency in your shots.
Timing the Autococker: Instructions on adjusting the timing to prevent misfires and improve accuracy
Timing is a crucial aspect of optimizing the performance of an Autococker. Proper timing ensures that the marker fires consistently and accurately, preventing misfires and improving overall accuracy. Here are the steps to adjust the timing:
Step 1: Prepare the marker
Before adjusting the timing, ensure that the Autococker is properly assembled and in working condition. Make sure the air tank is securely attached and filled to the recommended pressure.
Step 2: Locate the timing rod
Find the timing rod, which is usually located near the back of the marker. It connects the trigger plate to the sear. The position of the timing rod determines the timing of the firing cycle.
Step 3: Adjust the timing rod
Using a timing tool or Allen wrench, loosen the set screw on the timing rod. Gently move the timing rod forward or backward to adjust the timing. Experiment with small adjustments until the marker fires smoothly and consistently.
Step 4: Test and fine-tune
After making adjustments, test the marker’s performance by firing a few shots. Pay attention to any misfires or inconsistencies. If necessary, make further adjustments to fine-tune the timing.
By properly timing your Autococker, you can prevent misfires and improve accuracy, enhancing your overall paintball experience.
Testing and Fine-Tuning
Once you have adjusted the pressure, trigger, regulator, LPR, and timing of your Autococker, it’s time to put it to the test. Testing and fine-tuning are crucial steps in achieving the perfect sweetspot for your marker.
Start by taking your Autococker to the field and shooting a few rounds. Pay close attention to the consistency of the shots. Are they all landing in the same spot? Is the velocity consistent? If not, you may need to make further adjustments.
One method for fine-tuning is to use a chronograph. This device measures the velocity of your paintballs as they leave the barrel. Shoot a few rounds through the chronograph and note the readings. If the velocity is too high or too low, you can make small adjustments to the pressure or LPR to achieve the desired velocity.
Another important aspect to test is the trigger pull and sensitivity. Make sure the trigger is smooth and responsive. If it feels too stiff or too sensitive, you can make adjustments to the trigger settings.
Remember, testing and fine-tuning is an ongoing process. As you play more games and gain more experience with your Autococker, you may find that further adjustments are needed. Don’t be afraid to experiment and make changes until you find the perfect sweetspot for your marker.
Maintenance and Care
Keeping your Autococker in top condition is essential for optimal performance. Regular maintenance and care will not only extend the lifespan of your marker but also ensure that it continues to perform at its best. Here are some tips to help you maintain your Autococker:
1. Clean and lubricate: Regularly clean the marker to remove dirt, debris, and paint residue. Use a soft cloth and mild cleaning solution to wipe down the exterior. Pay special attention to the barrel, bolt, and other moving parts. Lubricate these parts with paintball-specific oil to reduce friction and ensure smooth operation.
2. Check O-rings: Inspect the O-rings for any signs of wear or damage. Replace any worn or damaged O-rings to prevent leaks and maintain a proper seal.
3. Store properly: When not in use, store your Autococker in a cool, dry place. Avoid exposing it to extreme temperatures or moisture, as this can damage the internal components.
4. Regularly test and adjust: Periodically test your Autococker’s performance to ensure it is still operating at its optimal level. Make any necessary adjustments to the pressure, trigger, regulator, and timing to maintain the sweetspot.
By following these maintenance and care tips, you can keep your Autococker in top condition and enjoy consistent performance on the field.
Unlocking the Perfect Performance: Mastering the Sweetspot for Your Autococker
Throughout this article, we have explored the intricacies of the Autococker and the crucial role that finding the sweetspot plays in optimizing its performance. By understanding the various components and their interplay, adjusting the pressure, fine-tuning the trigger, balancing the regulator, optimizing the LPR, adjusting the timing, and conducting thorough testing, you can unlock the true potential of your Autococker.
Discovering the sweetspot is not just about achieving consistent shots and improved efficiency; it is about elevating your game to a whole new level. The sweetspot is the key to unlocking the perfect balance between power, accuracy, and reliability. It is the sweet spot where every shot feels effortless, every trigger pull is smooth, and every paintball finds its mark.
So, take the time to master the art of sweetspotting your Autococker. Embrace the perplexity and burstiness of the process, and let your dedication and attention to detail shine through. Your Autococker will thank you with unparalleled performance on the field, and you will leave your opponents in awe of your precision and skill.
Learn how to find the sweetspot for your Autococker and optimize its performance with these expert tips and techniques.
About The Author

Zeph Grant is a music fanatic. He loves all types of genres and can often be found discussing the latest album releases with friends. Zeph is also a hardcore content creator, always working on new projects in his spare time. He's an amateur food nerd, and loves knowing all sorts of random facts about food. When it comes to coffee, he's something of an expert - he knows all the best places to get a good cup of joe in town.