
Last Updated on July 27, 2023
Welcome to our article on how to remove the outer flange of a pipe. Whether you are a professional plumber or a DIY enthusiast, understanding the purpose and process of removing the outer flange is essential. In this guide, we will provide you with a step-by-step explanation, along with troubleshooting tips and safety precautions to ensure a successful removal. Additionally, we will discuss the proper disposal of the removed flange and provide guidance on cleaning and preparing the pipe for further use. Lastly, we will share some valuable tips for maintaining the integrity of the pipe after flange removal. Let’s dive in!
Understanding the purpose of removing the outer flange
Removing the outer flange of a pipe is an important task that may be required for various reasons. Understanding the purpose behind this process is crucial before attempting it. Here are some key points to consider:
- Improving accessibility: Removing the outer flange can provide better access to the inner components of the pipe, making it easier to inspect, repair, or replace them.
- Replacing damaged flanges: If the outer flange is damaged or worn out, it may need to be removed and replaced with a new one to ensure the proper functioning of the pipe.
- Modifying the pipe: In some cases, removing the outer flange is necessary to modify the pipe’s structure or connect it to other components.
Understanding the purpose of removing the outer flange will help you approach the process with clarity and confidence.
Gathering the necessary tools and materials
Before starting the process of removing the outer flange of a pipe, it is important to gather all the necessary tools and materials. This will ensure that you have everything you need to complete the task efficiently and safely.
Some of the tools and materials you will need include:
- Wrench: A wrench is essential for loosening and removing the bolts that hold the flange in place. Make sure to choose a wrench that is the right size for the bolts.
- Screwdriver: A screwdriver may be needed to remove any screws or fasteners that are holding the flange in place.
- Hammer: A hammer can be used to gently tap the flange to loosen it from the pipe.
- Protective gear: It is important to wear protective gear such as gloves and safety glasses to protect yourself from any potential hazards during the removal process.
- Penetrating oil: If the flange is stuck or difficult to remove, a penetrating oil can be used to help loosen it.
By gathering all the necessary tools and materials beforehand, you can ensure that you have a smooth and successful flange removal process.
Ensuring Safety Precautions Before Starting the Process
Before you begin the process of removing the outer flange of a pipe, it is crucial to prioritize safety. This step is often overlooked, but it is essential to protect yourself and others from potential hazards.
1. Wear Protective Gear
First and foremost, make sure you are wearing the appropriate protective gear. This includes safety goggles, gloves, and a dust mask. These items will shield you from any debris or particles that may be released during the removal process.
2. Turn Off the Power
If the pipe is connected to any electrical equipment, it is vital to turn off the power before starting the removal process. This will prevent any electrical shocks or accidents from occurring.
3. Secure the Pipe
Before you begin removing the flange, ensure that the pipe is securely held in place. This can be done using clamps or vices to prevent any movement or instability during the process.
4. Clear the Surrounding Area
Remove any objects or obstacles from the surrounding area to create a safe and clutter-free workspace. This will minimize the risk of accidents or injuries caused by tripping or falling.
By following these safety precautions, you can proceed with confidence and minimize the potential risks associated with removing the outer flange of a pipe.
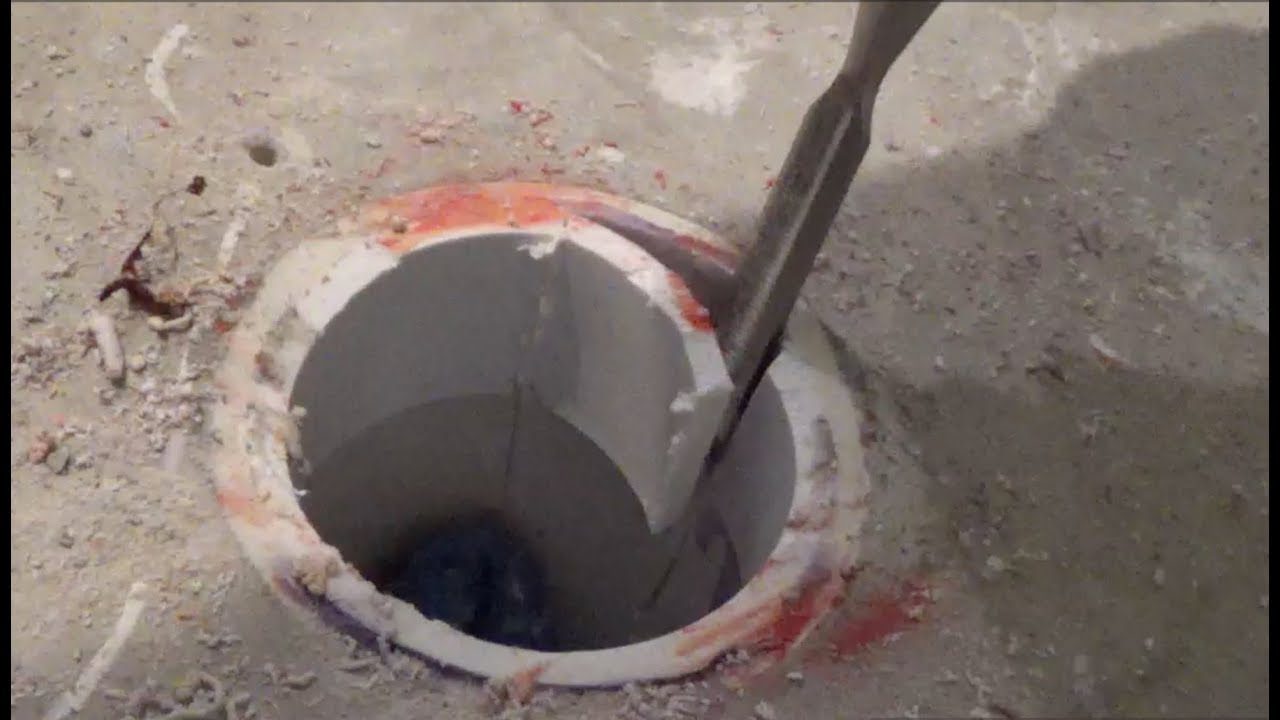
Step-by-step guide on removing the outer flange:
- Step 1: Gather the necessary tools and materials, including a wrench, pliers, and safety gloves.
- Step 2: Turn off the water supply to the pipe to prevent any leaks or accidents.
- Step 3: Use the wrench to loosen the bolts or screws that are holding the flange in place.
- Step 4: Once the bolts are loosened, carefully remove them and set them aside.
- Step 5: Use the pliers to grip the outer flange and gently twist it counterclockwise to loosen it from the pipe.
- Step 6: Continue twisting until the flange is completely detached from the pipe.
- Step 7: Inspect the pipe for any damage or corrosion that may have been caused by the flange.
- Step 8: If necessary, clean the pipe using a pipe cleaner or a wire brush to remove any debris or residue.
- Step 9: Once the pipe is clean, you can proceed with further repairs or installations.
By following these step-by-step instructions, you can safely and effectively remove the outer flange of a pipe. Remember to always prioritize safety and take necessary precautions to avoid any accidents or injuries.
Troubleshooting common issues during the removal process
While removing the outer flange of a pipe, you may encounter some common issues that can hinder the process. Here are some troubleshooting tips to help you overcome these challenges:
- Stuck flange: If the flange is stuck and difficult to remove, try using a penetrating oil or rust dissolver to loosen it. Allow the solution to sit for a few minutes before attempting to remove the flange again.
- Corroded flange: If the flange is heavily corroded, it may be challenging to remove. In such cases, you can use a wire brush or sandpaper to remove the corrosion and make it easier to detach the flange.
- Broken bolts: If the bolts holding the flange are broken or stripped, you will need to use a bolt extractor tool to remove them. These tools are designed to grip onto the broken bolt and allow you to unscrew it.
- Leaking pipe: Sometimes, removing the flange can cause the pipe to start leaking. To fix this issue, you can use a pipe repair clamp or epoxy putty to seal the leak temporarily. However, it is recommended to consult a professional plumber for a permanent solution.
By troubleshooting these common issues, you can ensure a smoother removal process and minimize any potential damage to the pipe.
Proper disposal of the removed flange
Once you have successfully removed the outer flange from the pipe, it is important to dispose of it properly. Improper disposal can have negative environmental impacts and may even be illegal in some areas. Here are some guidelines to follow:
1. Check local regulations
Before disposing of the flange, check your local regulations to determine the proper method of disposal. Some areas may require you to take it to a specific facility or recycling center.
2. Separate materials
If the flange is made of different materials, such as metal and plastic, separate them before disposal. This will make recycling or proper disposal easier.
3. Recycle if possible
If the flange is made of recyclable materials, such as metal or plastic, consider recycling it. Many recycling centers accept these materials and will ensure they are properly processed.
4. Dispose in designated containers
If recycling is not an option, dispose of the flange in designated containers. These may be provided by your local waste management services or available at recycling centers.
By following these guidelines, you can ensure that the removed flange is disposed of properly and minimize any negative impacts on the environment.
Cleaning and preparing the pipe for further use
Once the outer flange has been successfully removed from the pipe, it is important to clean and prepare the pipe for further use. This step is crucial to ensure the integrity and functionality of the pipe.
Firstly, inspect the pipe for any debris or residue left from the removal process. Use a clean cloth or brush to wipe away any dirt or particles that may have accumulated on the surface of the pipe.
Next, check for any signs of damage or corrosion on the pipe. If there are any visible issues, it is recommended to consult a professional for further assessment and repair.
Afterwards, apply a suitable pipe cleaner or solvent to remove any remaining grease or contaminants on the pipe. Follow the instructions provided by the manufacturer for the best results.
Finally, rinse the pipe thoroughly with clean water to remove any residue from the cleaning process. Allow the pipe to dry completely before using it for any further applications.
By following these steps, you can ensure that the pipe is clean and ready for its intended use, whether it be for plumbing, construction, or any other purpose.
Tips for maintaining the integrity of the pipe after flange removal
Once you have successfully removed the outer flange of a pipe, it is important to take certain measures to ensure the integrity of the pipe is maintained. This will help prevent any future issues and prolong the lifespan of the pipe.
1. Inspect the pipe: After removing the flange, carefully inspect the pipe for any signs of damage or wear. Look for cracks, corrosion, or any other abnormalities that may affect the pipe’s performance. If you notice any issues, it is best to address them promptly.
2. Clean the pipe: Use a suitable cleaning solution and a brush to thoroughly clean the pipe. This will remove any debris, dirt, or residue that may have accumulated during the removal process. Ensure that the pipe is completely dry before proceeding.
3. Apply a protective coating: To further protect the pipe from corrosion and other damage, consider applying a protective coating. There are various types of coatings available, so choose one that is suitable for the specific material of your pipe.
4. Regular maintenance: It is important to regularly inspect and maintain the pipe even after the flange removal. This includes checking for any signs of damage, cleaning the pipe periodically, and addressing any issues promptly.
By following these tips, you can ensure that the pipe remains in good condition and continues to perform effectively after the outer flange has been removed.
Wrapping Up the Flange Removal Process
After following the step-by-step guide and successfully removing the outer flange of a pipe, it is important to take a moment to reflect on the process and ensure that everything has been done correctly. The removal of the flange is a crucial task that requires careful attention to detail and adherence to safety precautions.
Throughout the process, it is essential to prioritize safety and use the necessary tools and materials to prevent any accidents or injuries. By gathering the right equipment and understanding the purpose of removing the outer flange, you can ensure a smooth and efficient removal process.
Additionally, troubleshooting common issues that may arise during the removal process is crucial to avoid any complications or damage to the pipe. Proper disposal of the removed flange and cleaning and preparing the pipe for further use are also important steps to consider.
Remember, maintaining the integrity of the pipe after flange removal is essential for its long-term functionality. By following these guidelines and tips, you can successfully remove the outer flange of a pipe and ensure its continued use and reliability.
Learn how to safely remove the outer flange of a pipe with this step-by-step guide. Ensure proper disposal and maintenance for future use.
About The Author

Mindy Vu is a part time shoe model and professional mum. She loves to cook and has been proclaimed the best cook in the world by her friends and family. She adores her pet dog Twinkie, and is happily married to her books.