
Last Updated on July 27, 2023
Welcome to our guide on how to make a microphone belt! Whether you’re a musician, podcaster, or public speaker, a microphone belt can be a handy accessory to have. In this article, we will walk you through the step-by-step process of creating your own microphone belt. But before we dive into the instructions, let’s take a look at the materials you’ll need for this project. So grab your measuring tape and let’s get started!
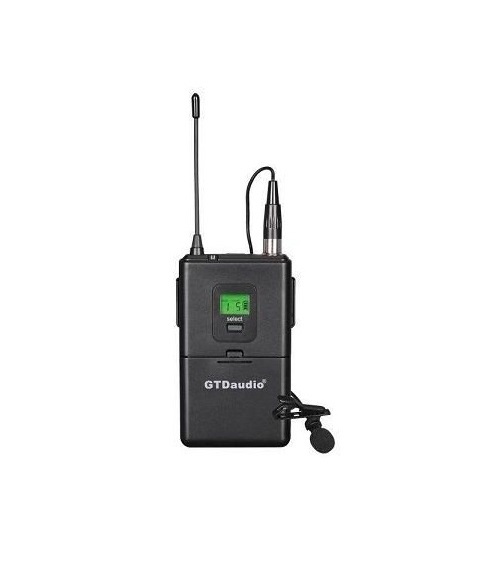
Materials needed for making a microphone belt
When making a microphone belt, you will need the following materials:
- A belt strap
- A microphone clip
- Adjustable straps
- Velcro or snap fasteners
- Scissors
- Needle and thread
- Measuring tape
- Microphone cable
These materials are essential for creating a functional and secure microphone belt.
Note: It is important to choose high-quality materials to ensure durability and longevity of the microphone belt.
Step 1: Measuring and cutting the belt strap
One of the first steps in making a microphone belt is to measure and cut the belt strap. This is an important step as it determines the length and width of the belt. To measure the belt strap, you will need a measuring tape or ruler. Start by measuring the circumference of your waist or the area where you want to wear the belt. Make sure to add a few extra inches to allow for adjustments and comfort. Once you have the measurement, mark it on the belt strap and use a pair of scissors or a utility knife to cut the strap to the desired length. It is important to cut the strap straight and evenly to ensure a professional-looking belt.
After cutting the strap, you can also trim the edges to give it a clean finish. This can be done using a pair of scissors or a hot knife. Be careful when using a hot knife as it can be dangerous. Make sure to follow the manufacturer’s instructions and take necessary safety precautions. Once the belt strap is cut and trimmed, you are ready to move on to the next step of attaching the microphone clip.
Step 2: Attaching the microphone clip to the belt strap
Once you have measured and cut the belt strap to the desired length, it’s time to attach the microphone clip. The microphone clip is the part that will hold the microphone securely in place on the belt.
To attach the microphone clip, you will need a small screwdriver and the necessary screws that come with the clip. Start by positioning the clip on the belt strap where you want it to be. Make sure it is centered and aligned properly.
Next, take the small screws and insert them through the holes in the clip and into the belt strap. Use the screwdriver to tighten the screws, making sure they are secure but not too tight.
Once the microphone clip is attached, give it a gentle tug to ensure it is firmly in place. It should not move or come loose easily. If it does, you may need to tighten the screws a bit more.
Now that the microphone clip is securely attached to the belt strap, you are ready to move on to the next step: adding adjustable straps for a secure fit.
Step 3: Adding adjustable straps for a secure fit
Once you have attached the microphone clip to the belt strap, it’s time to add adjustable straps to ensure a secure fit. These straps will allow you to adjust the tightness of the belt according to your preference.
- Measure and cut two pieces of nylon webbing, each about 12 inches long.
- Attach one end of each strap to the back of the belt strap, near the microphone clip. You can use a sewing machine or strong adhesive to secure the straps in place.
- Thread the other end of each strap through a plastic buckle, making sure the buckle is facing the right way.
- Adjust the length of the straps by pulling them through the buckle. This will allow you to tighten or loosen the belt as needed.
- Once you have adjusted the straps to your desired fit, secure them in place by stitching or gluing the loose ends.
Adding adjustable straps to your microphone belt will ensure that it stays in place while you are performing or speaking. It will also allow you to easily adjust the tightness of the belt for maximum comfort.
Step 4: Securing the microphone cable to the belt
Once you have attached the microphone clip to the belt strap and added adjustable straps for a secure fit, the next step is to secure the microphone cable to the belt. This will ensure that the cable stays in place and does not get tangled or interfere with your movements while using the microphone belt.
- Start by finding a suitable spot on the belt where you want to secure the cable.
- Use a small piece of adhesive tape or a cable tie to secure the cable to the belt.
- Make sure to leave enough slack in the cable so that you can move comfortably while wearing the microphone belt.
- If you are using adhesive tape, make sure it is strong enough to hold the cable securely in place.
- If you are using a cable tie, make sure it is tight enough to hold the cable but not too tight that it restricts your movement.
- Test the microphone belt to make sure the cable is secure and does not interfere with the microphone’s performance.
By securing the microphone cable to the belt, you can ensure that it stays in place and does not cause any distractions or disruptions while using the microphone belt.
Step 5: Testing and adjusting the microphone belt
Once you have completed all the previous steps, it is important to test and adjust the microphone belt to ensure it is working properly and fits comfortably. Here are some tips to help you with this process:
1. Test the microphone
Before attaching the microphone to the belt, make sure it is working correctly. Connect it to your audio device and speak into it to check for any issues with sound quality or volume.
2. Adjust the belt strap
Put on the microphone belt and adjust the strap to fit snugly around your waist or hips. It should be tight enough to hold the microphone securely in place, but not so tight that it is uncomfortable.
3. Check the microphone position
Once the belt is adjusted, check the position of the microphone. It should be positioned near your mouth, but not too close that it obstructs your speech or breathing.
By following these steps, you can ensure that your microphone belt is properly tested and adjusted for optimal performance. Remember to regularly check and adjust the belt as needed to maintain its functionality.
Tips for using and maintaining the microphone belt
Once you have successfully made your microphone belt, it is important to know how to use and maintain it properly. Here are some tips to help you get the most out of your microphone belt:
1. Positioning the microphone
When wearing the microphone belt, make sure to position the microphone clip near your mouth for optimal sound quality. Experiment with different angles and distances to find the best position for your voice.
2. Adjusting the straps
Ensure that the adjustable straps are properly tightened to secure the belt in place. This will prevent the microphone from moving or falling off during use.
3. Protecting the microphone cable
Take care to avoid any sharp objects or excessive pulling on the microphone cable, as this can damage the cable and affect the sound quality. Use cable clips or tape to secure the cable to the belt and prevent it from tangling.
4. Cleaning and maintenance
Regularly clean the microphone clip and belt strap to remove any dirt or sweat buildup. Use a soft cloth or mild cleaning solution to gently wipe them down. Avoid using harsh chemicals or abrasive materials that could damage the equipment.
By following these tips, you can ensure that your microphone belt remains in good condition and provides you with reliable performance for all your audio recording needs.
Benefits of using a microphone belt
A microphone belt offers several benefits for performers and speakers. Firstly, it provides convenience and freedom of movement. With a microphone belt, you no longer have to hold the microphone in your hand or worry about dropping it. This allows you to focus on your performance or presentation without any distractions.
Secondly, a microphone belt helps to improve sound quality. By securing the microphone close to your mouth, it ensures that your voice is captured clearly and effectively. This is especially important in situations where there is background noise or when you need to project your voice to a large audience.
Additionally, a microphone belt enhances comfort during long performances or presentations. It distributes the weight of the microphone evenly across your body, reducing strain on your hand and arm muscles. This can prevent fatigue and allow you to maintain a strong and consistent voice throughout your performance.
Furthermore, a microphone belt adds a professional touch to your appearance. It keeps the microphone securely in place, preventing it from accidentally falling off or getting in the way. This gives you a polished and professional look, which can make a positive impression on your audience.
In conclusion, a microphone belt is a valuable accessory for performers and speakers. It offers convenience, improved sound quality, comfort, and a professional appearance. By using a microphone belt, you can enhance your performance or presentation and deliver your message with confidence.
Wrapping it up: The Perfect Microphone Belt
After following the step-by-step guide on how to make a microphone belt, you are now equipped with a versatile and convenient accessory for your audio needs. By measuring and cutting the belt strap, attaching the microphone clip, adding adjustable straps, securing the microphone cable, and testing the belt for a secure fit, you have created a customized solution that ensures optimal performance.
Using a microphone belt offers numerous benefits such as hands-free operation, improved mobility, and reduced strain on your body. Whether you are a performer, presenter, or content creator, this accessory will enhance your audio experience and allow you to focus on your craft.
Remember to take proper care of your microphone belt by regularly cleaning it and inspecting for any signs of wear and tear. By doing so, you can prolong its lifespan and ensure consistent performance.
So, go ahead and put your newly crafted microphone belt to use. Enjoy the freedom it provides and let your voice be heard with clarity and confidence!
Learn how to make a microphone belt with this step-by-step guide. Perfect for high school students in years 10-11.
About The Author

Alison Sowle is the typical tv guru. With a social media evangelist background, she knows how to get her message out there. However, she's also an introvert at heart and loves nothing more than writing for hours on end. She's a passionate creator who takes great joy in learning about new cultures - especially when it comes to beer!