
Last Updated on July 27, 2023
Welcome to our guide on how to make a reflex deflex bow! Whether you’re a seasoned archer or just starting out, this article will provide you with all the information you need to create your own high-performance bow. A reflex deflex bow is a unique design that offers enhanced power and accuracy, making it a popular choice among archery enthusiasts. In this guide, we will walk you through each step of the process, from understanding the basics to testing and adjusting your finished bow. So, let’s dive in and discover the art of crafting a reflex deflex bow!
Understanding the Basics of a Reflex Deflex Bow
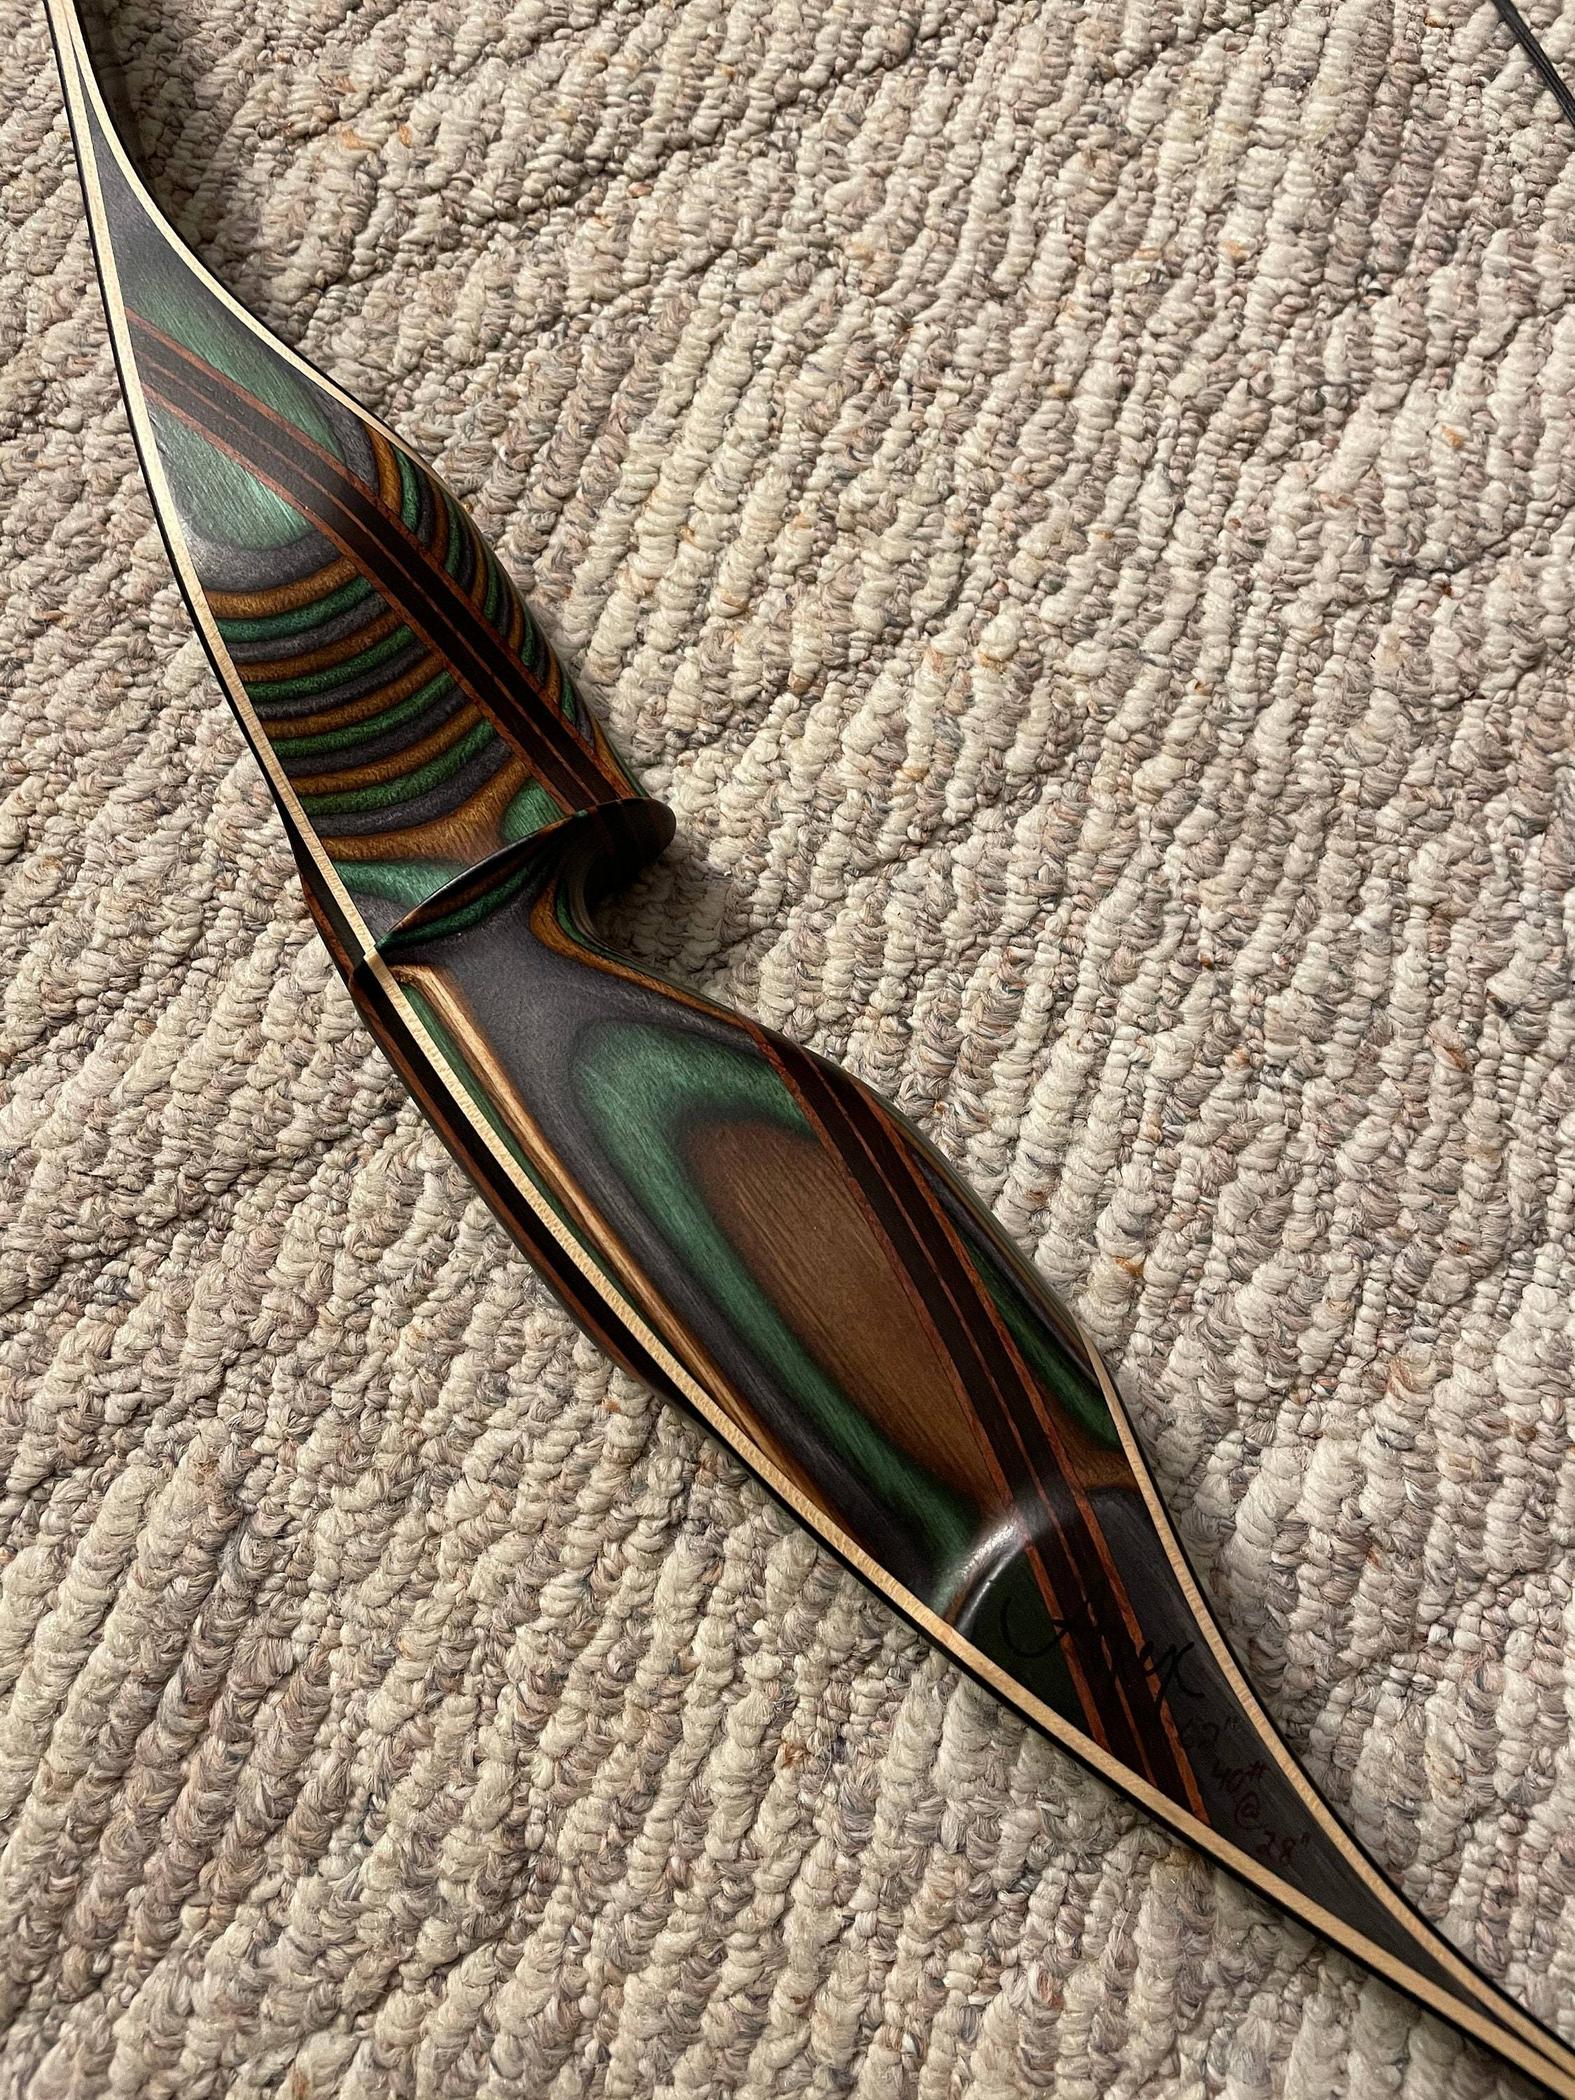
A reflex deflex bow is a type of bow that has a curved shape, with the limbs bending away from the archer when the bow is unstrung. This design allows for a more efficient transfer of energy from the bow to the arrow, resulting in increased speed and accuracy. To understand the basics of a reflex deflex bow, it is important to know the following:
- The reflex deflex design: The limbs of a reflex deflex bow are curved in opposite directions, with the tips of the limbs bending away from the archer.
- The benefits of a reflex deflex bow: The curved shape of the bow limbs allows for a longer draw length, which in turn increases the power and speed of the arrow. It also provides a more stable and forgiving shooting experience.
- The materials used: Reflex deflex bows can be made from various materials, including wood, fiberglass, and carbon fiber. Each material has its own advantages and disadvantages.
- The different types of reflex deflex bows: There are different styles of reflex deflex bows, such as longbows, recurve bows, and hybrid bows. Each style has its own unique characteristics and shooting experience.
By understanding the basics of a reflex deflex bow, you can better appreciate the craftsmanship and skill required to make one. In the following sections, we will explore the step-by-step process of making a reflex deflex bow.
Gathering the Necessary Materials and Tools
Before you can begin making a reflex deflex bow, it is important to gather all the necessary materials and tools. This will ensure that you have everything you need to complete the project successfully. Some of the materials you will need include a bow stave, which can be made from various types of wood such as hickory or yew. You will also need a draw knife, a rasp, sandpaper, and a heat source for bending the bow limbs.
In addition to these materials, you will also need some basic tools such as a tape measure, a pencil, and a saw. These tools will be used for measuring and cutting the bow stave to the desired length. It is important to have all the necessary materials and tools on hand before you begin, as this will make the process much smoother and more efficient.
Preparing the Bow Stave
Before you can start shaping your reflex deflex bow, you need to prepare the bow stave. The bow stave is the raw piece of wood that will eventually become your bow. It is important to choose the right type of wood for your bow stave, as different woods have different properties that can affect the performance of your bow.
First, you need to find a suitable piece of wood that is straight and free from knots or defects. Common woods used for bow staves include hickory, yew, and osage orange. Once you have found the right piece of wood, you will need to remove the bark and any excess branches or knots.
Next, you will need to season the bow stave. This involves allowing the wood to dry slowly and naturally, which can take several months. Seasoning the wood is important because it helps to prevent the bow from warping or cracking once it is shaped.
Once the bow stave is seasoned, you can start working on shaping the bow limbs. This is where the real craftsmanship comes in, as you will need to carefully remove wood from the stave to create the desired shape and profile for your reflex deflex bow.
5. Shaping the Bow Limbs
Once you have prepared the bow stave, the next step in making a reflex deflex bow is shaping the bow limbs. This involves carefully removing excess wood from the stave to create the desired shape and dimensions for the bow.
- Start by marking the centerline of the bow stave using a pencil or marker. This will serve as a guide for shaping the limbs evenly.
- Use a drawknife or rasp to begin shaping the limbs. Start at the handle and work your way towards the tips, removing small amounts of wood at a time.
- Pay close attention to the thickness and width of the limbs as you shape them. The limbs should taper towards the tips and be symmetrical on both sides of the centerline.
- Check the limb thickness and width frequently using a caliper or ruler to ensure consistency.
- Smooth out any rough edges or imperfections with sandpaper or a file.
Remember to take your time and work slowly and carefully when shaping the bow limbs. It’s important to maintain the integrity of the wood and avoid removing too much material, as this can weaken the bow.
6. Adding the Reflex and Deflex to the Bow
Once you have shaped the bow limbs, the next step is to add the reflex and deflex to the bow. This is an important step as it helps to improve the performance and efficiency of the bow.
-
Adding Reflex:
To add reflex to the bow, you will need to heat the bow limbs. This can be done by using a heat gun or by placing the bow limbs in hot water. Heating the limbs will make them more pliable and allow you to shape them into a reflex curve.
Once the limbs are heated, you can gently bend them backwards to create the reflex. Be careful not to overheat the limbs or bend them too much, as this can cause the bow to break.
-
Adding Deflex:
To add deflex to the bow, you will need to heat the handle section of the bow. This can be done using the same methods as adding reflex.
Once the handle section is heated, you can gently bend it forward to create the deflex. Again, be cautious not to overheat or bend the handle section too much.
Adding the reflex and deflex to the bow will give it a unique shape and improve its performance. It is important to take your time and be careful during this step to ensure the bow is properly shaped and balanced.
Tillering the Bow for Optimal Performance
Once you have shaped the bow limbs and added the reflex and deflex, the next step in making a reflex deflex bow is tillering. Tillering is the process of carefully adjusting the bend of the bow limbs to ensure optimal performance and balance.
To begin tillering, you will need a tillering tree or a tillering board. This is a device that allows you to safely and accurately measure the bend of the bow limbs. Attach the bow to the tillering tree or board using bowstring and secure it in place.
Next, you will need to apply pressure to the bowstring to flex the limbs. Start with a low amount of pressure and gradually increase it as you observe the bend of the limbs. Use a tillering stick or a tillering string to measure the bend at various points along the limbs.
As you tiller the bow, make small adjustments to the limbs to ensure an even bend on both sides. This will help to prevent any twisting or uneven stress on the bow. Continue tillering until you achieve the desired bend and balance.
Remember to take your time and be patient during the tillering process. It requires careful observation and adjustment to achieve optimal performance. Once you are satisfied with the tiller, you can move on to applying a finish to the bow.
Applying a Finish to the Bow
Once you have completed shaping the bow limbs and achieving the desired reflex and deflex, it is time to apply a finish to the bow. The finish serves multiple purposes, including protecting the wood from moisture and adding a smooth and polished look to the bow.
Before applying the finish, it is important to ensure that the bow limbs are completely dry and free from any dust or debris. You can use a clean cloth or brush to remove any particles that may be present.
There are various types of finishes that can be used for a reflex deflex bow, such as varnish, oil, or wax. Each type has its own advantages and disadvantages, so it is important to choose the one that best suits your preferences and needs.
When applying the finish, it is recommended to follow the manufacturer’s instructions for the specific product you are using. Generally, you will need to apply multiple thin coats, allowing each coat to dry completely before applying the next one.
Once the finish has been applied, allow the bow to dry and cure for the recommended amount of time. This will ensure that the finish is fully set and provides the desired protection and aesthetic appeal.
Testing and Adjusting the Reflex Deflex Bow
Once you have completed all the previous steps in making a reflex deflex bow, it is time to test and adjust the bow to ensure optimal performance. Testing the bow involves checking its draw weight, draw length, and overall functionality.
First, you need to measure the draw weight of the bow. This can be done using a bow scale or a draw weight scale. The draw weight should be consistent and within your desired range. If it is too high or too low, you may need to make adjustments to the bow limbs.
Next, you should measure the draw length of the bow. This is the distance from the string to the deepest part of the grip when the bow is at full draw. The draw length should be comfortable for you to shoot accurately. If it is too long or too short, you may need to make adjustments to the bow limbs or the string.
Finally, you should test the overall functionality of the bow by shooting it. Pay attention to how the bow feels when you shoot it and how the arrows fly. If there are any issues, such as excessive hand shock or inconsistent arrow flight, you may need to make further adjustments to the bow.
Remember, testing and adjusting a reflex deflex bow is an ongoing process. It may take some time and experimentation to achieve the desired performance. But with patience and persistence, you can fine-tune your bow to shoot accurately and smoothly.
Wrapping it Up: Achieving Bow Perfection
After following the step-by-step guide on how to make a reflex deflex bow, you are now equipped with the knowledge and skills to create your own masterpiece. By understanding the basics of this unique bow design, gathering the necessary materials and tools, and carefully shaping and tillering the bow, you have taken the necessary steps towards achieving optimal performance.
Throughout this process, it is important to remember the significance of adding reflex and deflex to the bow. These key elements contribute to the bow’s flexibility and power, allowing for a more accurate and efficient shooting experience.
Now that you have completed the construction of your reflex deflex bow, it is time to apply a finish that will protect and enhance its appearance. This final touch will not only add a professional look to your bow but also ensure its longevity.
Lastly, don’t forget to test and adjust your bow to ensure it meets your desired performance standards. By making any necessary tweaks, you can fine-tune your reflex deflex bow to perfection.
So, go ahead and put your newfound knowledge to the test. Create your own reflex deflex bow and experience the satisfaction of shooting with a bow that you crafted with your own hands.
Learn how to make a reflex deflex bow with this comprehensive guide. Gather materials, shape limbs, and test for optimal performance.
About The Author

Alison Sowle is the typical tv guru. With a social media evangelist background, she knows how to get her message out there. However, she's also an introvert at heart and loves nothing more than writing for hours on end. She's a passionate creator who takes great joy in learning about new cultures - especially when it comes to beer!