
Last Updated on July 27, 2023
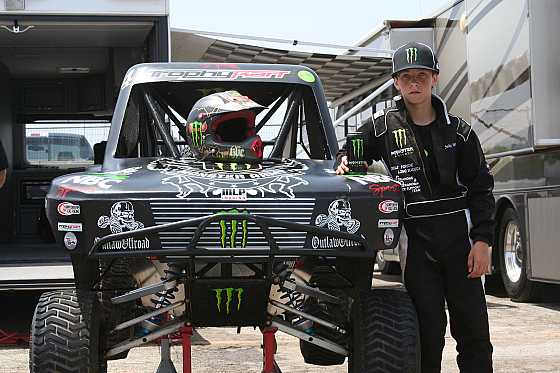
Welcome to our guide on how to make a trophy kart! If you’re a fan of off-road racing and want to try your hand at building your own kart, you’ve come to the right place. In this article, we will walk you through the step-by-step process of creating your very own trophy kart, from gathering the necessary materials and tools to customizing the body and fine-tuning the kart for optimal performance. Whether you’re a seasoned DIY enthusiast or a high school student looking for a fun project, this guide is designed to help you create a kart that is both functional and stylish. So let’s get started!
Gather the necessary materials and tools
Before you begin building your trophy kart, it’s important to gather all the necessary materials and tools. Here are the items you’ll need:
- Frame: Look for a sturdy frame that is suitable for off-road use.
- Suspension system: Choose a suspension system that can handle rough terrain.
- Engine and transmission: Select a powerful engine and a reliable transmission.
- Electrical components: You’ll need a battery, wiring harness, and other electrical components.
- Steering and braking systems: Find a steering wheel, steering column, and brake components.
- Body: Decide on the type of body you want for your trophy kart.
- Paint: Choose a high-quality paint that can withstand outdoor conditions.
- Tools: Make sure you have a variety of tools, including wrenches, screwdrivers, and a welder.
By gathering all the necessary materials and tools beforehand, you’ll be well-prepared to start building your trophy kart.
Choose the right frame for your trophy kart
When it comes to building a trophy kart, one of the most important decisions you’ll need to make is choosing the right frame. The frame is the foundation of your kart, and it needs to be strong, durable, and able to withstand the rigors of off-road racing. There are several options to consider when selecting a frame, including steel, aluminum, and chromoly. Each material has its own advantages and disadvantages, so it’s important to do your research and choose the one that best fits your needs.
Steel frames are a popular choice for trophy karts due to their affordability and strength. They are heavy, which can provide stability on rough terrain, but they may also slow you down. Aluminum frames are lightweight and offer better handling and acceleration, but they can be more expensive. Chromoly frames are the most expensive option, but they are incredibly strong and lightweight, making them ideal for high-performance racing. Whichever material you choose, make sure it is compatible with the other components of your kart and meets the safety requirements of your racing organization.
Assemble the frame and suspension system
Once you have chosen the right frame for your trophy kart, it’s time to assemble it. This step is crucial as it will determine the stability and durability of your kart. Start by laying out all the frame pieces and ensuring that they are in the correct order. Use the necessary tools to securely fasten the frame pieces together, making sure to tighten all the bolts and screws.
Next, you will need to install the suspension system. This is what will allow your kart to absorb shocks and bumps while driving. Begin by attaching the suspension arms to the frame, making sure they are aligned properly. Then, install the shocks and springs, adjusting them to the desired height and stiffness.
It’s important to follow the manufacturer’s instructions and guidelines when assembling the frame and suspension system. This will ensure that your trophy kart is safe and performs optimally on the track. Take your time and double-check all the connections and adjustments before moving on to the next step.
To enhance the article and improve its readability, I will use bullet points for the steps involved in installing the engine and transmission in a trophy kart:
– Step 1: Choose the right engine for your trophy kart. Consider factors such as power output, reliability, and compatibility with the frame and suspension system.
– Step 2: Gather the necessary tools and materials for the installation, including wrenches, sockets, a jack, and an engine hoist if needed.
– Step 3: Position the engine in the designated area of the frame, ensuring that it aligns with the mounting holes and brackets.
– Step 4: Secure the engine to the frame using the appropriate bolts and fasteners. Make sure to tighten them properly to prevent any movement or vibrations.
– Step 5: Connect the transmission to the engine, following the manufacturer’s instructions. This may involve attaching a clutch, drive belt, or chain, depending on the type of transmission used.
– Step 6: Install the necessary components for the engine and transmission, such as the air filter, fuel tank, and exhaust system. Ensure that they are properly connected and functioning correctly.
– Step 7: Check all the connections and fittings for any leaks or loose parts. Tighten or fix them as necessary.
– Step 8: Test the engine and transmission by starting the trophy kart and running it for a short period. Listen for any unusual noises or vibrations and address them promptly.
– Step 9: Fine-tune the engine and transmission settings, such as the carburetor adjustments or gear ratios, to optimize performance and reliability.
– Step 10: Once satisfied with the installation and performance, proceed to the next steps in customizing the body and painting the trophy kart.To enhance the article and improve readability, I will use bullet points for step 6 on adding the necessary electrical components. Here is the information for step 6:
Add the necessary electrical components:
- Start by installing a battery box to securely hold the battery in place.
- Connect the battery to the starter motor using heavy-duty cables.
- Install a fuse box to protect the electrical system from any potential damage.
- Connect the fuse box to the battery and other electrical components using appropriate wiring.
- Install a key switch to control the power supply to the kart.
- Connect the key switch to the fuse box and battery.
- Install headlights and taillights for better visibility during night rides.
- Connect the lights to the fuse box and battery.
- Install a horn to alert others when necessary.
- Connect the horn to the fuse box and battery.
- Consider adding additional electrical components such as a GPS system or a radio for added convenience.
By following these steps, you will be able to add all the necessary electrical components to your trophy kart. It is important to ensure that all connections are secure and the wiring is properly insulated to avoid any electrical issues. Once you have completed this step, you can move on to the next step of installing the steering and braking systems.
Install the steering and braking systems
Once you have assembled the frame and suspension system of your trophy kart, it’s time to install the steering and braking systems. These components are crucial for the kart’s control and safety.
Start by attaching the steering column to the frame. Make sure it is securely fastened and aligned properly. Next, install the steering wheel onto the column, ensuring it is centered and comfortable to grip.
For the braking system, you will need to install brake calipers and rotors on each wheel. These components work together to slow down and stop the kart when necessary. Make sure to follow the manufacturer’s instructions for proper installation.
Once the steering and braking systems are in place, test them to ensure they are functioning correctly. Turn the steering wheel to check for smooth movement, and apply the brakes to ensure they engage and release properly.
With the steering and braking systems installed, your trophy kart is one step closer to being complete. The next step is to customize the body and paint the kart to give it a unique and personalized look.
Customize the body and paint the trophy kart
Once you have assembled the frame and installed all the necessary components, it’s time to customize the body of your trophy kart. This is where you can let your creativity shine and make your kart truly unique.
Start by choosing a body kit that fits your style and preferences. There are many options available, from sleek and aerodynamic designs to more rugged and aggressive looks. Consider the type of racing you will be doing and choose a body kit that complements your kart’s performance.
Next, you will need to prepare the body for painting. This involves sanding down any rough edges or imperfections and applying a primer to ensure a smooth and even surface. Once the primer is dry, you can start applying your chosen paint color. Use multiple thin coats for the best results, allowing each coat to dry before applying the next.
After the paint has dried, you can add any additional decals or graphics to further personalize your trophy kart. This is a great opportunity to showcase your sponsors or add your own unique flair.
Finally, don’t forget to apply a clear coat to protect the paint and give it a glossy finish. This will help keep your kart looking fresh and vibrant for years to come.
Test and fine-tune the trophy kart
Once you have completed all the previous steps and your trophy kart is fully assembled, it’s time to put it to the test. Testing and fine-tuning your kart is crucial to ensure its performance and safety on the track.
Start by checking all the nuts and bolts to make sure they are tightened properly. This will prevent any loose parts that could cause accidents or damage to the kart. Next, check the suspension system and make any necessary adjustments to ensure a smooth and stable ride.
Now it’s time to test the engine and transmission. Start the engine and listen for any unusual noises or vibrations. Take the kart for a test drive and pay attention to its acceleration, top speed, and handling. If you notice any issues, such as poor acceleration or difficulty shifting gears, you may need to make adjustments or seek professional help.
Lastly, fine-tune the steering and braking systems. Make sure the steering is responsive and the brakes are working effectively. Adjust the alignment if necessary to improve the kart’s maneuverability.
Remember, testing and fine-tuning is an ongoing process. As you gain more experience with your trophy kart, you may discover areas that need improvement or fine-tuning. Don’t be afraid to experiment and make adjustments to optimize your kart’s performance.
Wrapping it Up: Creating Your Own Trophy Kart
After following the step-by-step guide on how to make a trophy kart, you are now ready to hit the tracks with your very own custom-built machine. This project may have required some technical skills and a lot of patience, but the end result is truly worth it.
By gathering the necessary materials and tools, choosing the right frame, assembling the suspension system, installing the engine and transmission, adding the electrical components, and installing the steering and braking systems, you have created a high-performance vehicle that is sure to turn heads.
But the journey doesn’t end there. Once your trophy kart is complete, it’s important to test and fine-tune it to ensure optimal performance. Take it for a spin, make any necessary adjustments, and get ready to dominate the off-road racing scene.
So, whether you’re a racing enthusiast or simply looking for a new DIY project, creating your own trophy kart is a rewarding experience that allows you to unleash your creativity and passion for speed. Get ready to rev your engines and enjoy the thrill of racing in a kart that you built with your own two hands.
Learn how to make a trophy kart with this step-by-step guide. Gather materials, assemble, customize, and test your creation.
About The Author

Alison Sowle is the typical tv guru. With a social media evangelist background, she knows how to get her message out there. However, she's also an introvert at heart and loves nothing more than writing for hours on end. She's a passionate creator who takes great joy in learning about new cultures - especially when it comes to beer!