
Last Updated on July 27, 2023
Understanding the importance of removing the Nikon F viewfinder is essential for any photographer looking to maintain and repair their camera. Whether you’re a professional or an amateur, knowing how to remove the viewfinder can greatly enhance your camera maintenance skills. In this article, we will guide you through the step-by-step process of removing the Nikon F viewfinder, from gathering the necessary tools to testing the functionality of the reattached viewfinder. We will also address common issues that may arise during the removal process and provide troubleshooting tips. By the end of this article, you’ll have the knowledge and confidence to successfully remove the Nikon F viewfinder and improve your camera repair capabilities.
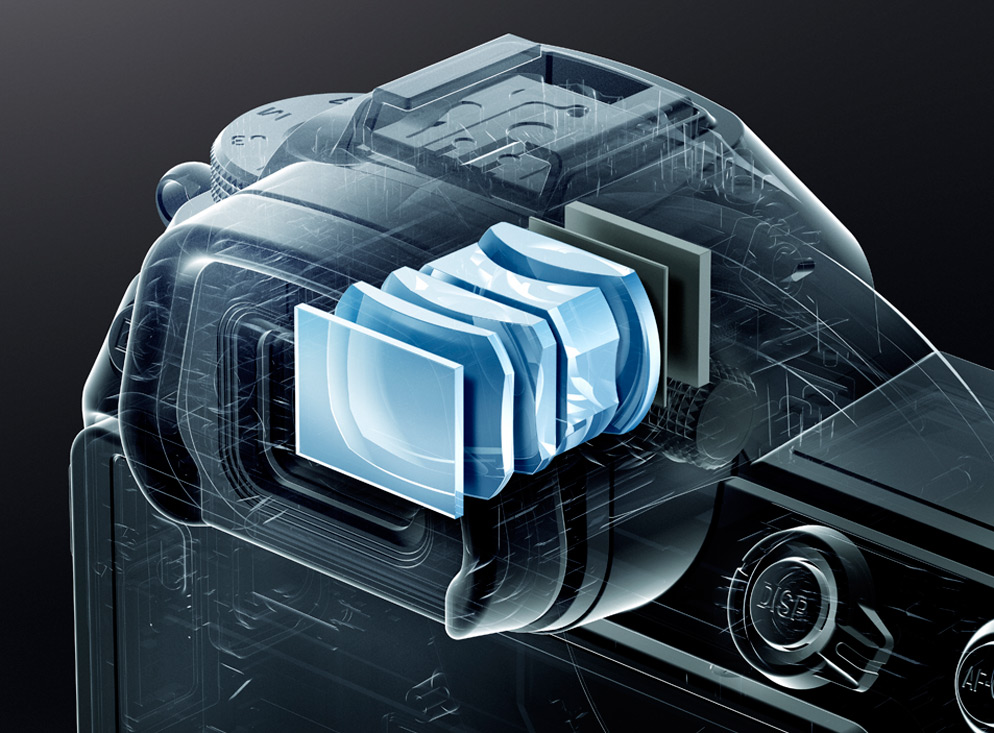
Step 2: Preparing the camera for viewfinder removal
Before removing the Nikon F viewfinder, it is important to properly prepare the camera to ensure a smooth and successful removal process. Follow these steps to prepare the camera:
- Step 2.1: Turn off the camera and remove the battery to prevent any accidental damage or injury.
- Step 2.2: Locate the viewfinder release button, which is typically located on the side or top of the camera body.
- Step 2.3: Gently press the viewfinder release button to unlock the viewfinder from the camera body.
- Step 2.4: Carefully lift the viewfinder up and away from the camera body, ensuring not to apply excessive force or damage any internal components.
- Step 2.5: Set the viewfinder aside in a safe and clean location to prevent any damage or contamination.
By properly preparing the camera for viewfinder removal, you can ensure a safe and successful removal process without causing any damage to the camera or viewfinder.
Step 2: Preparing the camera for viewfinder removal
Before you can begin removing the Nikon F viewfinder, it is important to properly prepare the camera. This step ensures that the removal process goes smoothly and minimizes the risk of damaging any components.
First, make sure the camera is turned off and the battery is removed to prevent any accidental power surges or damage. Next, locate the viewfinder release button, which is typically located on the side or top of the camera body. Press and hold this button to release the viewfinder.
Once the viewfinder is released, carefully remove any accessories or attachments that may be connected to it, such as eyepiece covers or diopter adjustment knobs. These can often be unscrewed or gently pulled off.
Finally, take a moment to inspect the camera body and viewfinder for any signs of damage or wear. This will help you identify any potential issues that may need to be addressed during the removal process.
By properly preparing the camera for viewfinder removal, you can ensure a smooth and successful removal process, minimizing the risk of damage and maximizing your camera maintenance and repair capabilities.
Step 3: Removing the screws holding the viewfinder in place
Now that you have gathered the necessary tools and prepared the camera for viewfinder removal, it is time to move on to the next step: removing the screws holding the viewfinder in place. This step requires precision and careful handling to avoid any damage to the camera or viewfinder.
First, locate the screws that are securing the viewfinder to the camera body. These screws are typically located on the top or sides of the viewfinder housing. Use a small screwdriver that fits the size of the screws to carefully unscrew them.
It is important to note that different camera models may have different screw placements, so refer to your camera’s manual or online resources for specific instructions. Additionally, some screws may be hidden under rubber or plastic covers, so gently remove these covers to access the screws.
Once all the screws are removed, set them aside in a safe place to avoid losing them. Be sure to keep track of the number and location of each screw, as this will make reattaching the viewfinder easier later on.
Step 4: Detaching the viewfinder from the camera body
Once the screws holding the viewfinder in place have been removed, it is time to detach the viewfinder from the camera body. This step requires careful handling to avoid any damage to the camera or the viewfinder itself. Follow these steps:
- Hold the camera body firmly with one hand to provide stability.
- Using your other hand, gently lift the viewfinder upwards, applying even pressure.
- Be cautious not to twist or force the viewfinder, as this can cause damage.
- If the viewfinder does not come off easily, double-check that all screws have been removed.
- Once the viewfinder is detached, set it aside in a safe place to prevent any accidental damage.
By following these steps, you can safely detach the viewfinder from the Nikon F camera body. This will allow you to proceed with the cleaning and inspection process, ensuring optimal performance and longevity of your camera.
Step 5: Cleaning and inspecting the viewfinder and camera body
Once the viewfinder has been detached from the camera body, it is important to clean and inspect both the viewfinder and the camera body before reattaching the viewfinder. This will ensure that there are no dirt, dust, or debris that could affect the functionality of the viewfinder or the camera.
- Use a soft, lint-free cloth to gently wipe the viewfinder lens and the camera body.
- Inspect the viewfinder lens for any scratches or damage. If there are any issues, it may be necessary to replace the lens.
- Check the camera body for any loose screws or other signs of damage. Tighten any loose screws if necessary.
- Remove any dirt or debris from the viewfinder housing and the camera body using a small brush or compressed air.
- Ensure that the viewfinder and camera body are completely dry before reattaching the viewfinder.
By cleaning and inspecting the viewfinder and camera body, you can ensure that they are in optimal condition before reattaching the viewfinder. This will help to maintain the functionality and longevity of your Nikon F camera.
Step 6: Reattaching the viewfinder securely to the camera body
After cleaning and inspecting the viewfinder and camera body, it is time to reattach the viewfinder securely to the camera body. This step is crucial to ensure that the viewfinder stays in place and functions properly.
1. Align the viewfinder: Start by aligning the viewfinder with the designated slot on the camera body. Make sure that the viewfinder is positioned correctly and fits snugly into place.
2. Insert the screws: Once the viewfinder is aligned, insert the screws that were removed earlier back into their respective holes. Use a screwdriver to tighten the screws, but be careful not to overtighten them as it may damage the camera body.
3. Test the attachment: Once the screws are securely in place, gently test the attachment by lightly pressing on the viewfinder. It should not move or feel loose. If it does, double-check the alignment and tighten the screws if necessary.
By following these steps, you can ensure that the viewfinder is reattached securely to the camera body, allowing for optimal functionality and performance.
Step 7: Testing the functionality of the reattached viewfinder
After successfully reattaching the viewfinder to the camera body, it is crucial to test its functionality to ensure that it has been properly installed. Testing the viewfinder will help identify any issues or errors that may have occurred during the removal and reattachment process.
To test the functionality of the reattached viewfinder, follow these steps:
1. Power on the camera
Turn on the camera and ensure that it is functioning properly. Check if the viewfinder displays a clear and accurate image.
2. Adjust the focus
Use the camera’s focus adjustment controls to ensure that the viewfinder is correctly aligned with the camera’s lens. Test the focus at different distances to ensure accuracy.
3. Check for any distortions or abnormalities
Inspect the viewfinder for any distortions, dark spots, or abnormalities in the image. These issues may indicate a misalignment or damage during the removal and reattachment process.
If any issues are detected during the testing process, it is recommended to repeat the removal and reattachment steps to ensure proper installation. If problems persist, it may be necessary to seek professional assistance or consult the camera’s user manual for further troubleshooting.
By thoroughly testing the functionality of the reattached viewfinder, you can ensure that your Nikon F camera is in optimal working condition and ready for use.
Troubleshooting common issues during the removal process
While removing the Nikon F viewfinder may seem like a straightforward process, there are some common issues that may arise. It is important to be aware of these issues and know how to troubleshoot them effectively.
Issue 1: Stuck screws
One common problem that many photographers encounter is stuck screws. This can make it difficult to remove the viewfinder from the camera body. To troubleshoot this issue, it is recommended to use a screwdriver with a good grip and apply gentle pressure while turning the screws. If the screws are still stuck, applying a small amount of lubricant can help loosen them.
Issue 2: Damaged viewfinder
Another issue that may occur during the removal process is a damaged viewfinder. This can happen if too much force is applied or if the wrong tools are used. To avoid this issue, it is important to handle the viewfinder with care and use the correct tools for removal. If the viewfinder does get damaged, it may need to be replaced.
By being aware of these common issues and knowing how to troubleshoot them, you can ensure a smooth and successful removal process for the Nikon F viewfinder. This will enhance your camera maintenance and repair capabilities, allowing you to keep your camera in optimal condition.
Conclusion: Enhancing Camera Maintenance and Repair Capabilities
In conclusion, successfully removing the Nikon F viewfinder is a crucial step in enhancing camera maintenance and repair capabilities. By following the steps outlined in this article, photographers and camera enthusiasts can gain the necessary skills to perform this task with confidence.
Removing the viewfinder allows for a thorough cleaning and inspection of both the viewfinder and camera body, ensuring optimal performance. It also provides the opportunity to troubleshoot any common issues that may arise during the removal process.
Once the viewfinder has been detached and cleaned, it can be securely reattached to the camera body, ensuring a tight fit and proper functionality. Testing the reattached viewfinder is essential to ensure that it is working correctly and providing accurate framing and focusing.
By successfully removing the Nikon F viewfinder, photographers can extend the lifespan of their camera and avoid costly repairs. It also allows for greater customization and flexibility, as different viewfinders can be used to achieve specific effects or preferences.
Overall, mastering the process of removing the Nikon F viewfinder is a valuable skill for any camera owner, and it opens up new possibilities for maintenance, repair, and creative exploration.
Learn how to remove the Nikon F viewfinder with this step-by-step guide. Enhance your camera maintenance skills today!
About The Author

Fernánda Esteban is a food fanatic. She can't go more than a few hours without eating, and she loves trying new foods from all over the world. Her friends know that they can always count on her for a good conversation, and she's an animal lover who will never turn down an opportunity to pet a dog or cat. Fernánda also enjoys learning about random facts, and she's a social media practitioner who loves to share what she knows with others.