
Last Updated on July 27, 2023
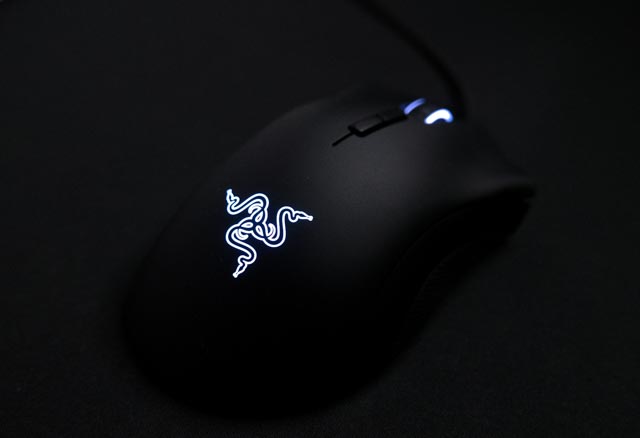
Welcome to our guide on how to take apart a Razer Deathadder Elite Mouse. Whether you’re a gaming enthusiast or simply looking to fix a malfunctioning mouse, this step-by-step tutorial will walk you through the process. Before we dive in, it’s important to gather the necessary tools for the job. Once you have everything you need, we’ll guide you through turning off and unplugging the mouse, removing the mouse feet, and opening the mouse casing. From there, we’ll show you how to disconnect the internal components and clean both the components and casing. Finally, we’ll walk you through reassembling the mouse and testing its functionality. Let’s get started!
Gather the necessary tools
Before you begin taking apart your Razer Deathadder Elite Mouse, it’s important to gather all the necessary tools. Here’s what you’ll need:
- Screwdriver (Phillips or flathead, depending on the screws)
- Tweezers
- Cotton swabs
- Isopropyl alcohol
- Microfiber cloth
Having these tools on hand will make the disassembly process much easier and ensure that you don’t damage any of the components.
Turn off and unplug the mouse
Before you start taking apart the mouse, make sure to turn it off and unplug it from your computer. This will prevent any accidental damage or electrical shock.
Remove the mouse feet
The next step is to remove the mouse feet. These are the small adhesive pads on the bottom of the mouse that allow it to glide smoothly. Use a flathead screwdriver or your fingernail to carefully lift the edges of the feet and peel them off.
Open the mouse casing
Once the mouse feet are removed, you can start opening the mouse casing. Look for the screws that hold the top and bottom halves of the mouse together. Use the appropriate screwdriver to remove these screws and gently separate the casing.
Disconnect the internal components
With the mouse casing open, you’ll be able to see the internal components. Carefully disconnect any cables or connectors that are attached to the circuit board. Use tweezers if necessary to avoid damaging any delicate parts.
Clean the components and casing
Now that the mouse is disassembled, it’s time to clean the components and casing. Use cotton swabs dipped in isopropyl alcohol to gently clean any dirt or debris. Wipe down the casing with a microfiber cloth to remove any fingerprints or smudges.
Reassemble the mouse
Once everything is clean and dry, it’s time to reassemble the mouse. Carefully reconnect any cables or connectors and align the top and bottom halves of the casing. Replace the screws and make sure they are tightened securely.
Gather the necessary toolsBefore you begin taking apart your Razer Deathadder Elite Mouse, it is important to gather all the necessary tools. This will ensure that you have everything you need to complete the task efficiently and effectively. Some of the tools you will need include a small Phillips head screwdriver, a plastic pry tool, tweezers, and a clean cloth or cotton swabs for cleaning. It is important to use the correct tools to avoid damaging the mouse or its components.
Gather the necessary tools before you begin taking apart your Razer Deathadder Elite Mouse. This will ensure that you have everything you need to complete the task efficiently and effectively. Some of the tools you will need include a small Phillips head screwdriver, a plastic pry tool, tweezers, and a clean cloth or cotton swabs for cleaning. It is important to use the correct tools to avoid damaging the mouse or its components.
Remove the mouse feet
Before you can access the internal components of your Razer Deathadder Elite Mouse, you will need to remove the mouse feet. These are the small adhesive pads located on the bottom of the mouse that allow it to glide smoothly across surfaces. To remove the mouse feet, you will need a sharp object such as a knife or a flathead screwdriver.
Start by gently lifting one corner of the mouse foot with your chosen tool. Be careful not to apply too much pressure, as you don’t want to damage the foot or the mouse casing. Once you have lifted one corner, slowly peel back the rest of the foot, taking care to keep it intact.
Repeat this process for all four mouse feet. Once you have removed them, set them aside in a safe place, as you will need to reattach them later when reassembling the mouse.
To enhance the article on how to take apart a Razer Deathadder Elite Mouse, we can use bullet points to improve readability. Here is an outline of step 5:
5. Open the mouse casing
- Locate the screws: Look for the screws that hold the mouse casing together. These screws are usually hidden under the mouse feet.
- Remove the screws: Use a screwdriver to carefully remove the screws. Make sure to keep track of the screws so you can easily reassemble the mouse later.
- Separate the casing: Once all the screws are removed, gently separate the top and bottom parts of the mouse casing. Be cautious not to damage any internal components.
- Inspect the casing: Take a moment to inspect the inside of the casing for any dust, debris, or signs of damage. This is also a good time to clean the casing if necessary.
By using bullet points, we can clearly outline the steps involved in opening the mouse casing. This makes it easier for readers to follow along and understand the process.
6. Disconnect the internal components
Once you have successfully opened the mouse casing, you will need to disconnect the internal components. This step is crucial in order to safely clean and reassemble the mouse.
- Locate the ribbon cables that connect the internal components to the circuit board.
- Gently unplug the ribbon cables from the circuit board. Be careful not to apply too much force, as this can damage the cables or the circuit board.
- If there are any screws holding the components in place, use a screwdriver to remove them.
- Once the components are disconnected and any screws are removed, carefully lift them out of the casing.
- Take note of the position and orientation of each component, as this will be important when reassembling the mouse.
By disconnecting the internal components, you are ensuring that they can be thoroughly cleaned and inspected. This step also allows for easier access to the casing and other components that may need attention.
Clean the components and casing
Once you have successfully disconnected the internal components of the Razer Deathadder Elite Mouse, it is time to clean both the components and the casing. This step is crucial to ensure that your mouse functions optimally and remains in good condition.
Start by using a can of compressed air to remove any dust or debris from the internal components. Be sure to pay extra attention to the sensor and the buttons, as these areas tend to accumulate the most dirt.
Next, dampen a microfiber cloth with a small amount of isopropyl alcohol. Gently wipe down the components and the inside of the casing to remove any stubborn dirt or grime. Avoid using excessive amounts of liquid, as this can damage the electronic components.
Once you have cleaned everything thoroughly, allow the components and casing to air dry completely before proceeding to the next step.
Reassemble the mouse
Now that you have cleaned all the components and casing of your Razer Deathadder Elite Mouse, it’s time to put everything back together. This step is crucial to ensure that the mouse functions properly once it is reassembled.
Start by reconnecting the internal components that you disconnected earlier. Make sure to align them properly and secure them in place. Take your time with this step to avoid any damage to the components.
Next, carefully place the mouse casing back onto the main body of the mouse. Ensure that all the tabs and hooks are properly aligned before pressing the casing down. Use gentle pressure to avoid any cracks or breakage.
Once the casing is in place, it’s time to reattach the mouse feet. These are the small pads that provide smooth movement for the mouse. Align them with the designated areas on the bottom of the mouse and press them firmly to secure them in place.
Finally, double-check that all the components are securely in place and that the mouse is properly reassembled. This will help prevent any issues with functionality or performance.
Now that you have successfully reassembled your Razer Deathadder Elite Mouse, it’s time to move on to the next step: testing the mouse functionality.
Test the mouse functionality
Once you have successfully reassembled the Razer Deathadder Elite Mouse, it is important to test its functionality to ensure that everything is working properly. This step is crucial as it allows you to identify any potential issues or problems that may have occurred during the disassembly and reassembly process.
To test the mouse functionality, simply plug it back into your computer and turn it on. Move the mouse around and check if the cursor responds accurately on your screen. Test all the buttons on the mouse to make sure they are functioning as intended. Pay close attention to the left and right-click buttons, as well as the scroll wheel.
If you notice any issues or abnormalities, it may be necessary to go back and double-check your work. Make sure all the internal components are properly connected and that there are no loose wires or connections. If the problem persists, you may need to seek professional assistance or consider replacing the mouse.
Once you are satisfied with the mouse’s functionality, you can proceed to the final step of the process – the conclusion.
Wrapping it Up: The Final Verdict
After following the step-by-step guide on how to take apart a Razer Deathadder Elite Mouse, you should now have a clear understanding of the process involved. By gathering the necessary tools, turning off and unplugging the mouse, removing the mouse feet, opening the mouse casing, disconnecting the internal components, and cleaning everything thoroughly, you have successfully disassembled and cleaned your mouse.
Now comes the moment of truth – reassembling the mouse and testing its functionality. Make sure to carefully put all the components back in their proper places and secure them tightly. Once you have reassembled the mouse, plug it back in and turn it on to see if everything is working as it should.
Remember, taking apart a mouse can be a delicate process, so it’s important to proceed with caution and follow the instructions carefully. With a little patience and attention to detail, you can extend the lifespan of your Razer Deathadder Elite Mouse and keep it in optimal condition for years to come.
Learn how to take apart a Razer Deathadder Elite mouse and clean its components for optimal functionality.
About The Author

Fernánda Esteban is a food fanatic. She can't go more than a few hours without eating, and she loves trying new foods from all over the world. Her friends know that they can always count on her for a good conversation, and she's an animal lover who will never turn down an opportunity to pet a dog or cat. Fernánda also enjoys learning about random facts, and she's a social media practitioner who loves to share what she knows with others.